
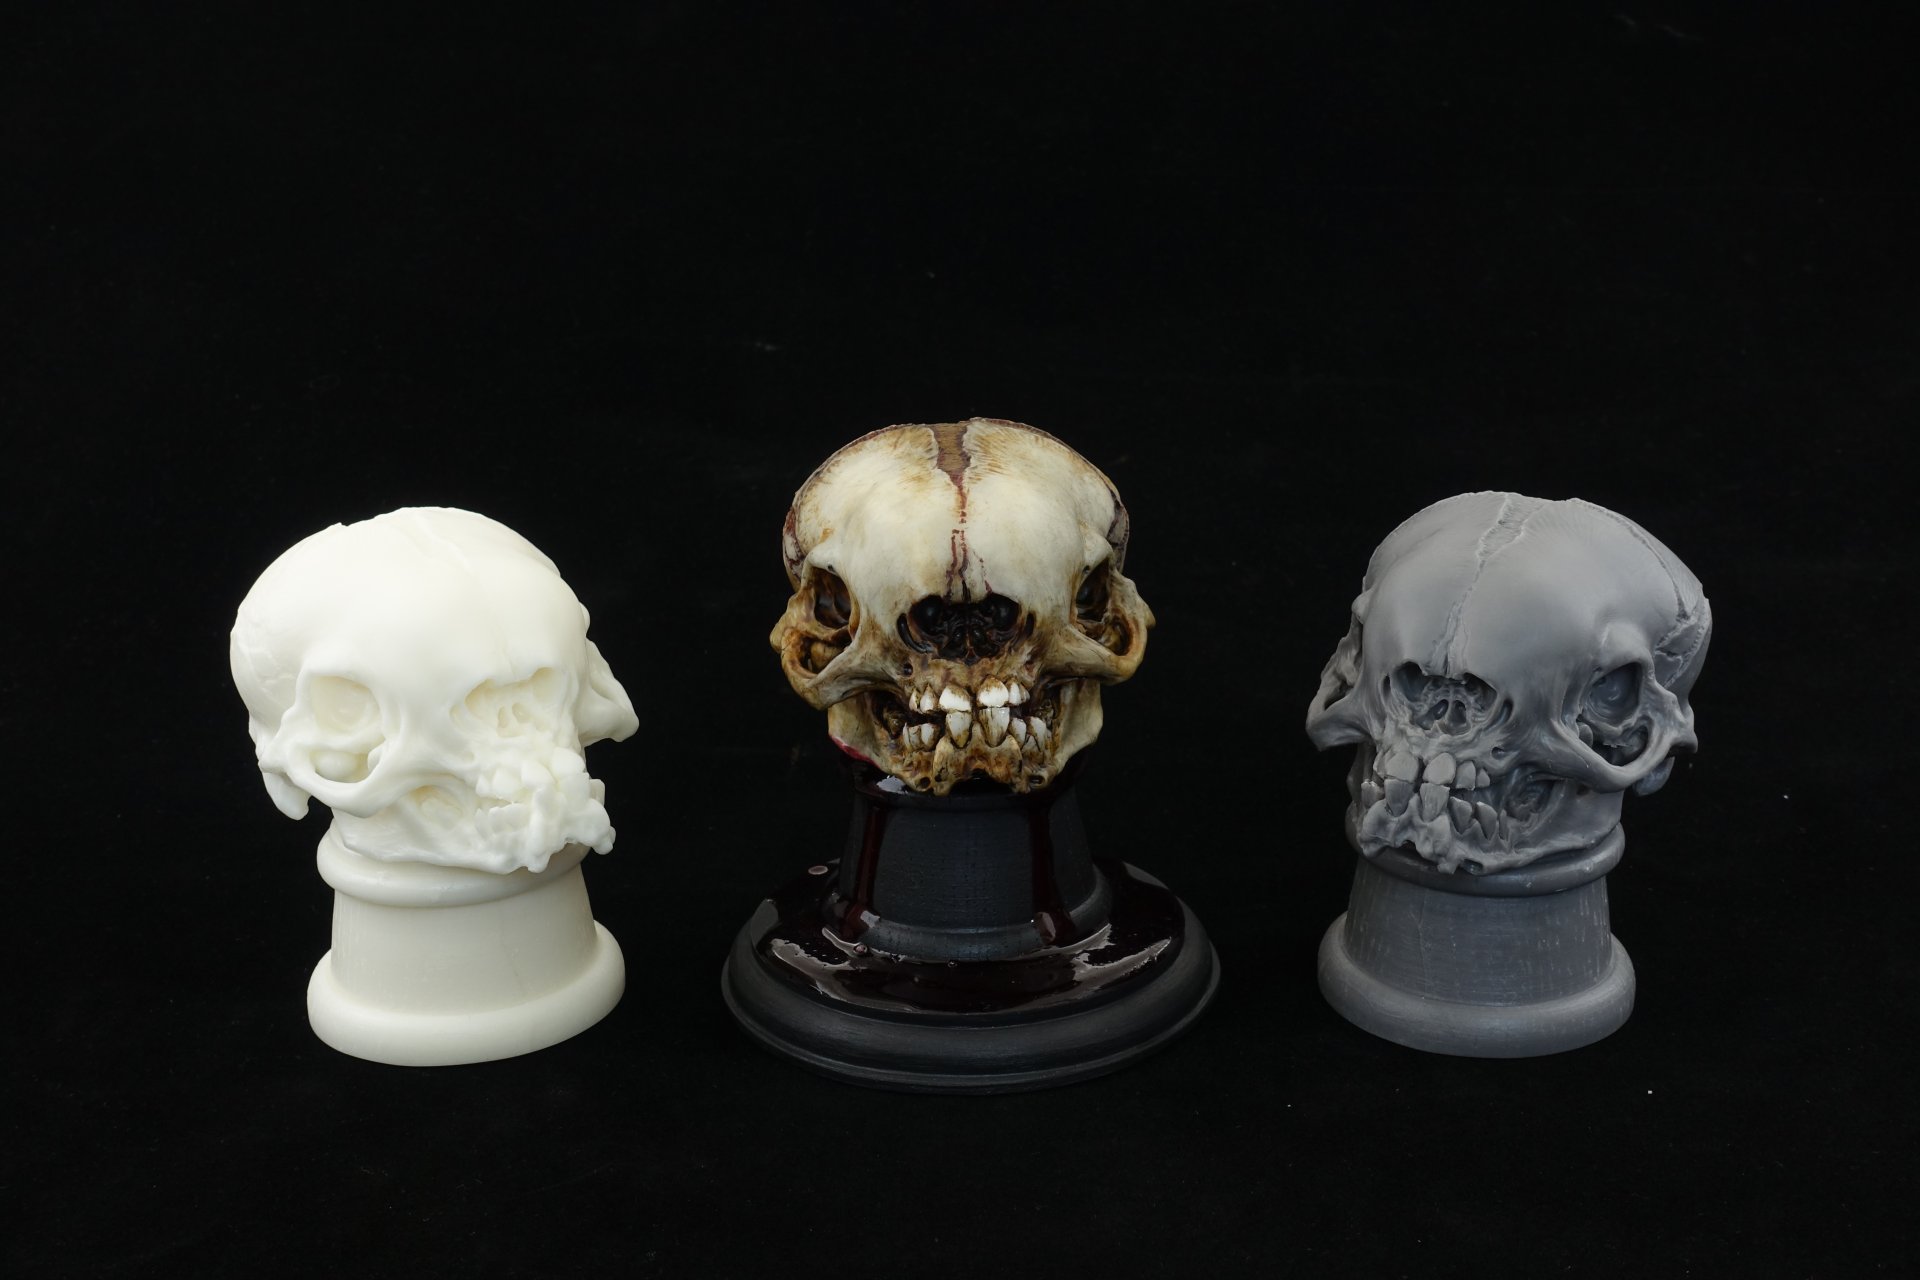
IDEA
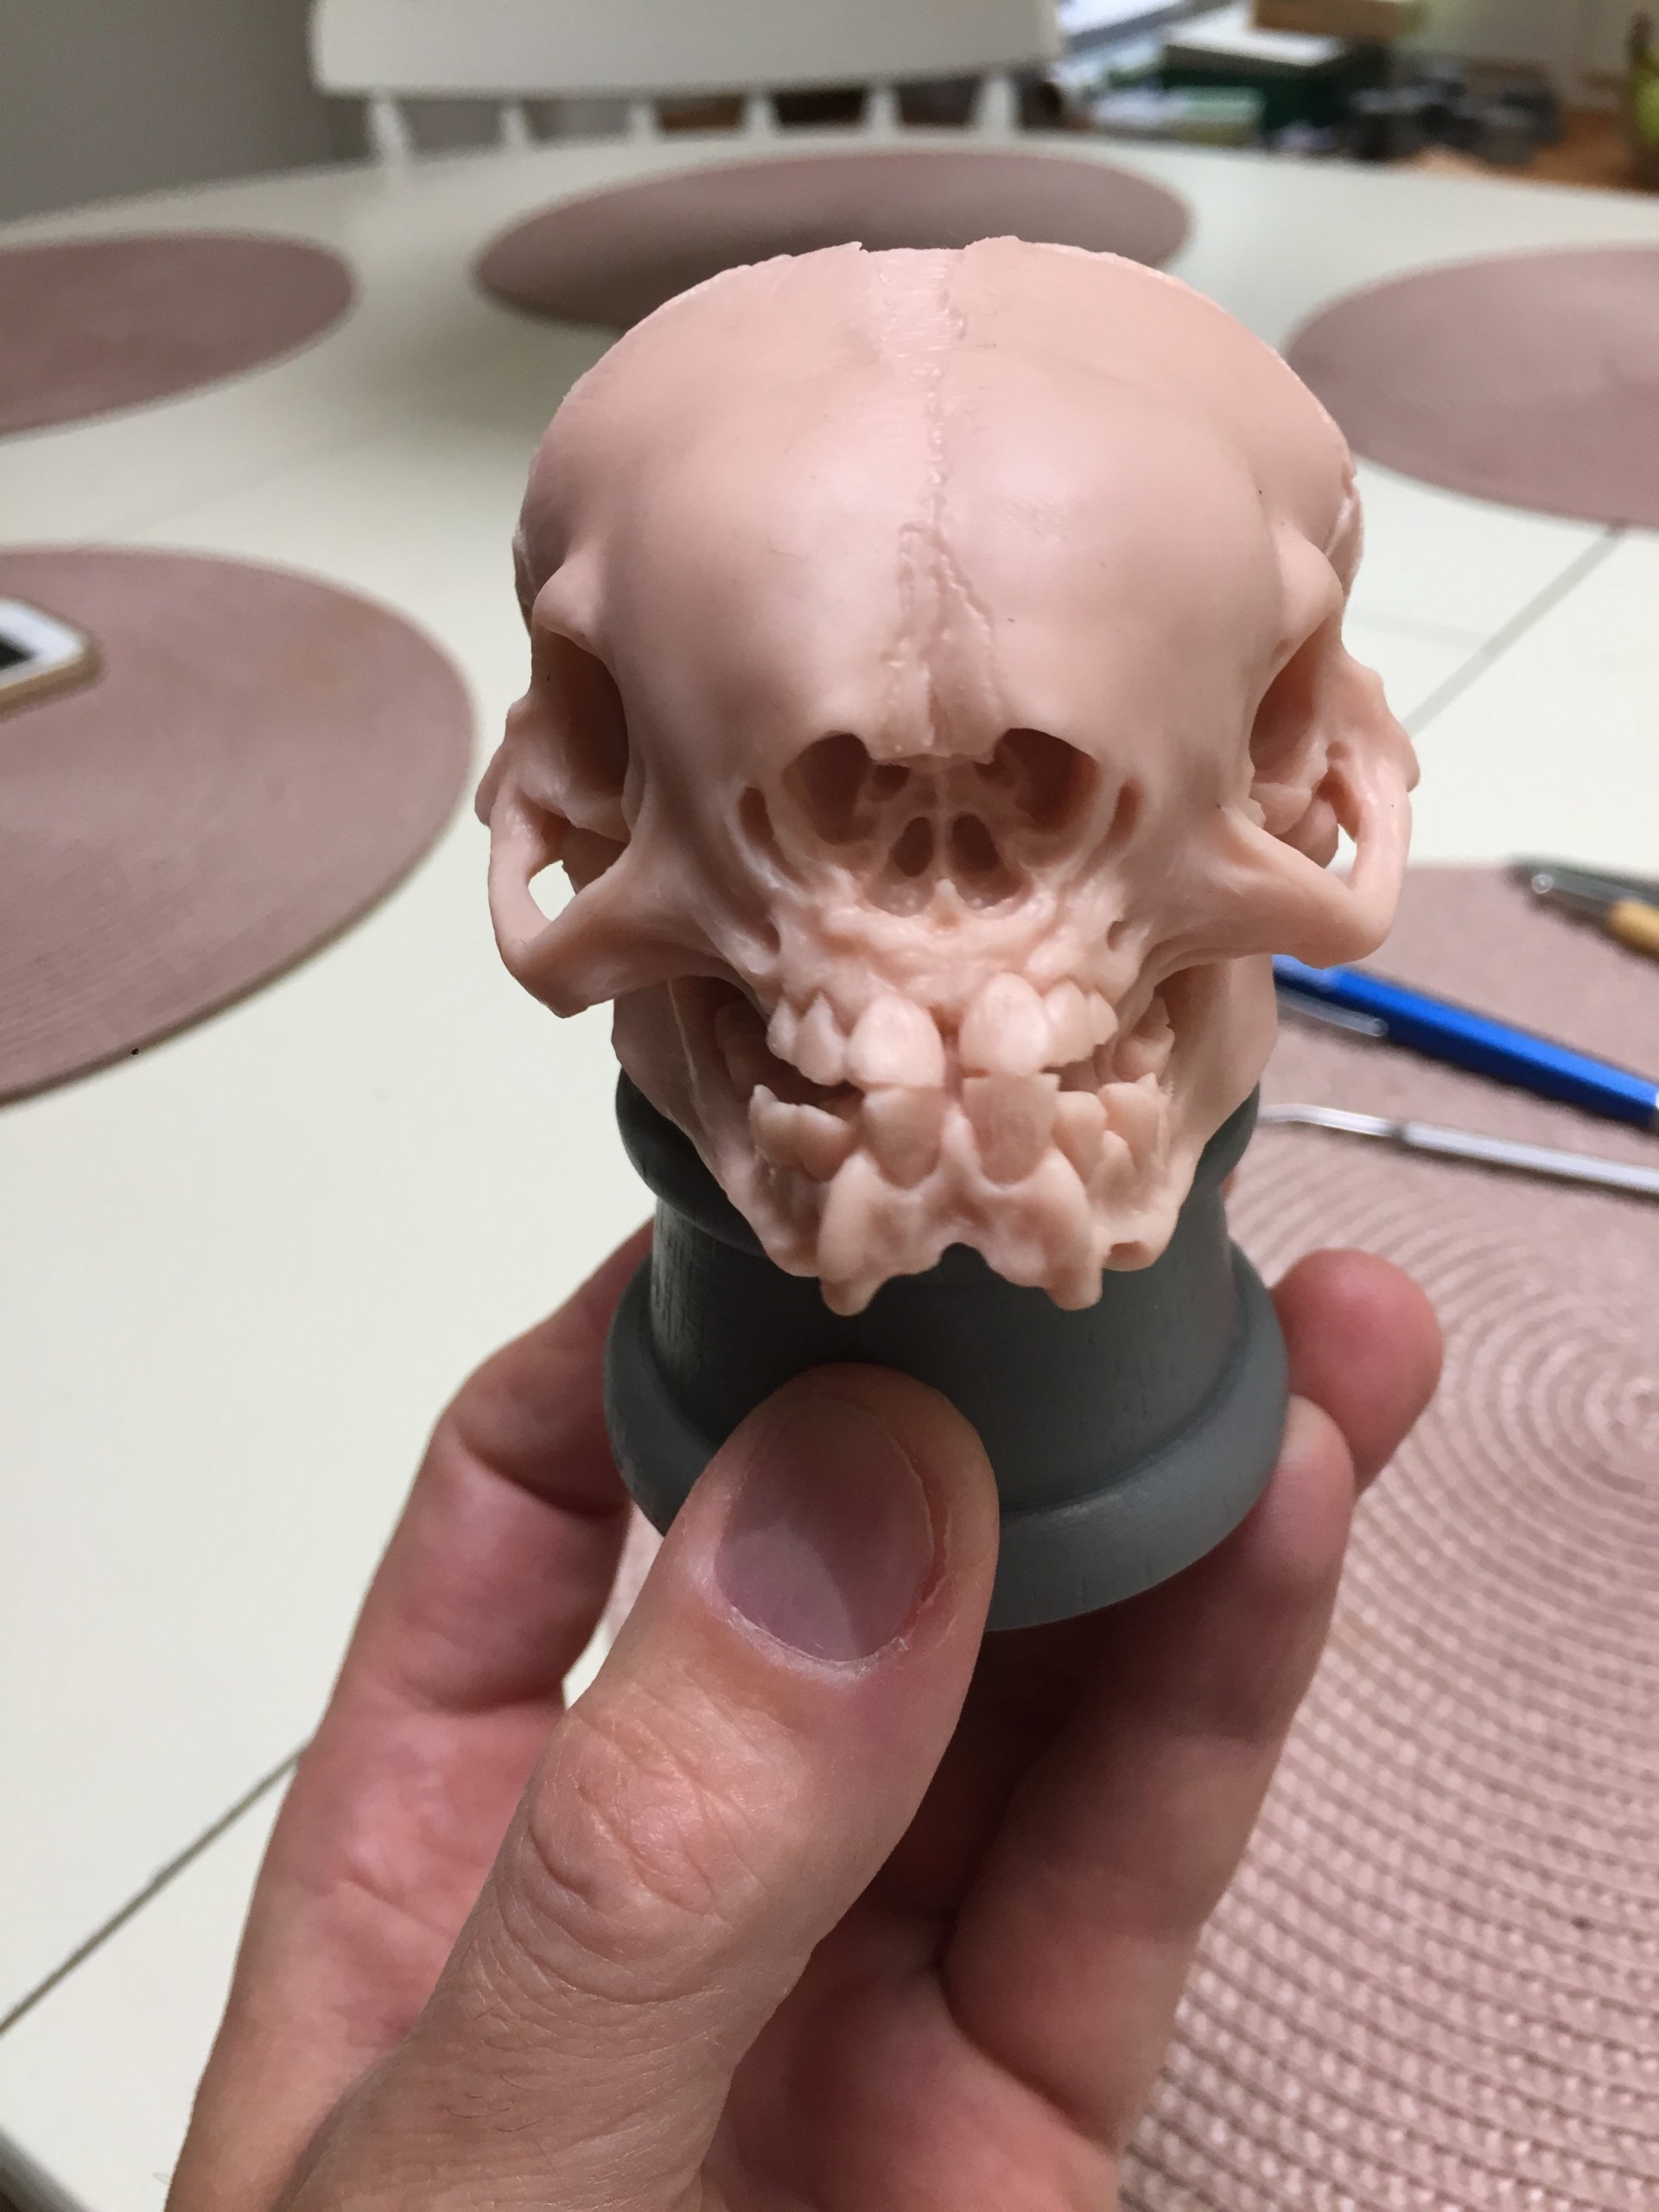
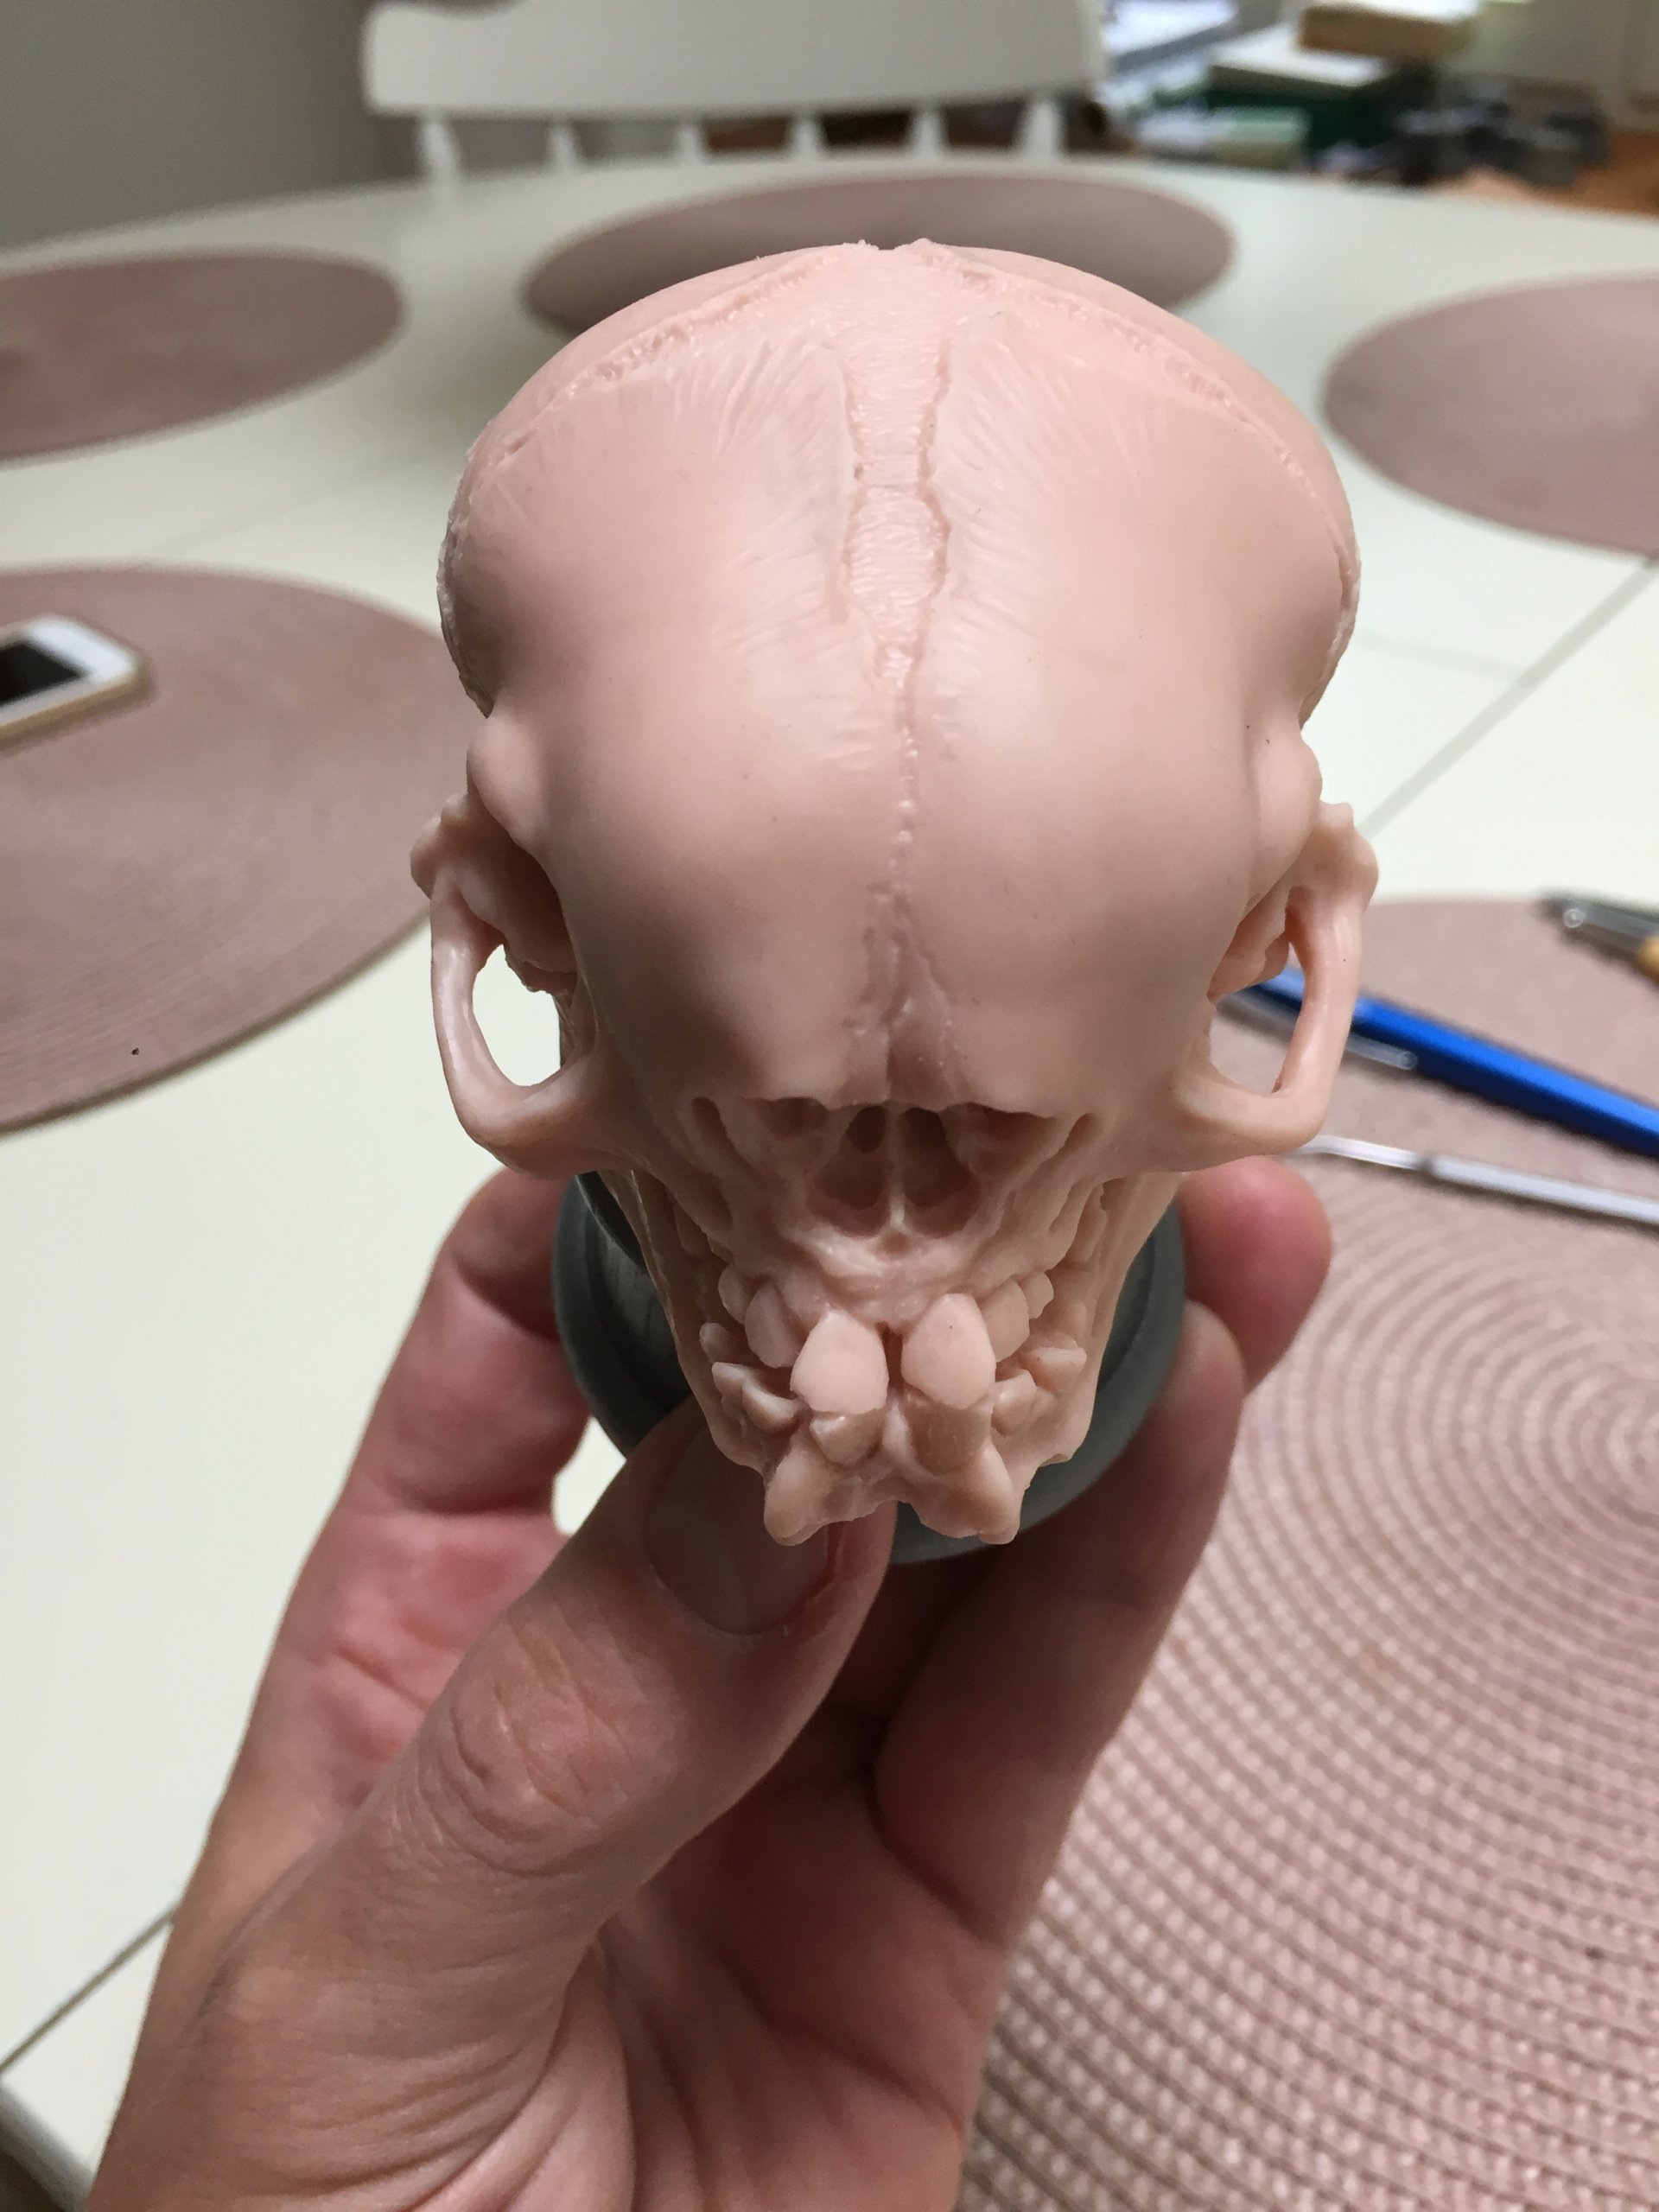
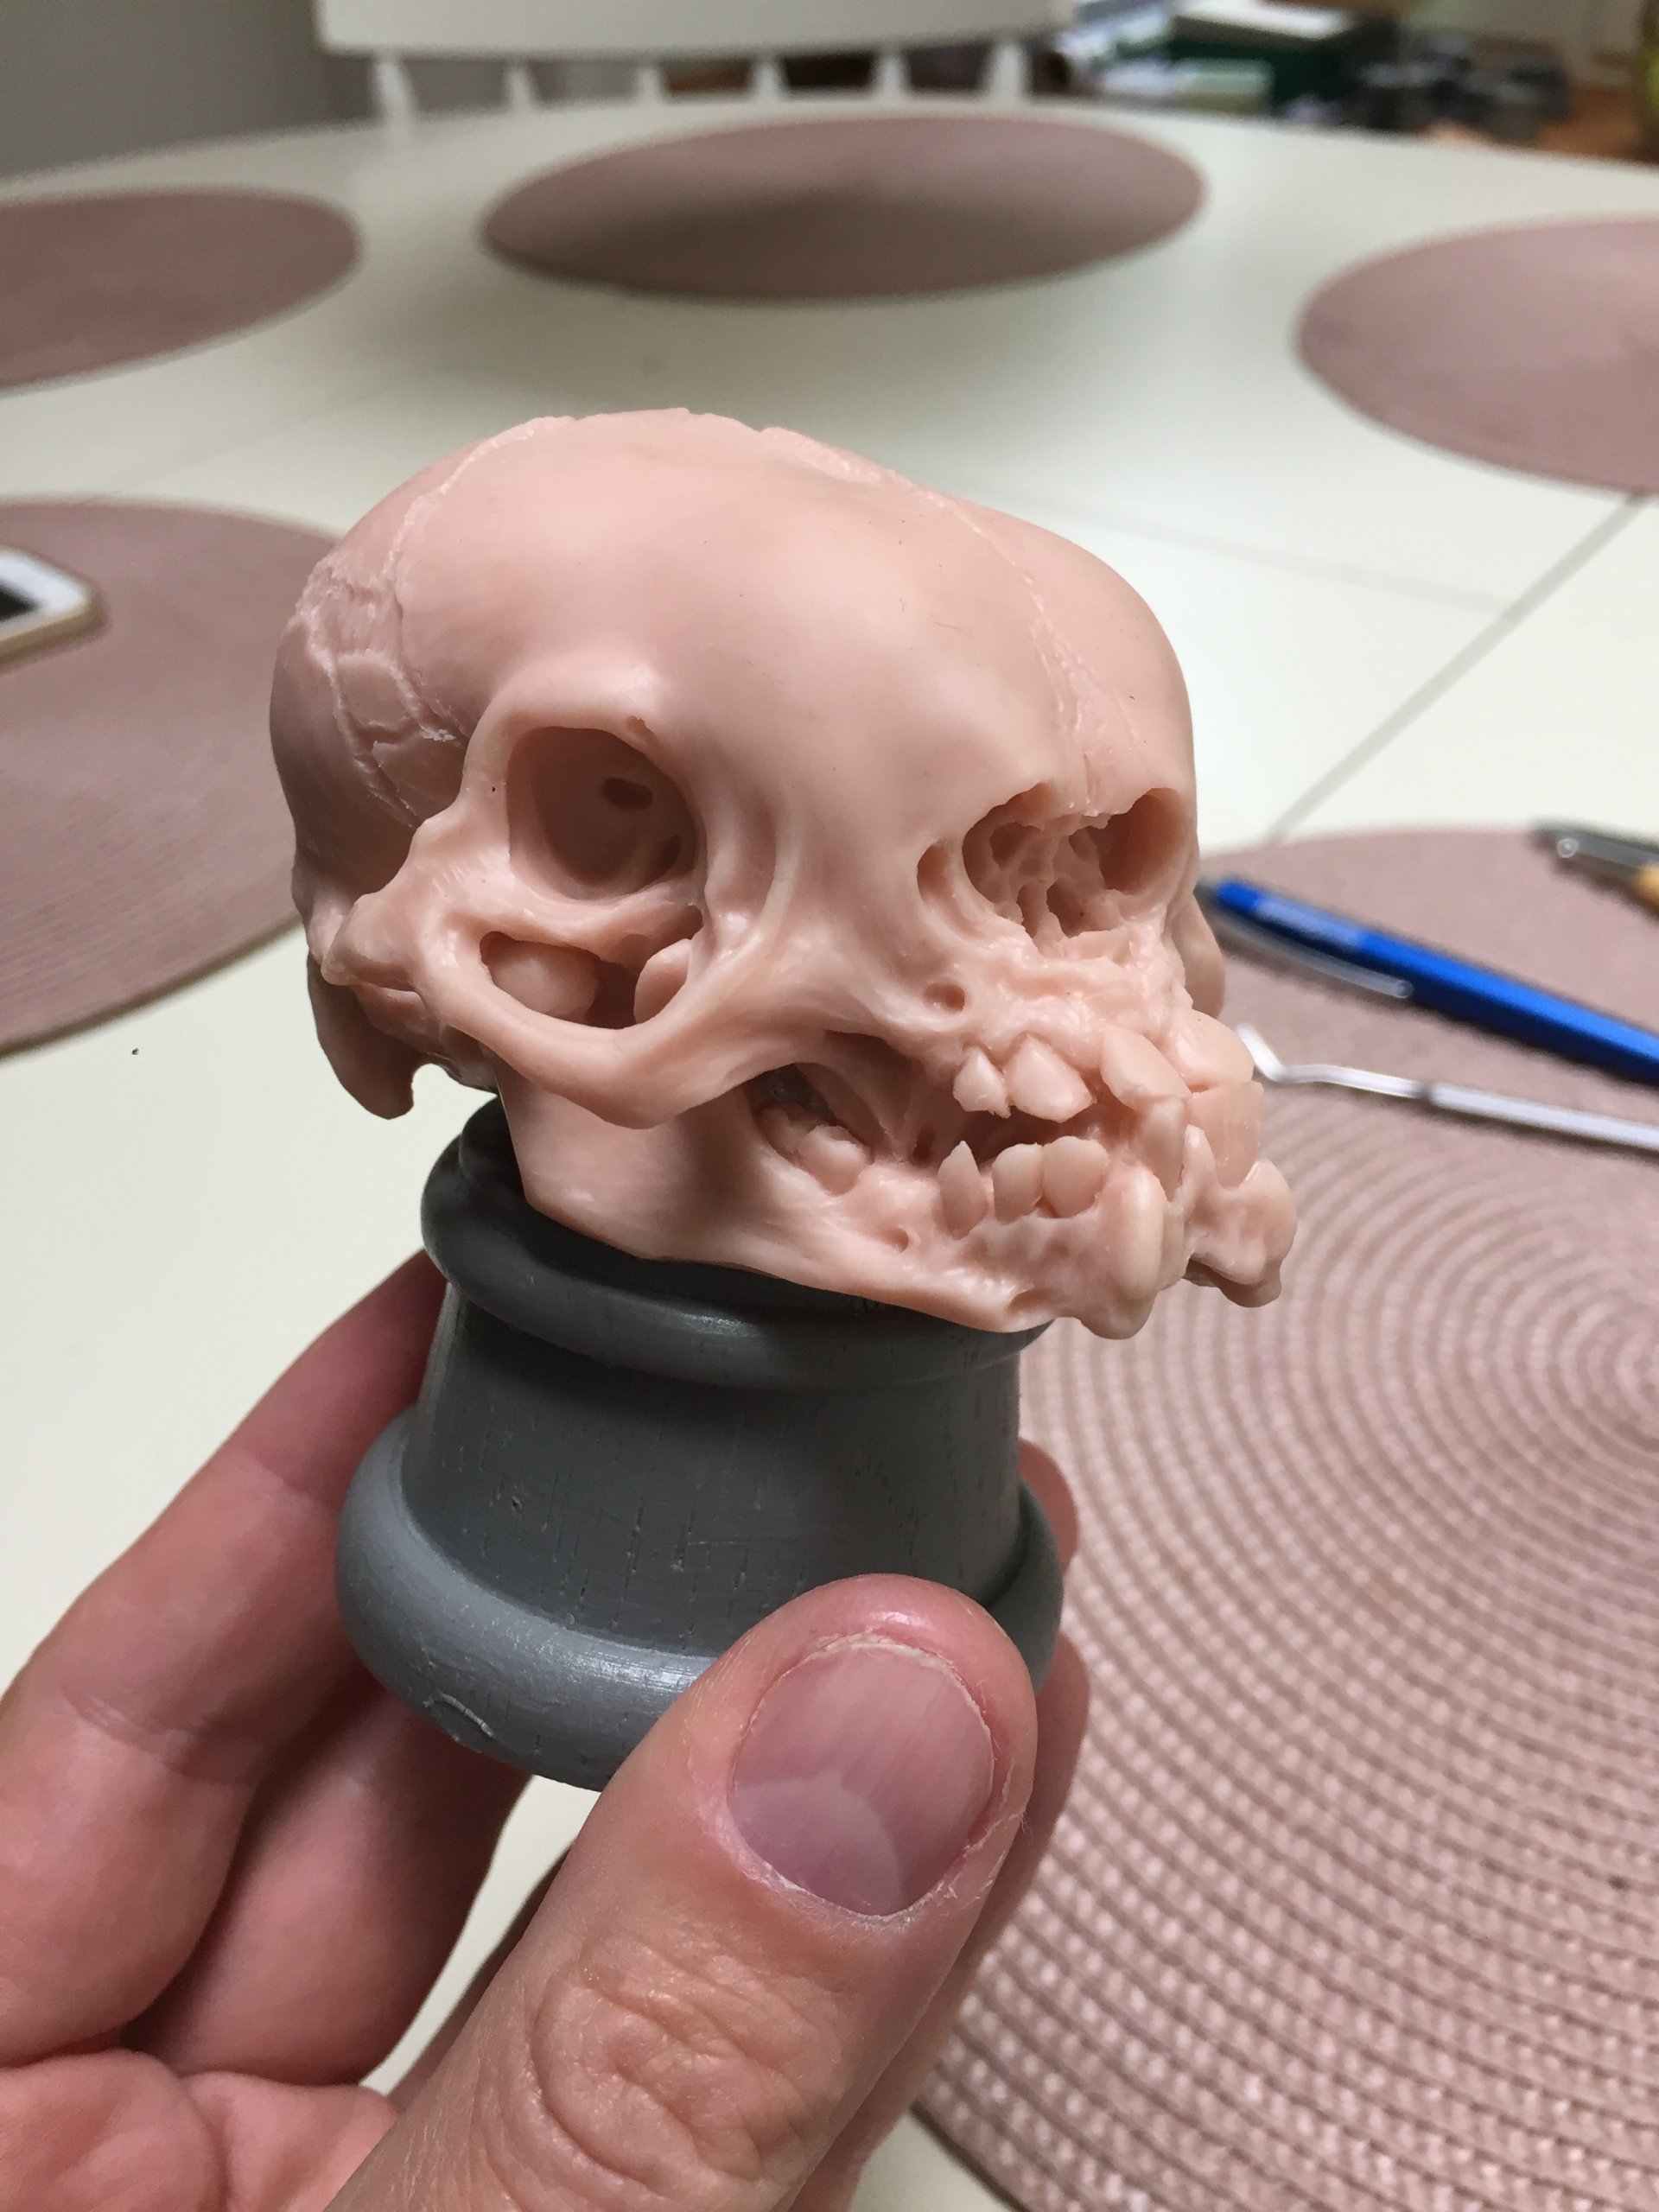
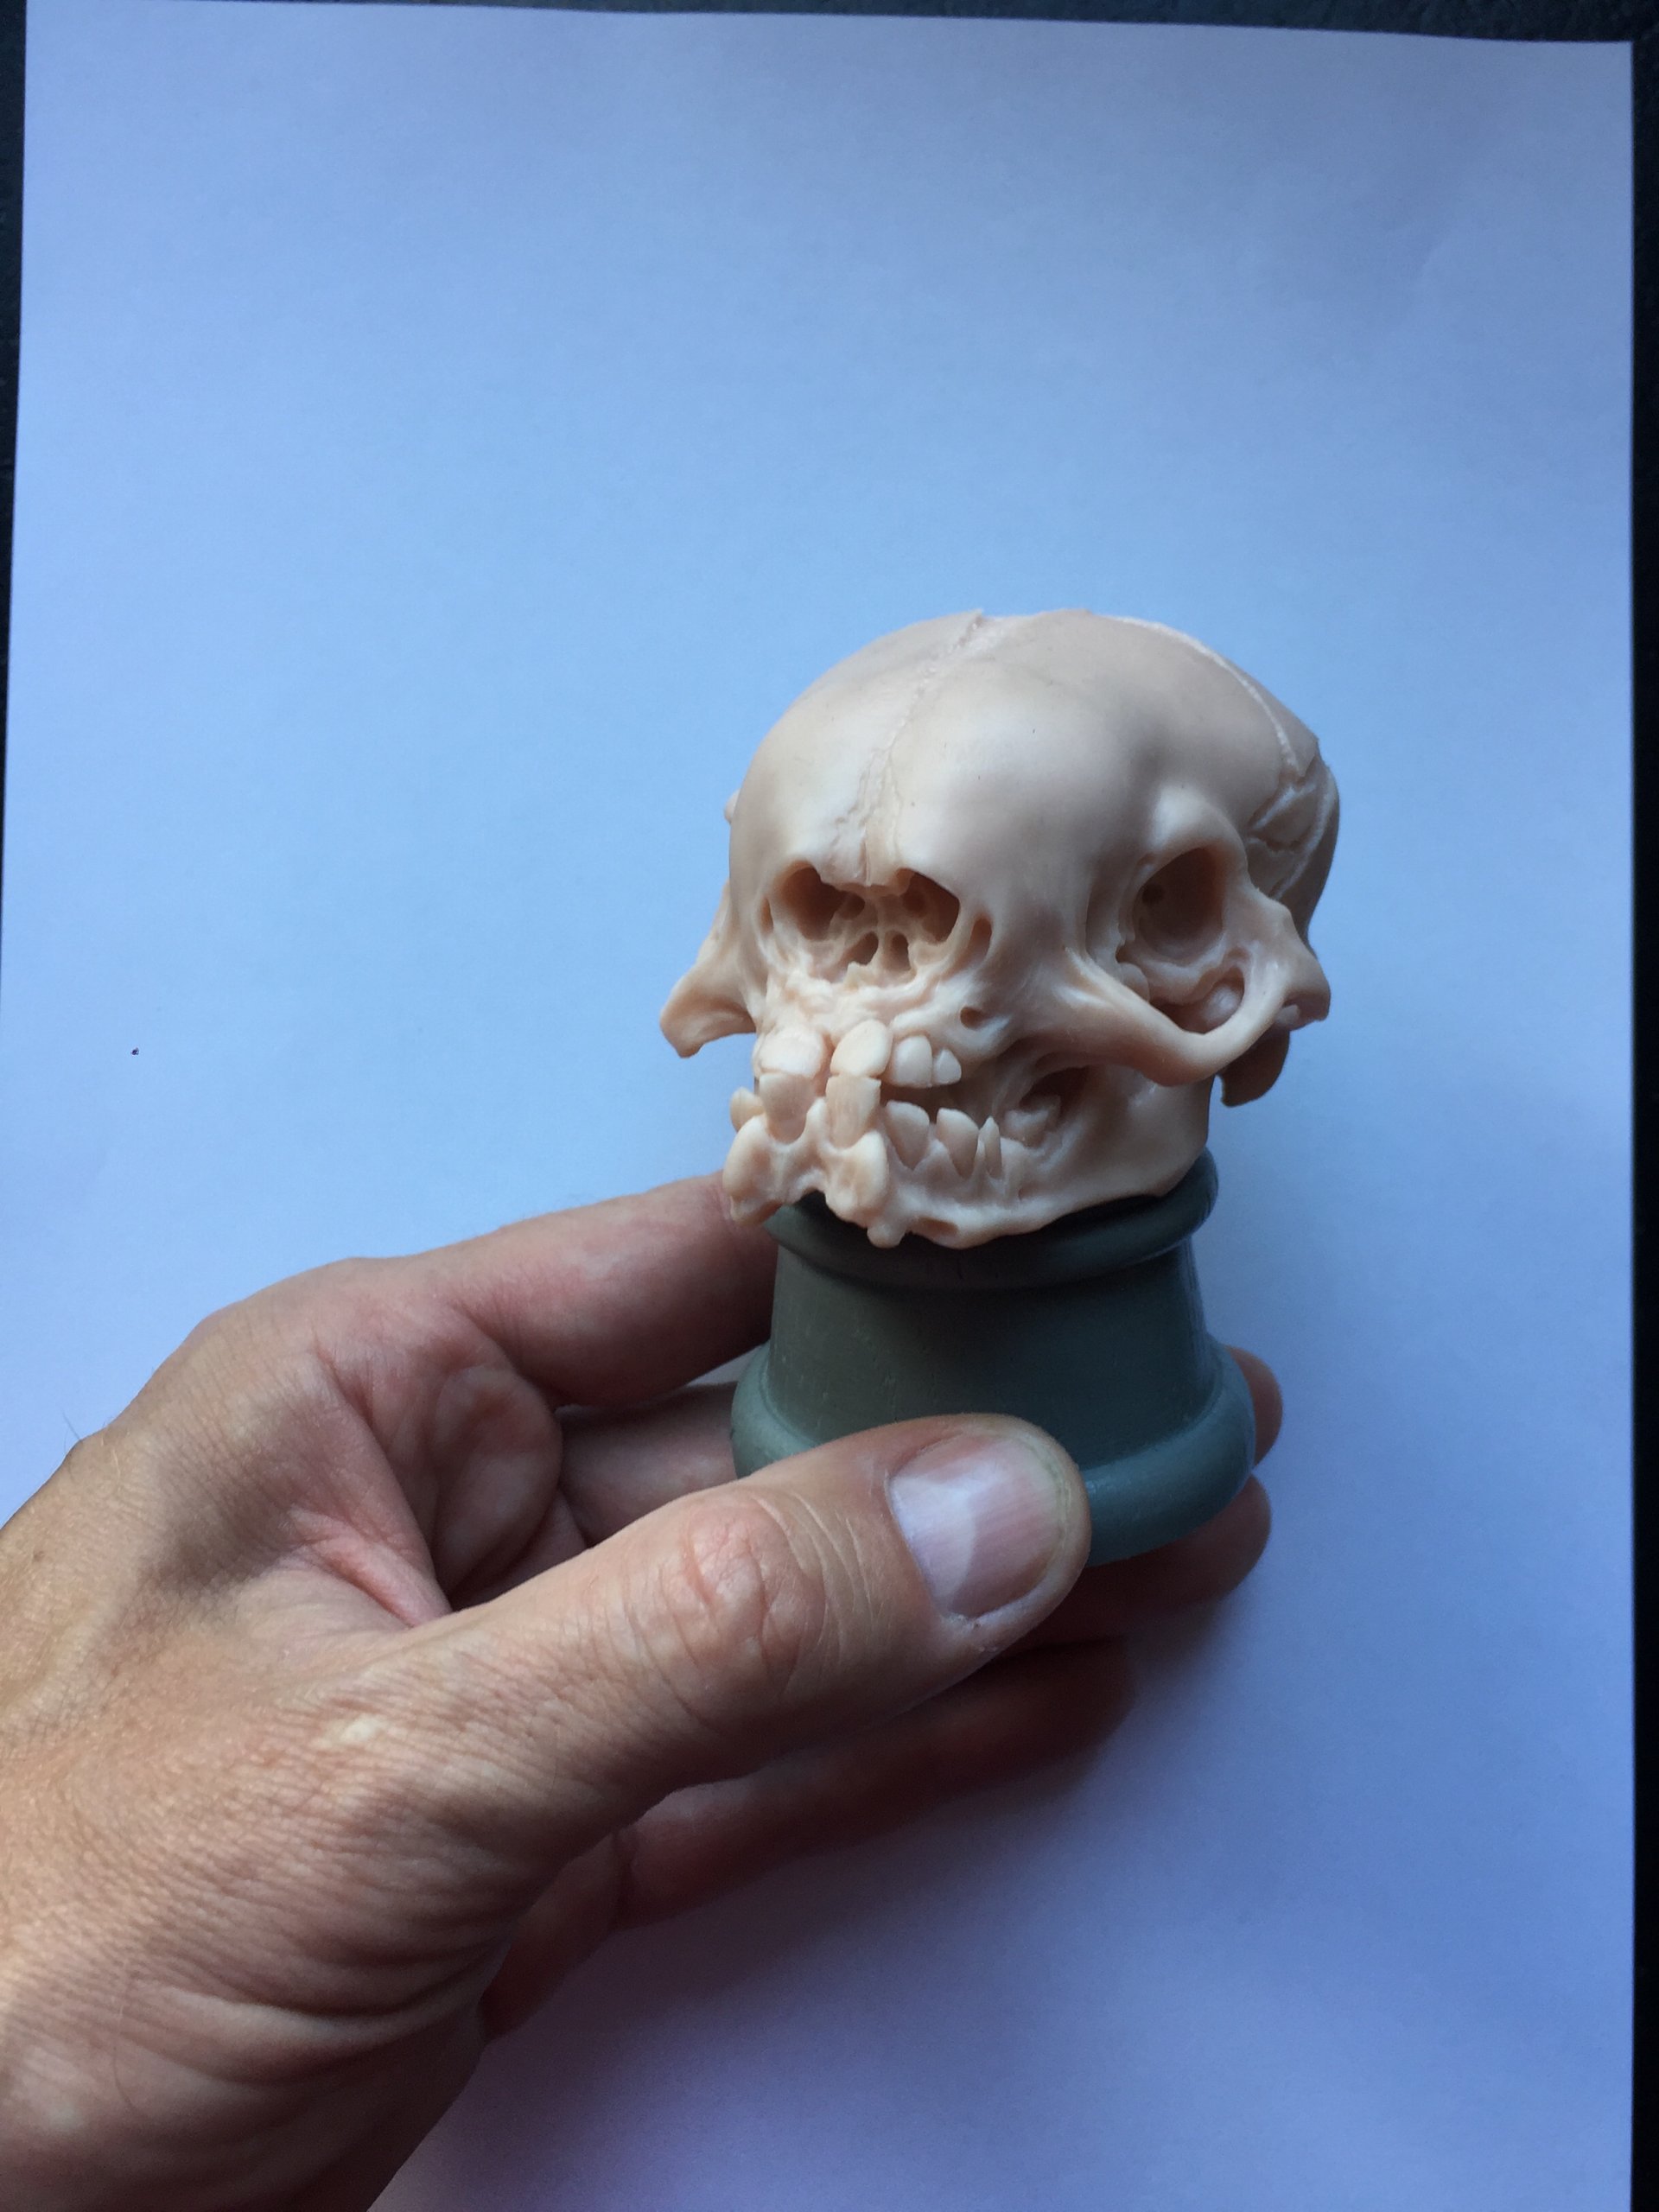
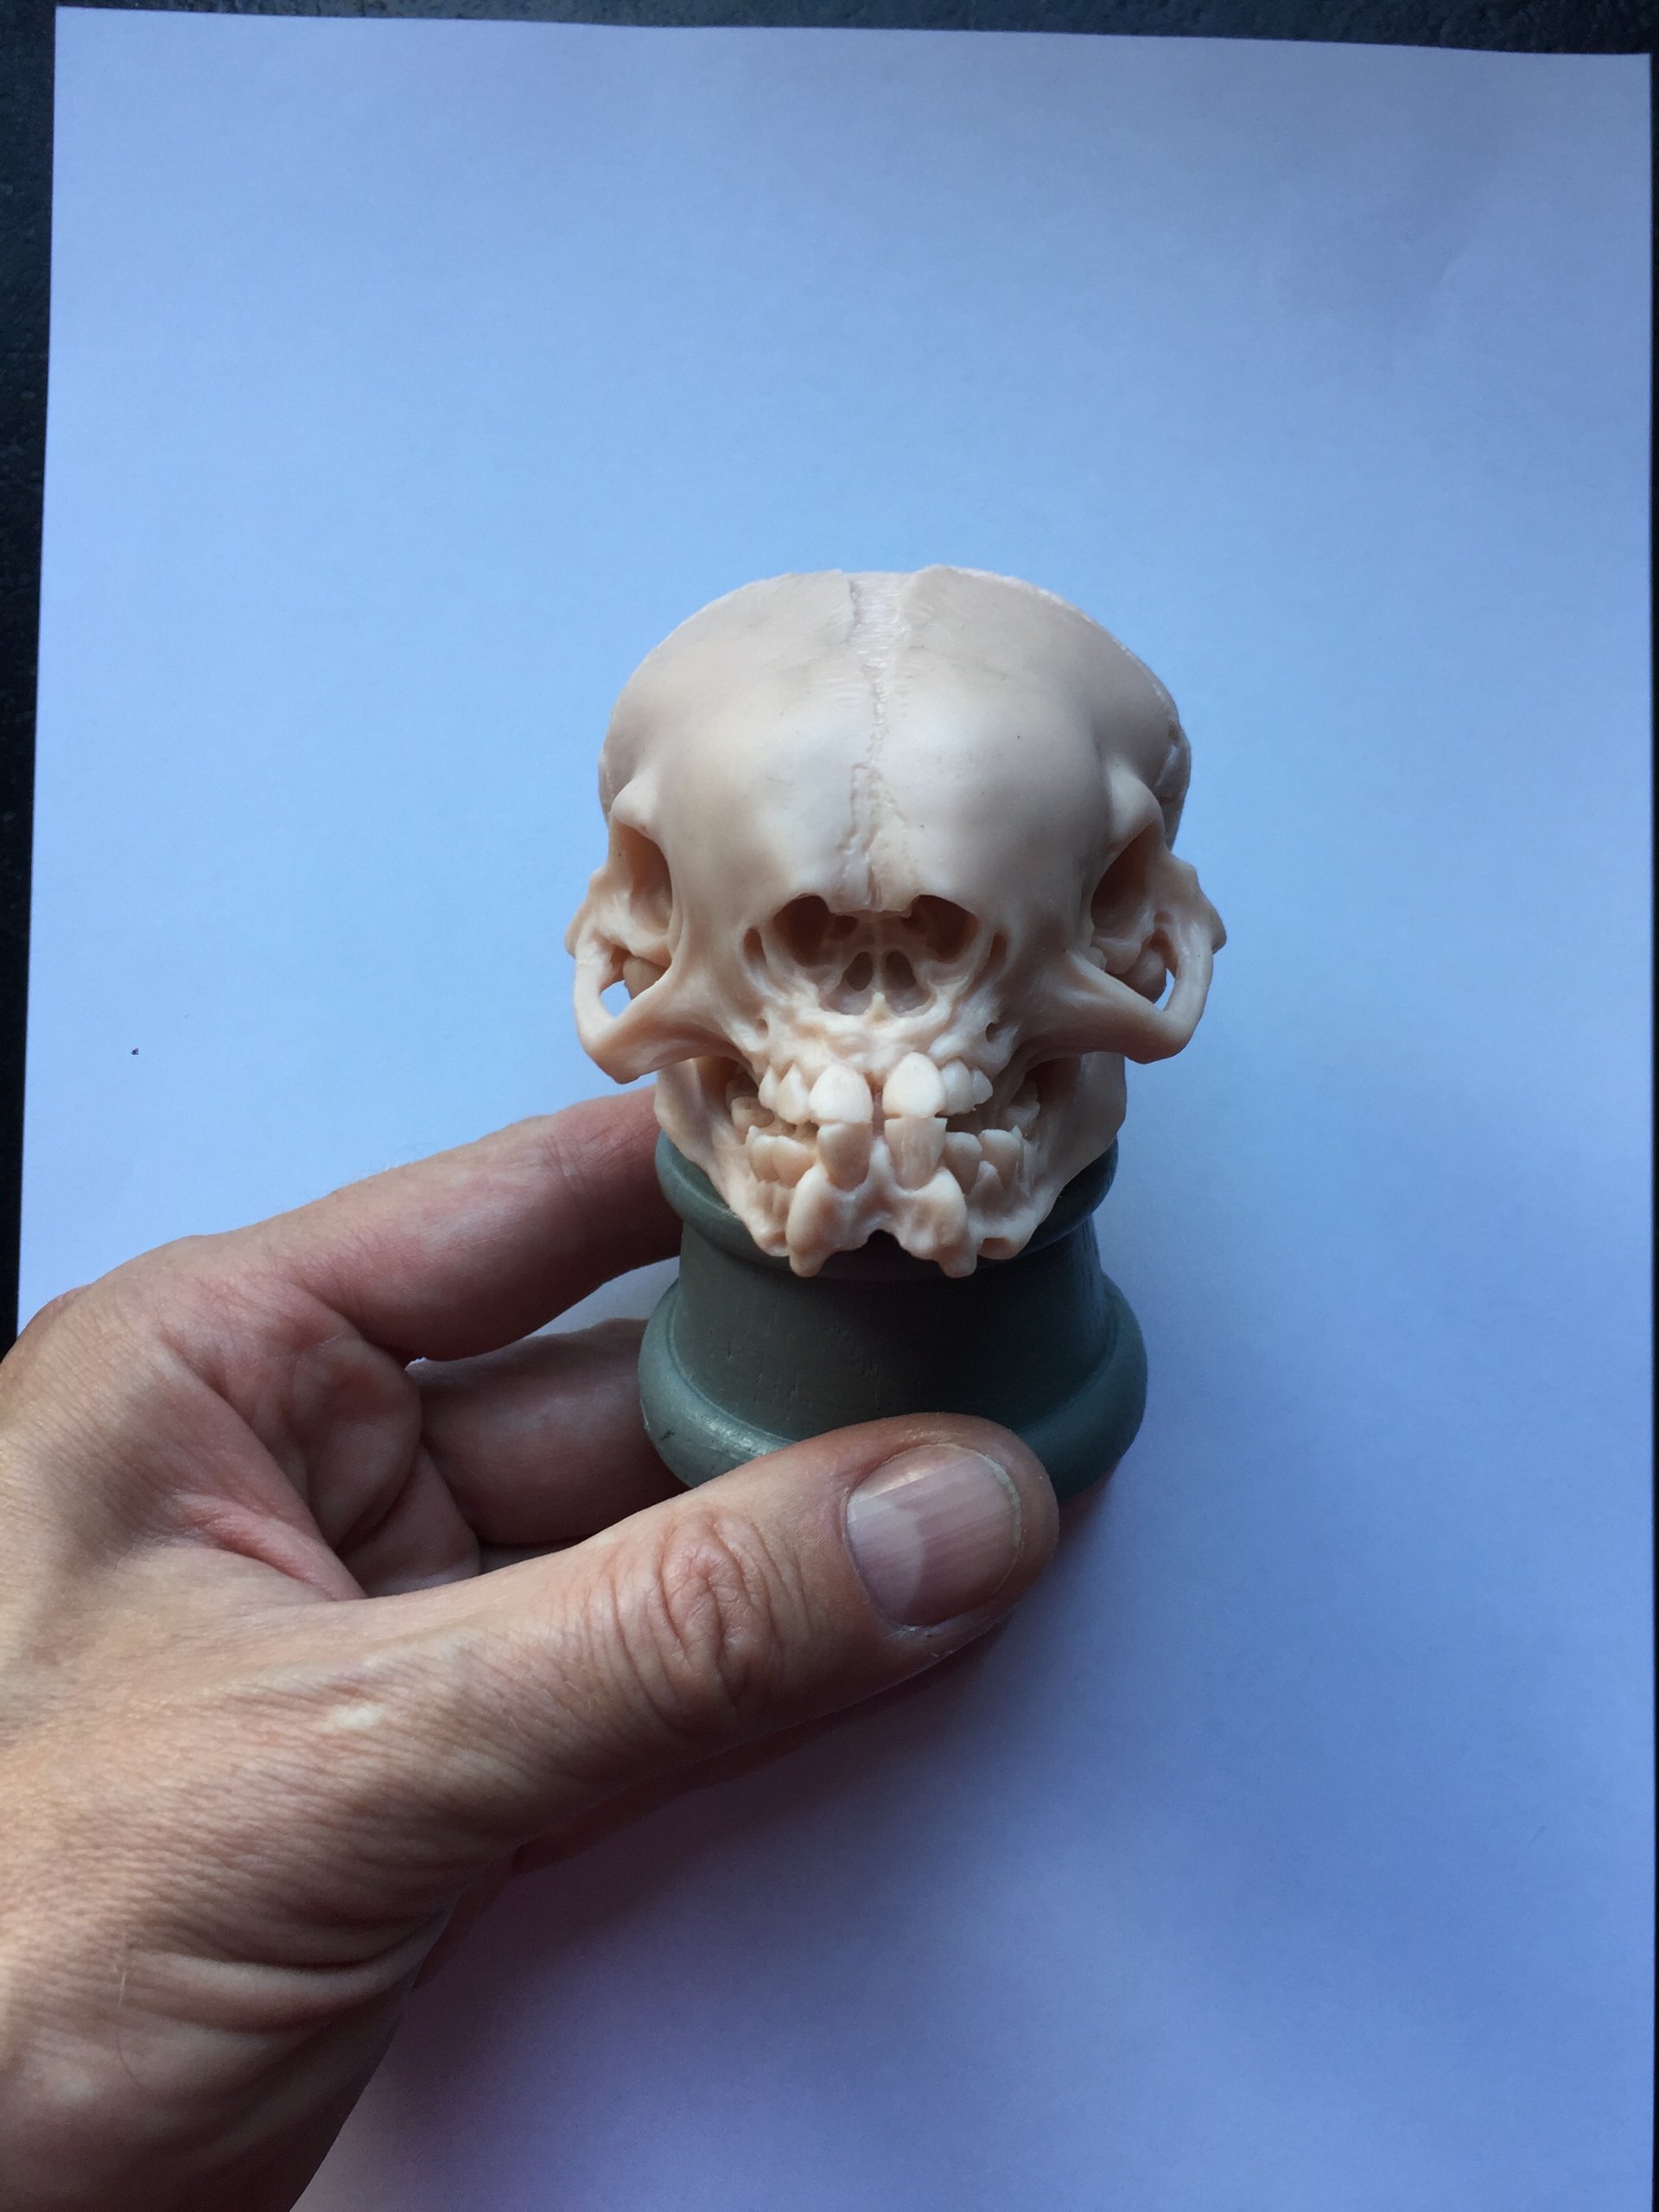
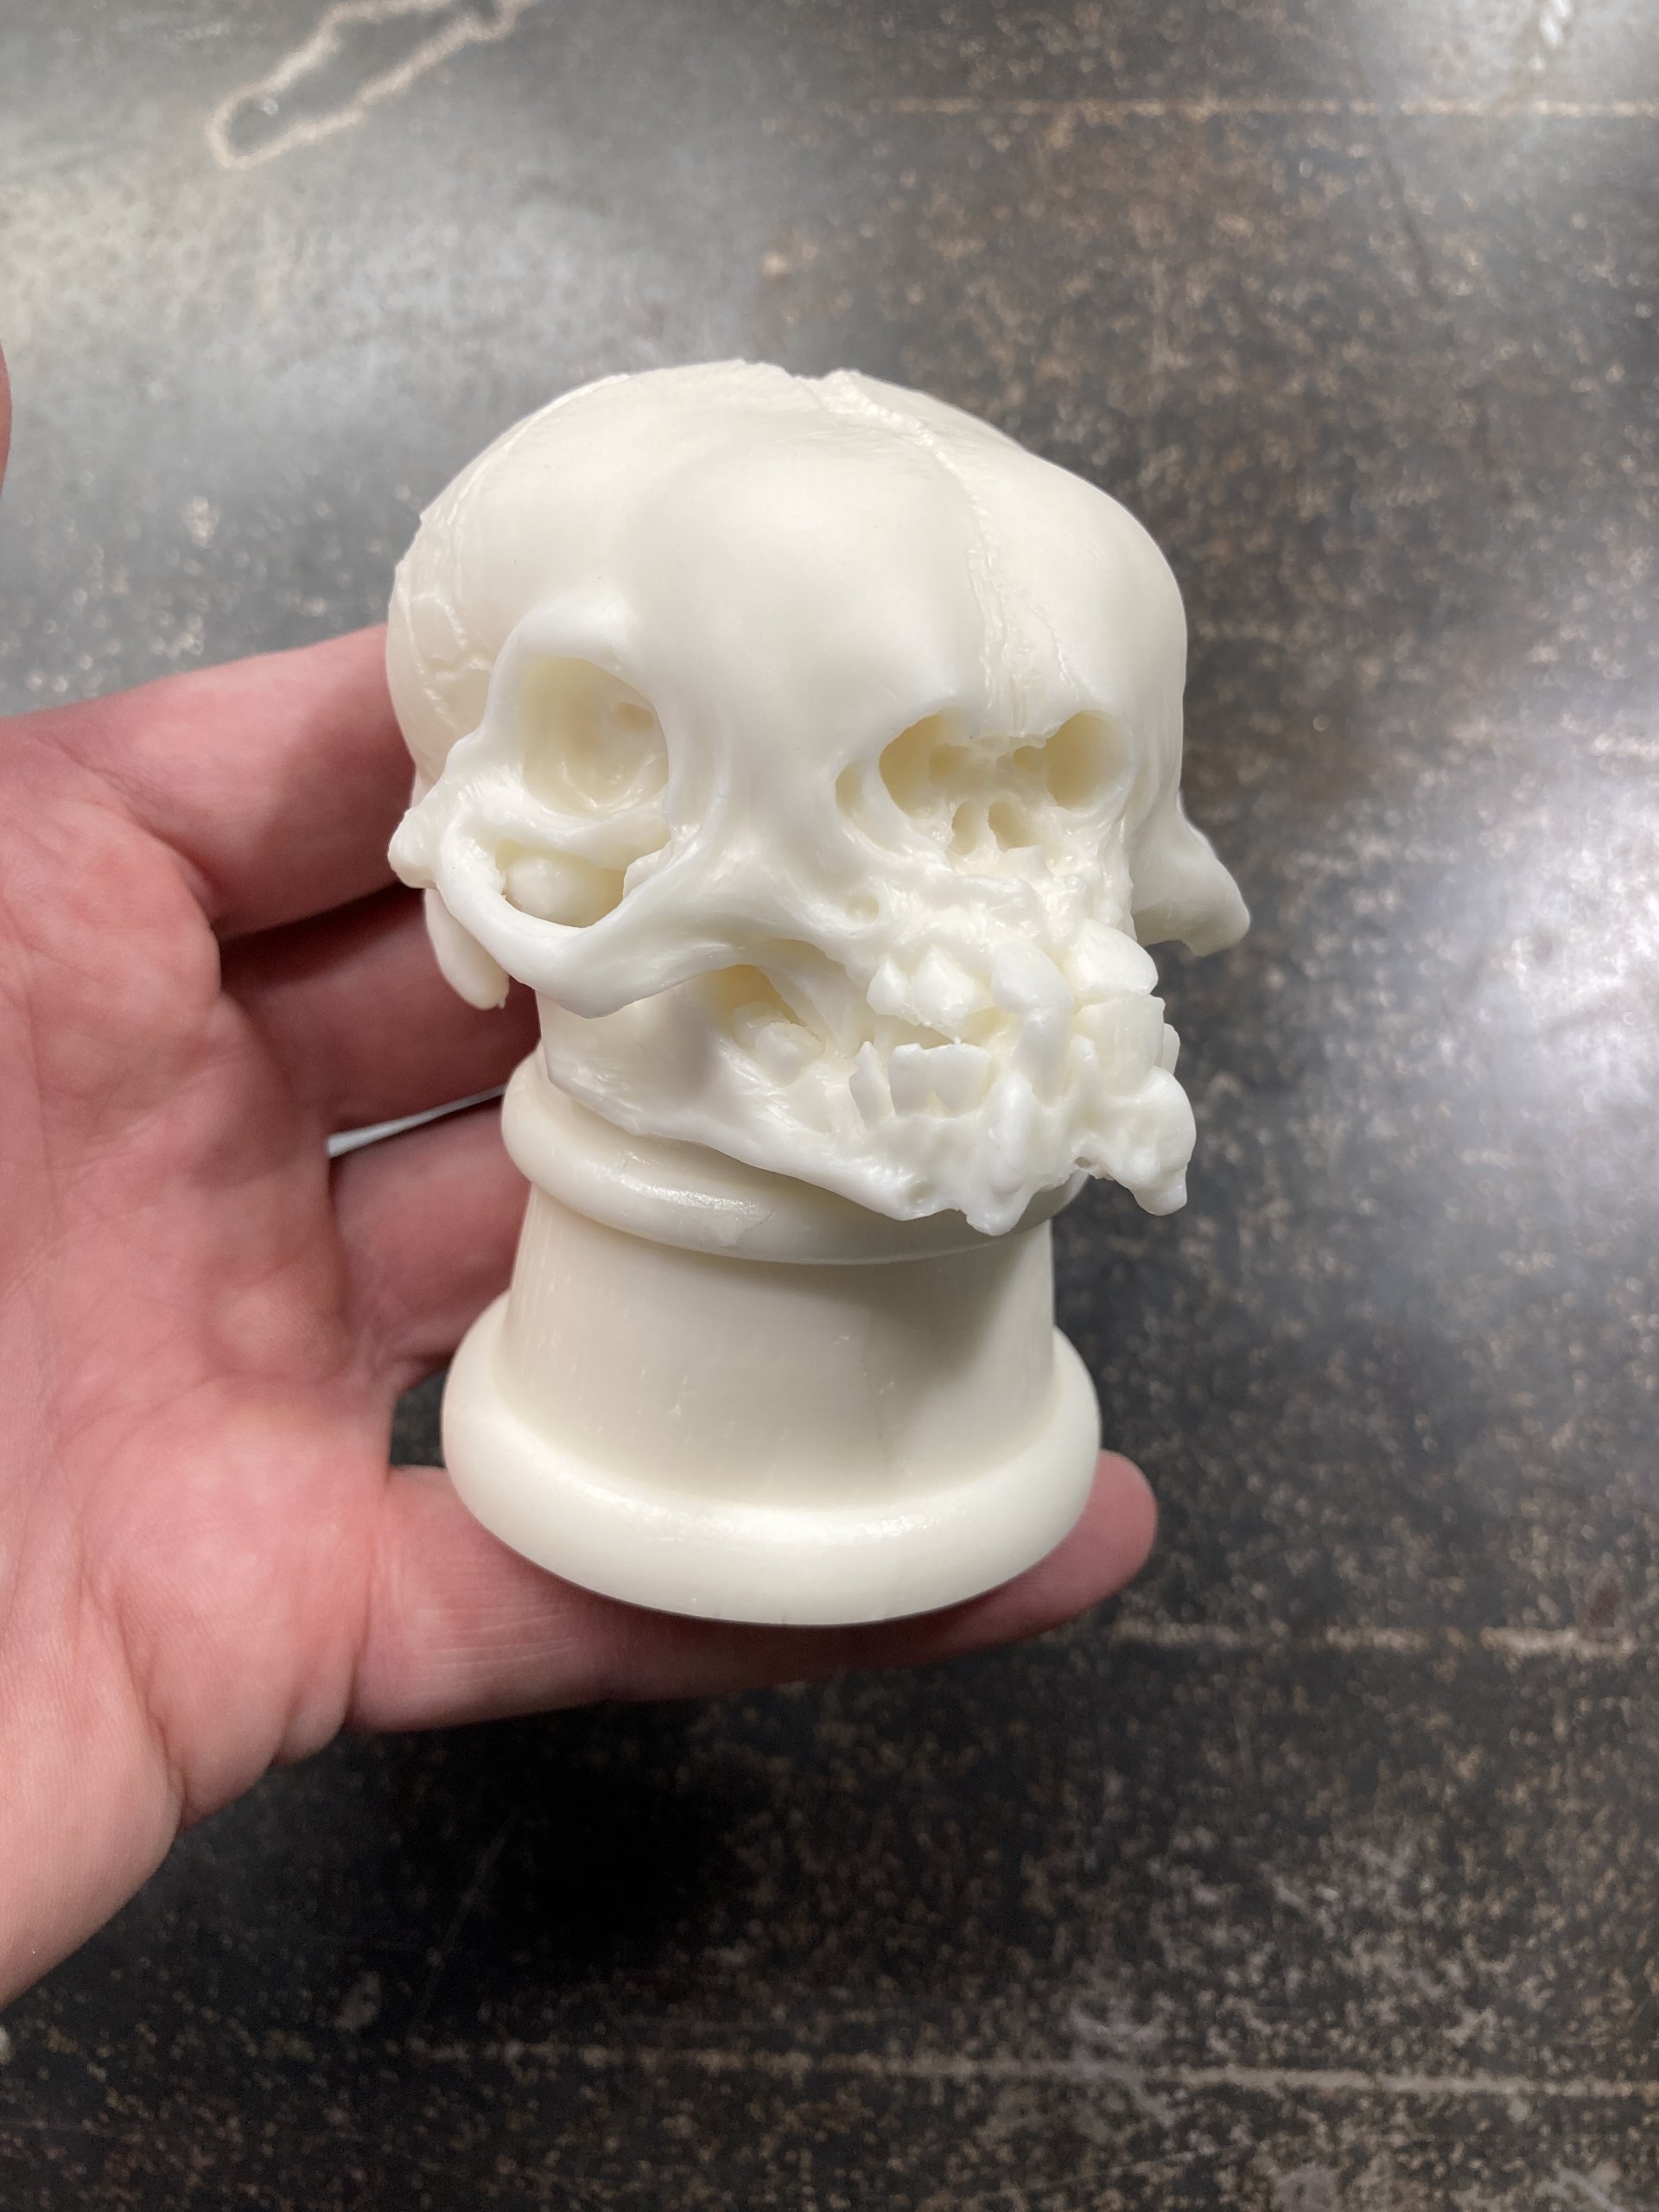
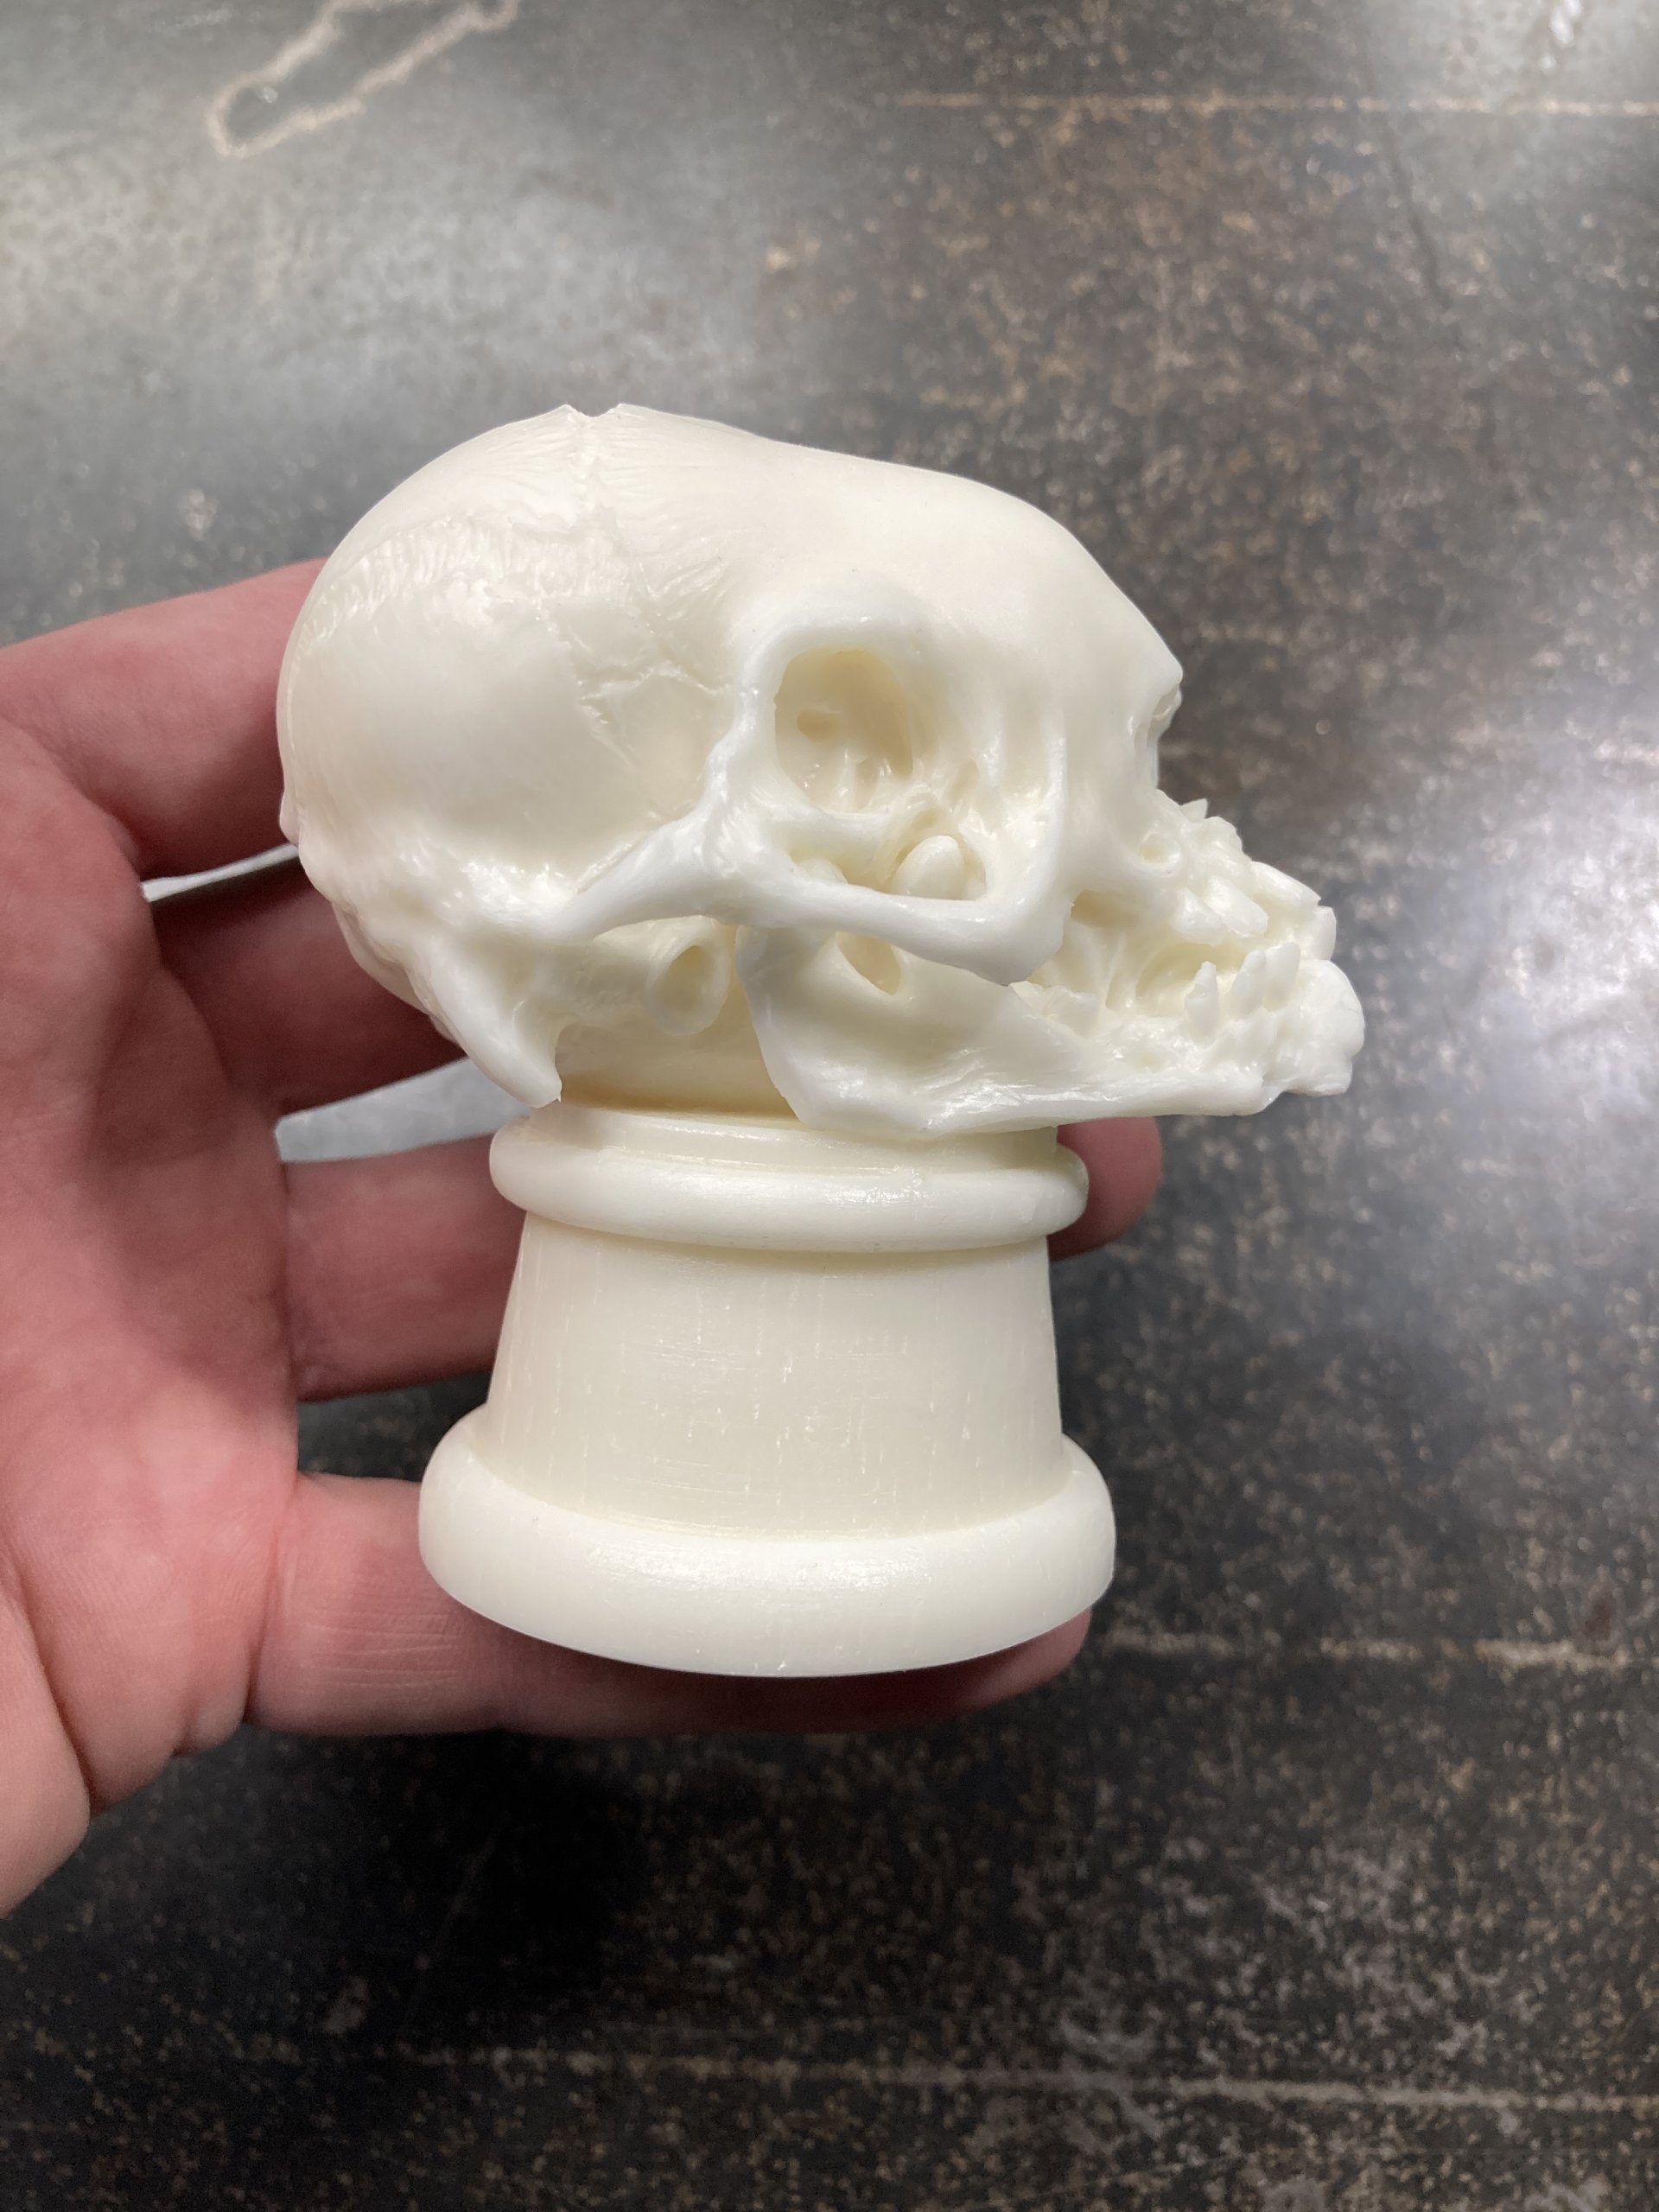
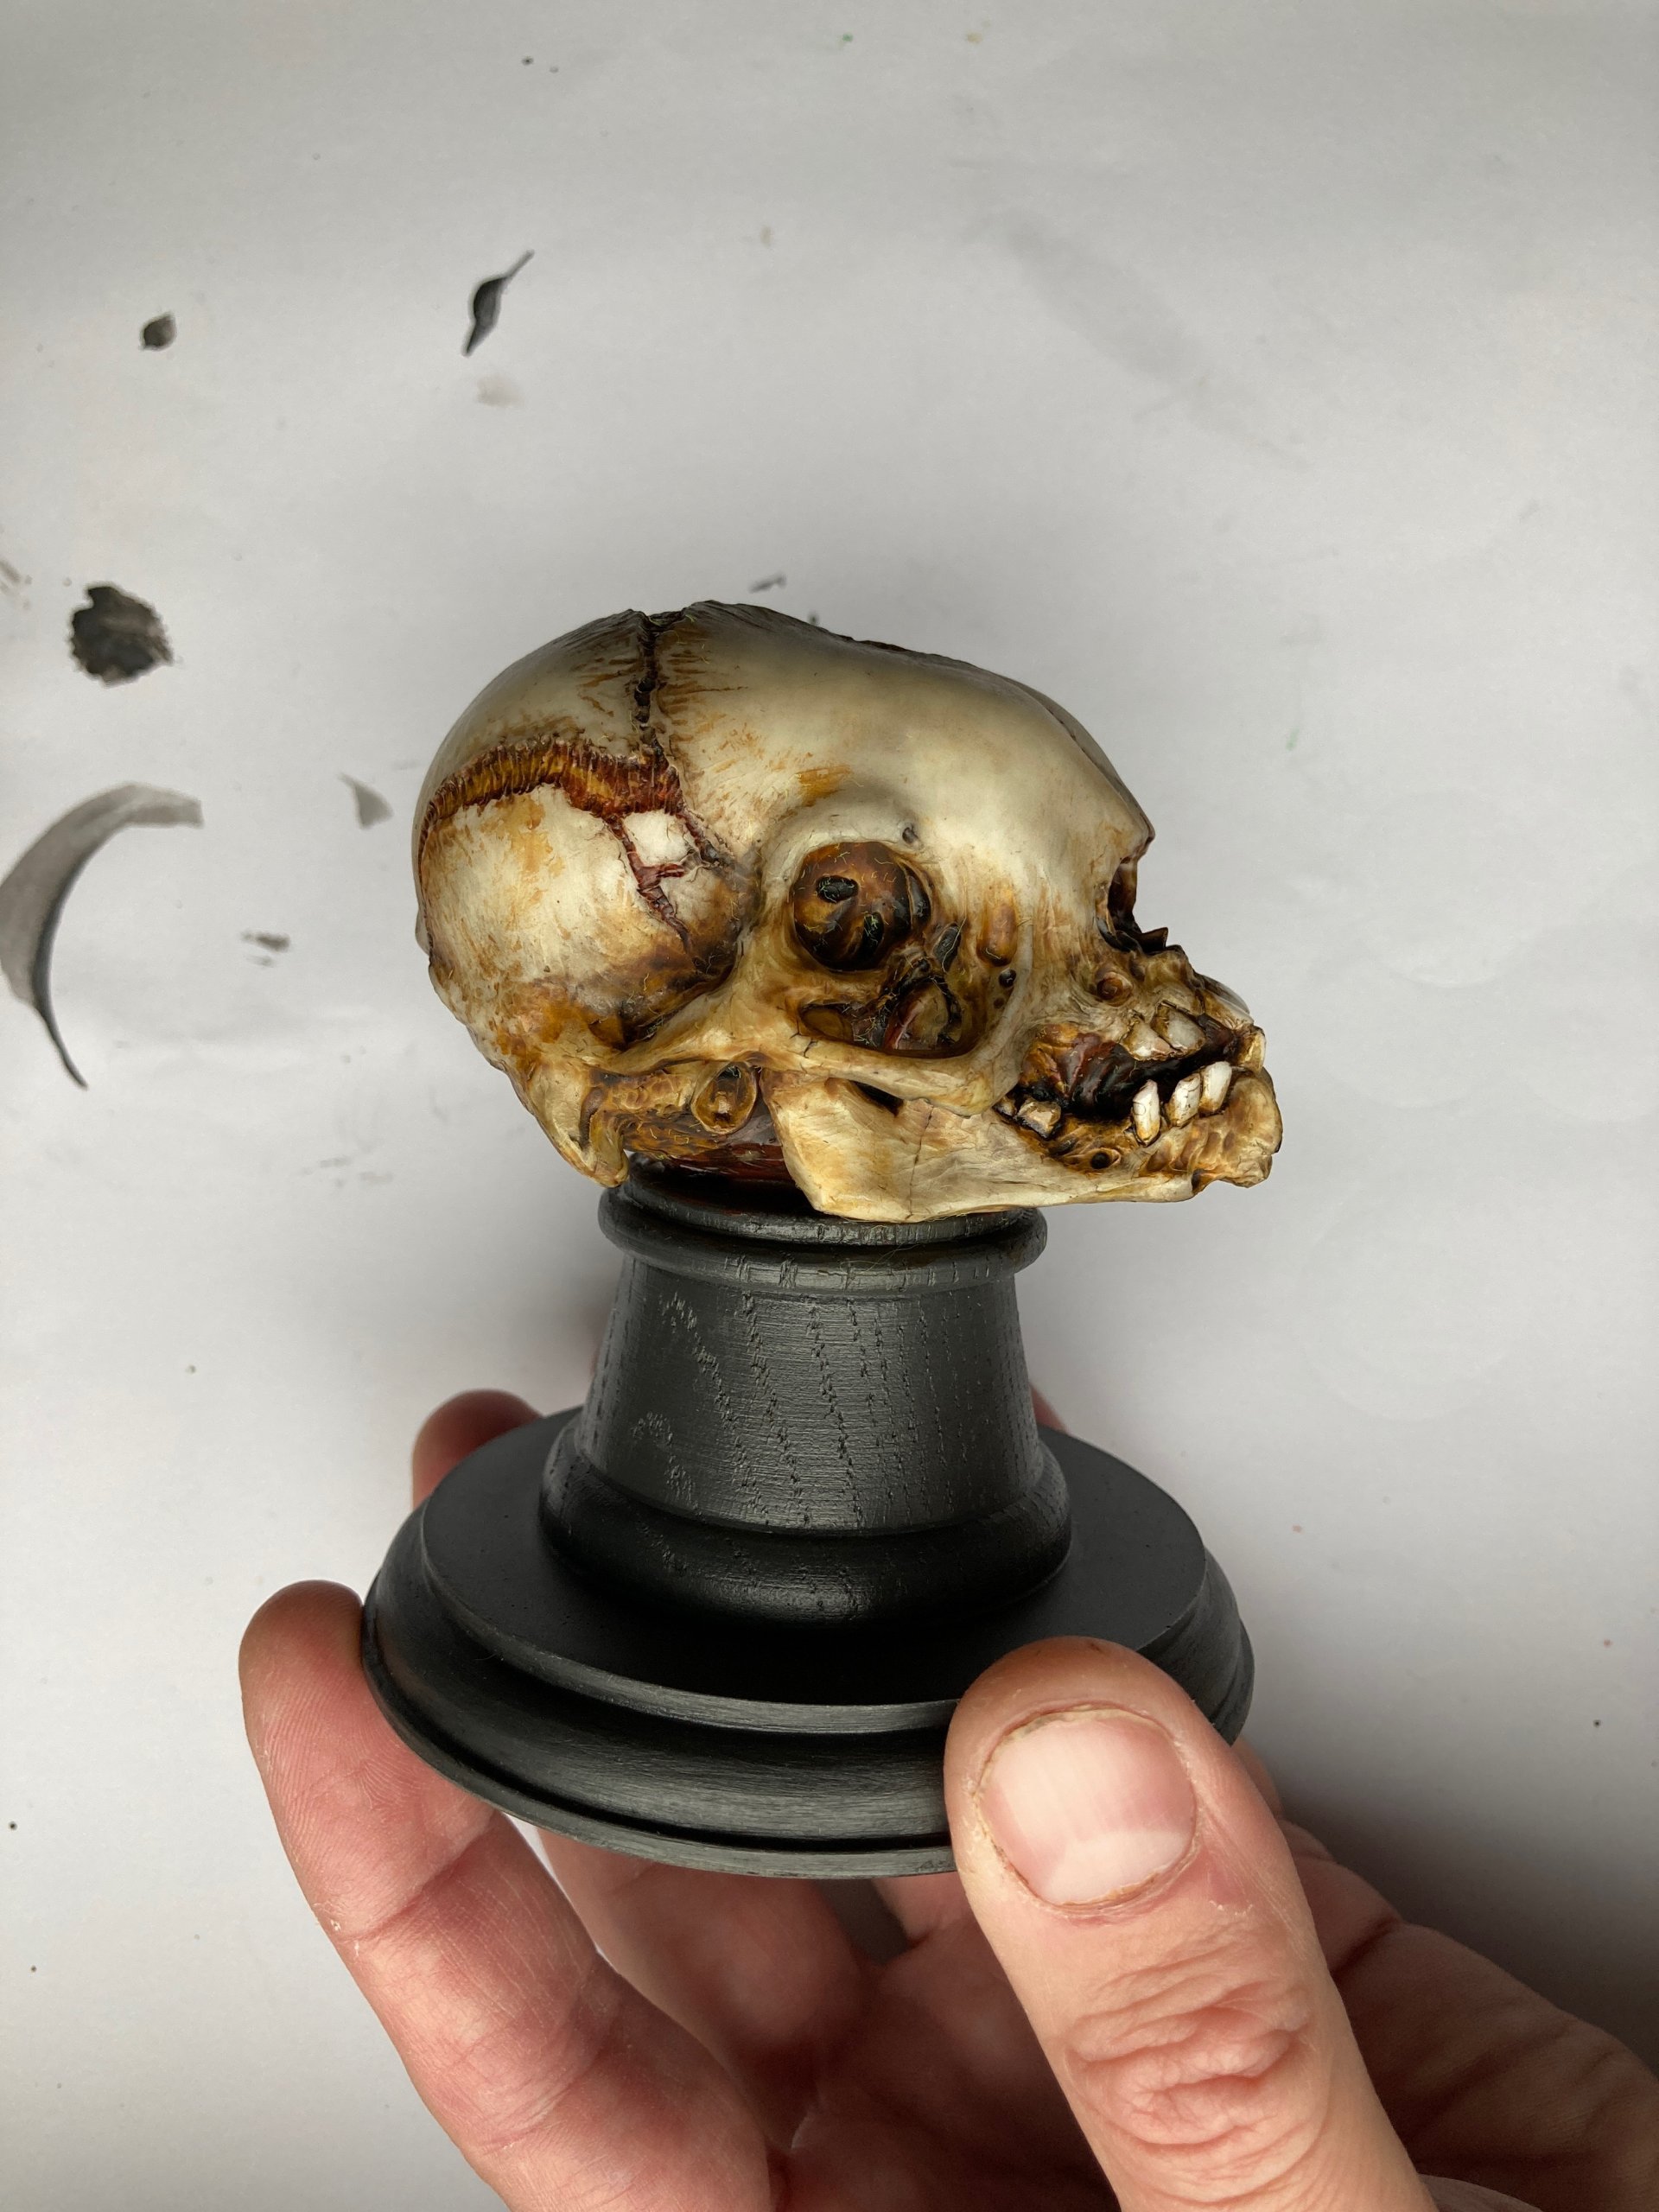
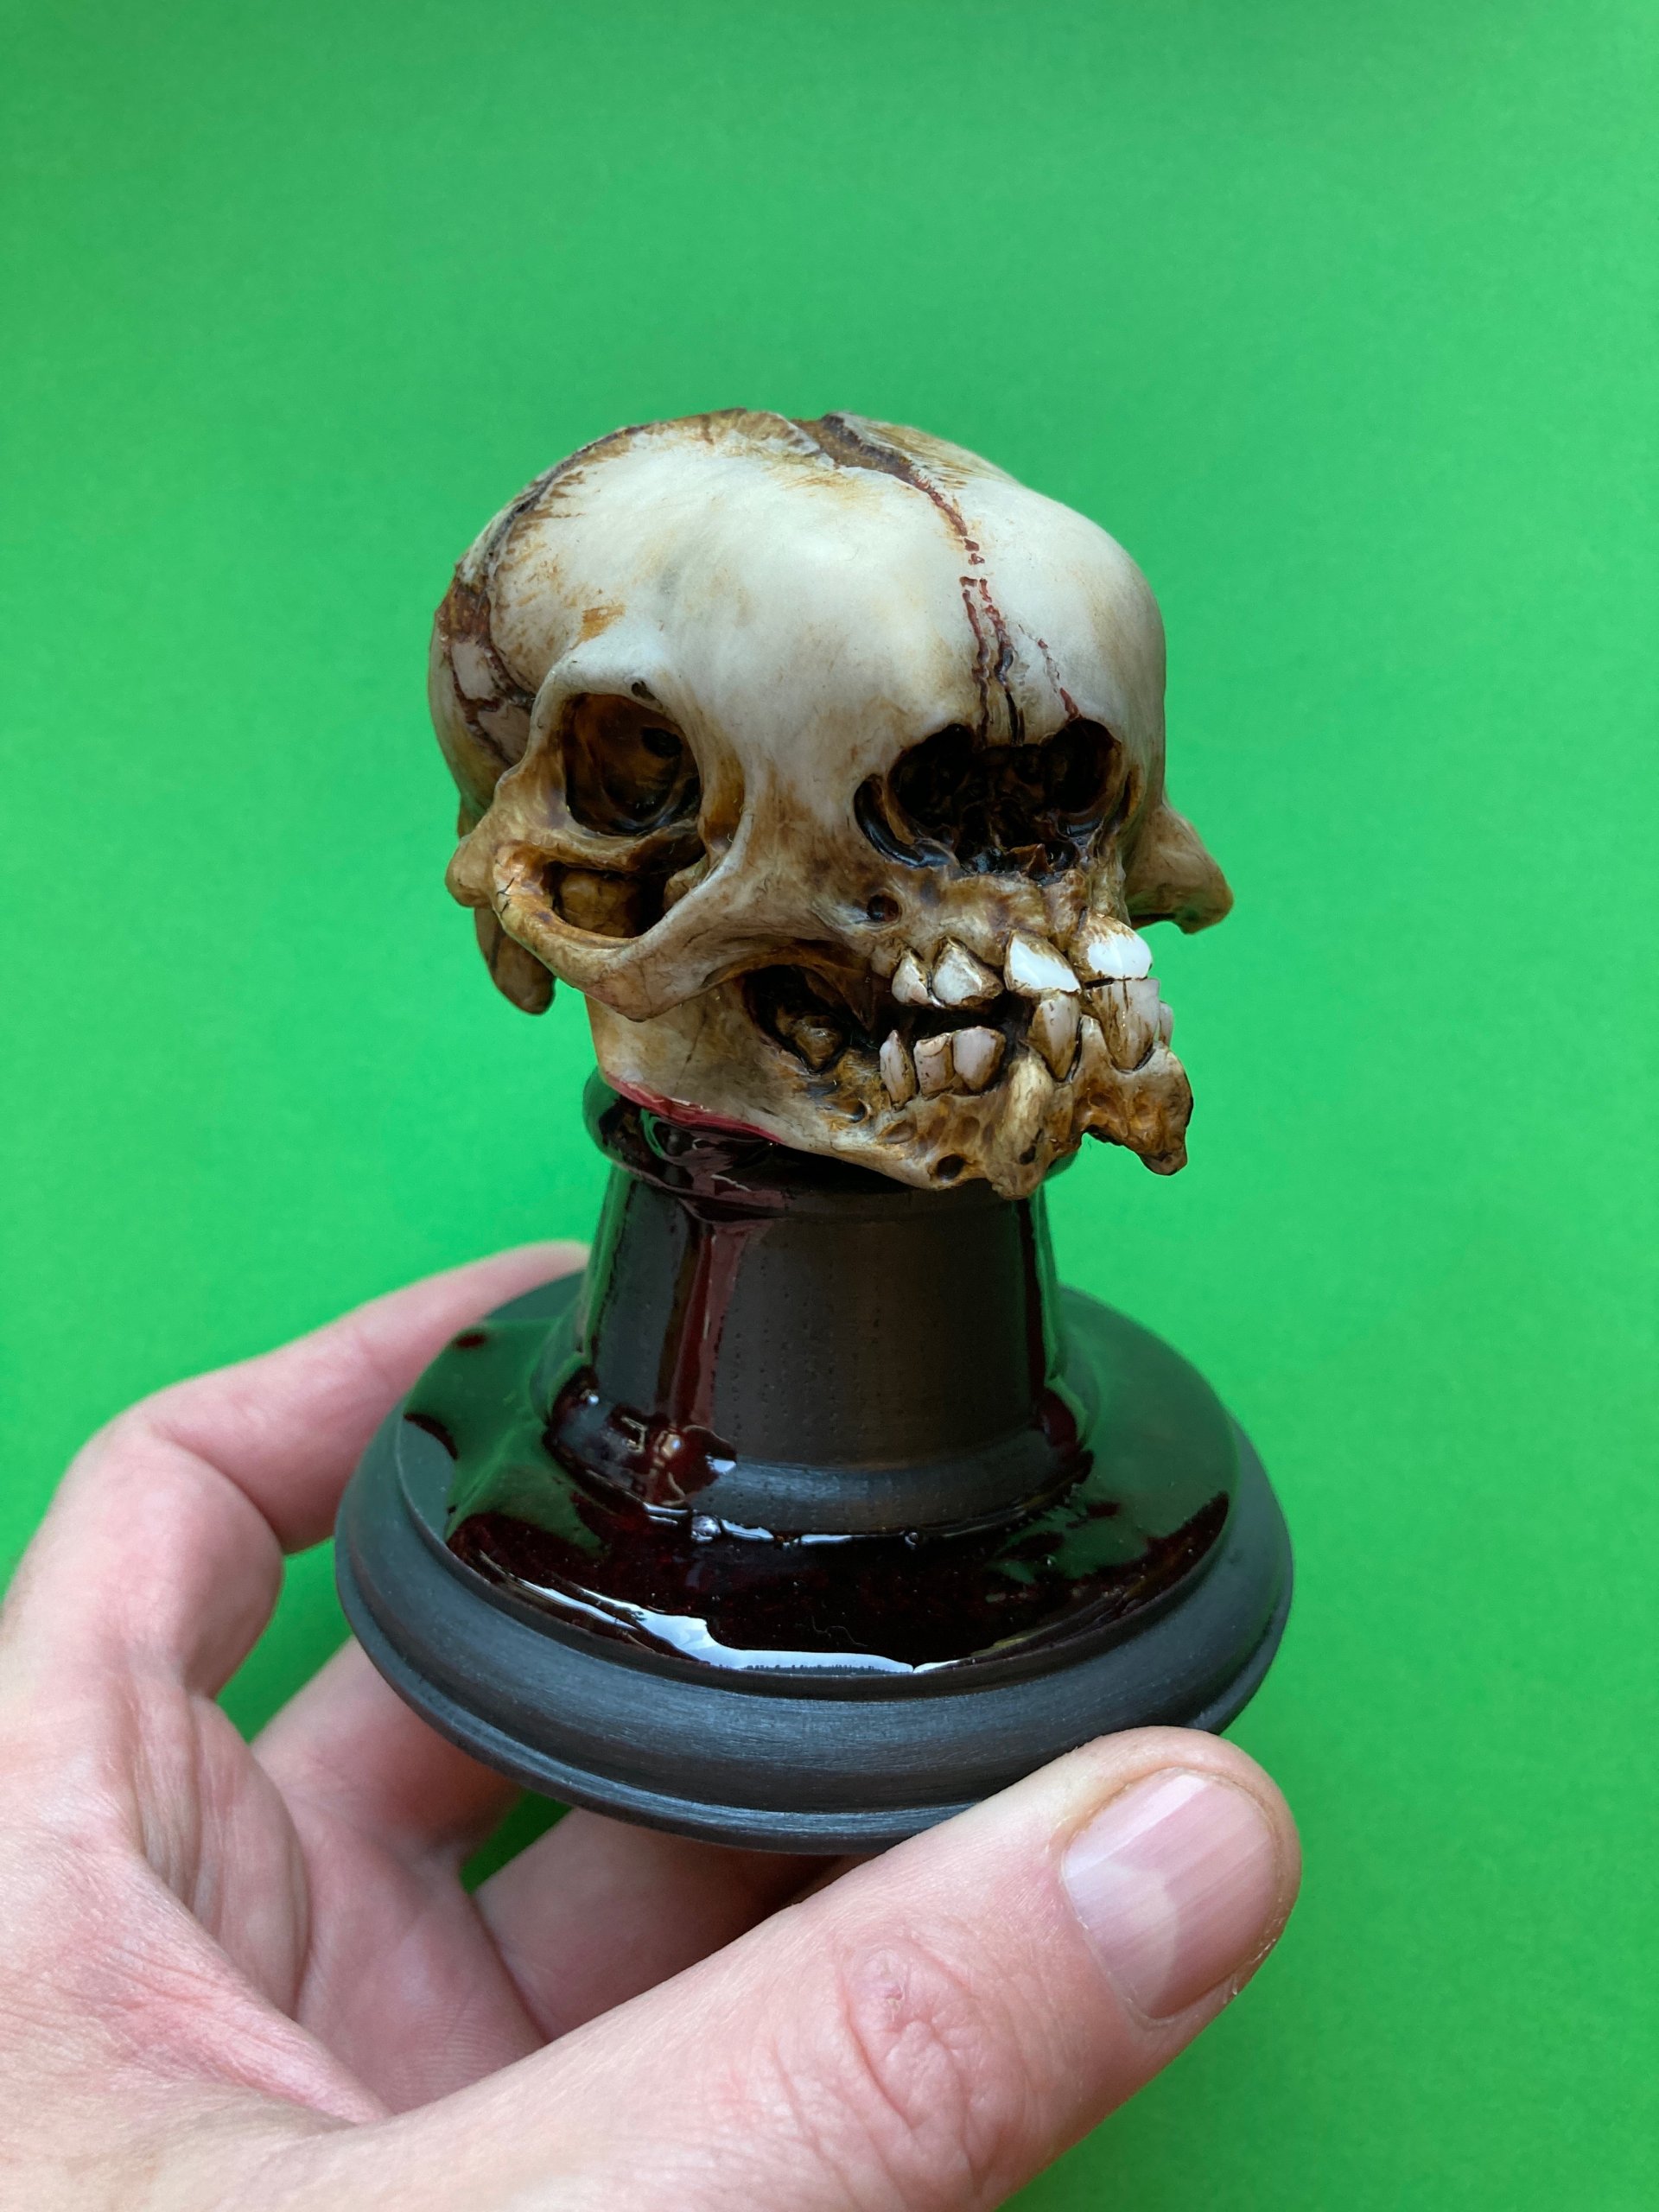
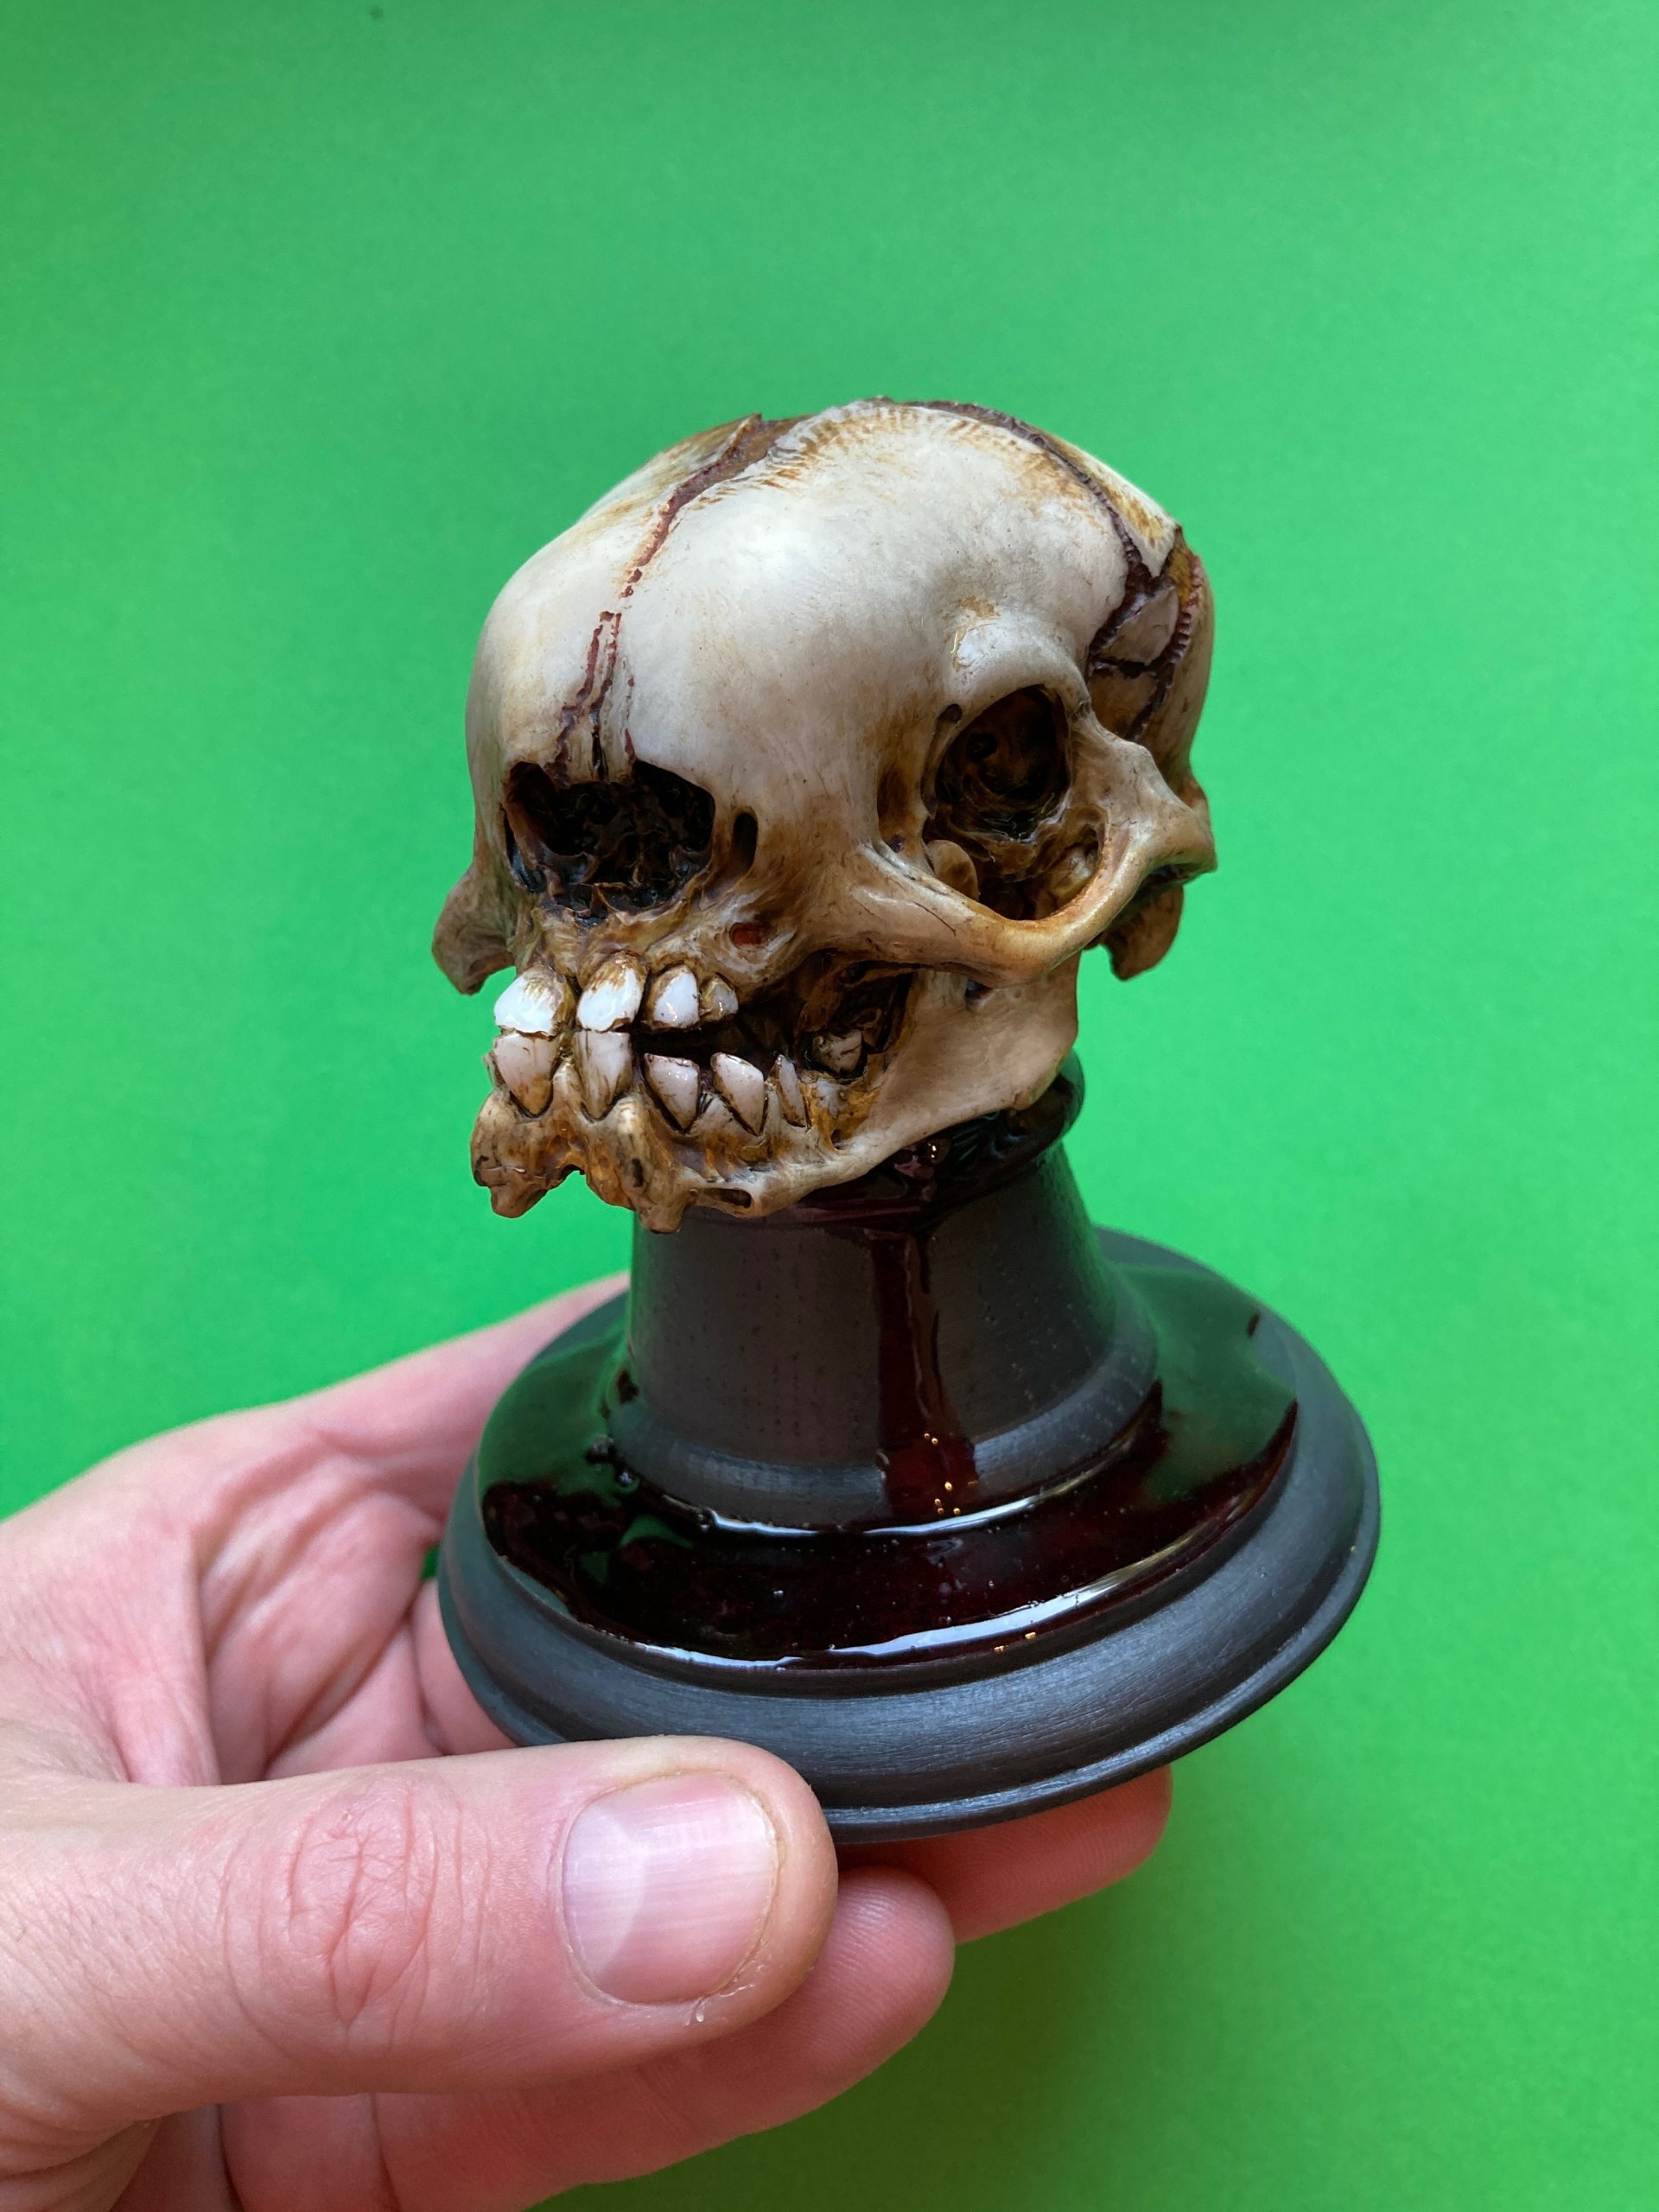
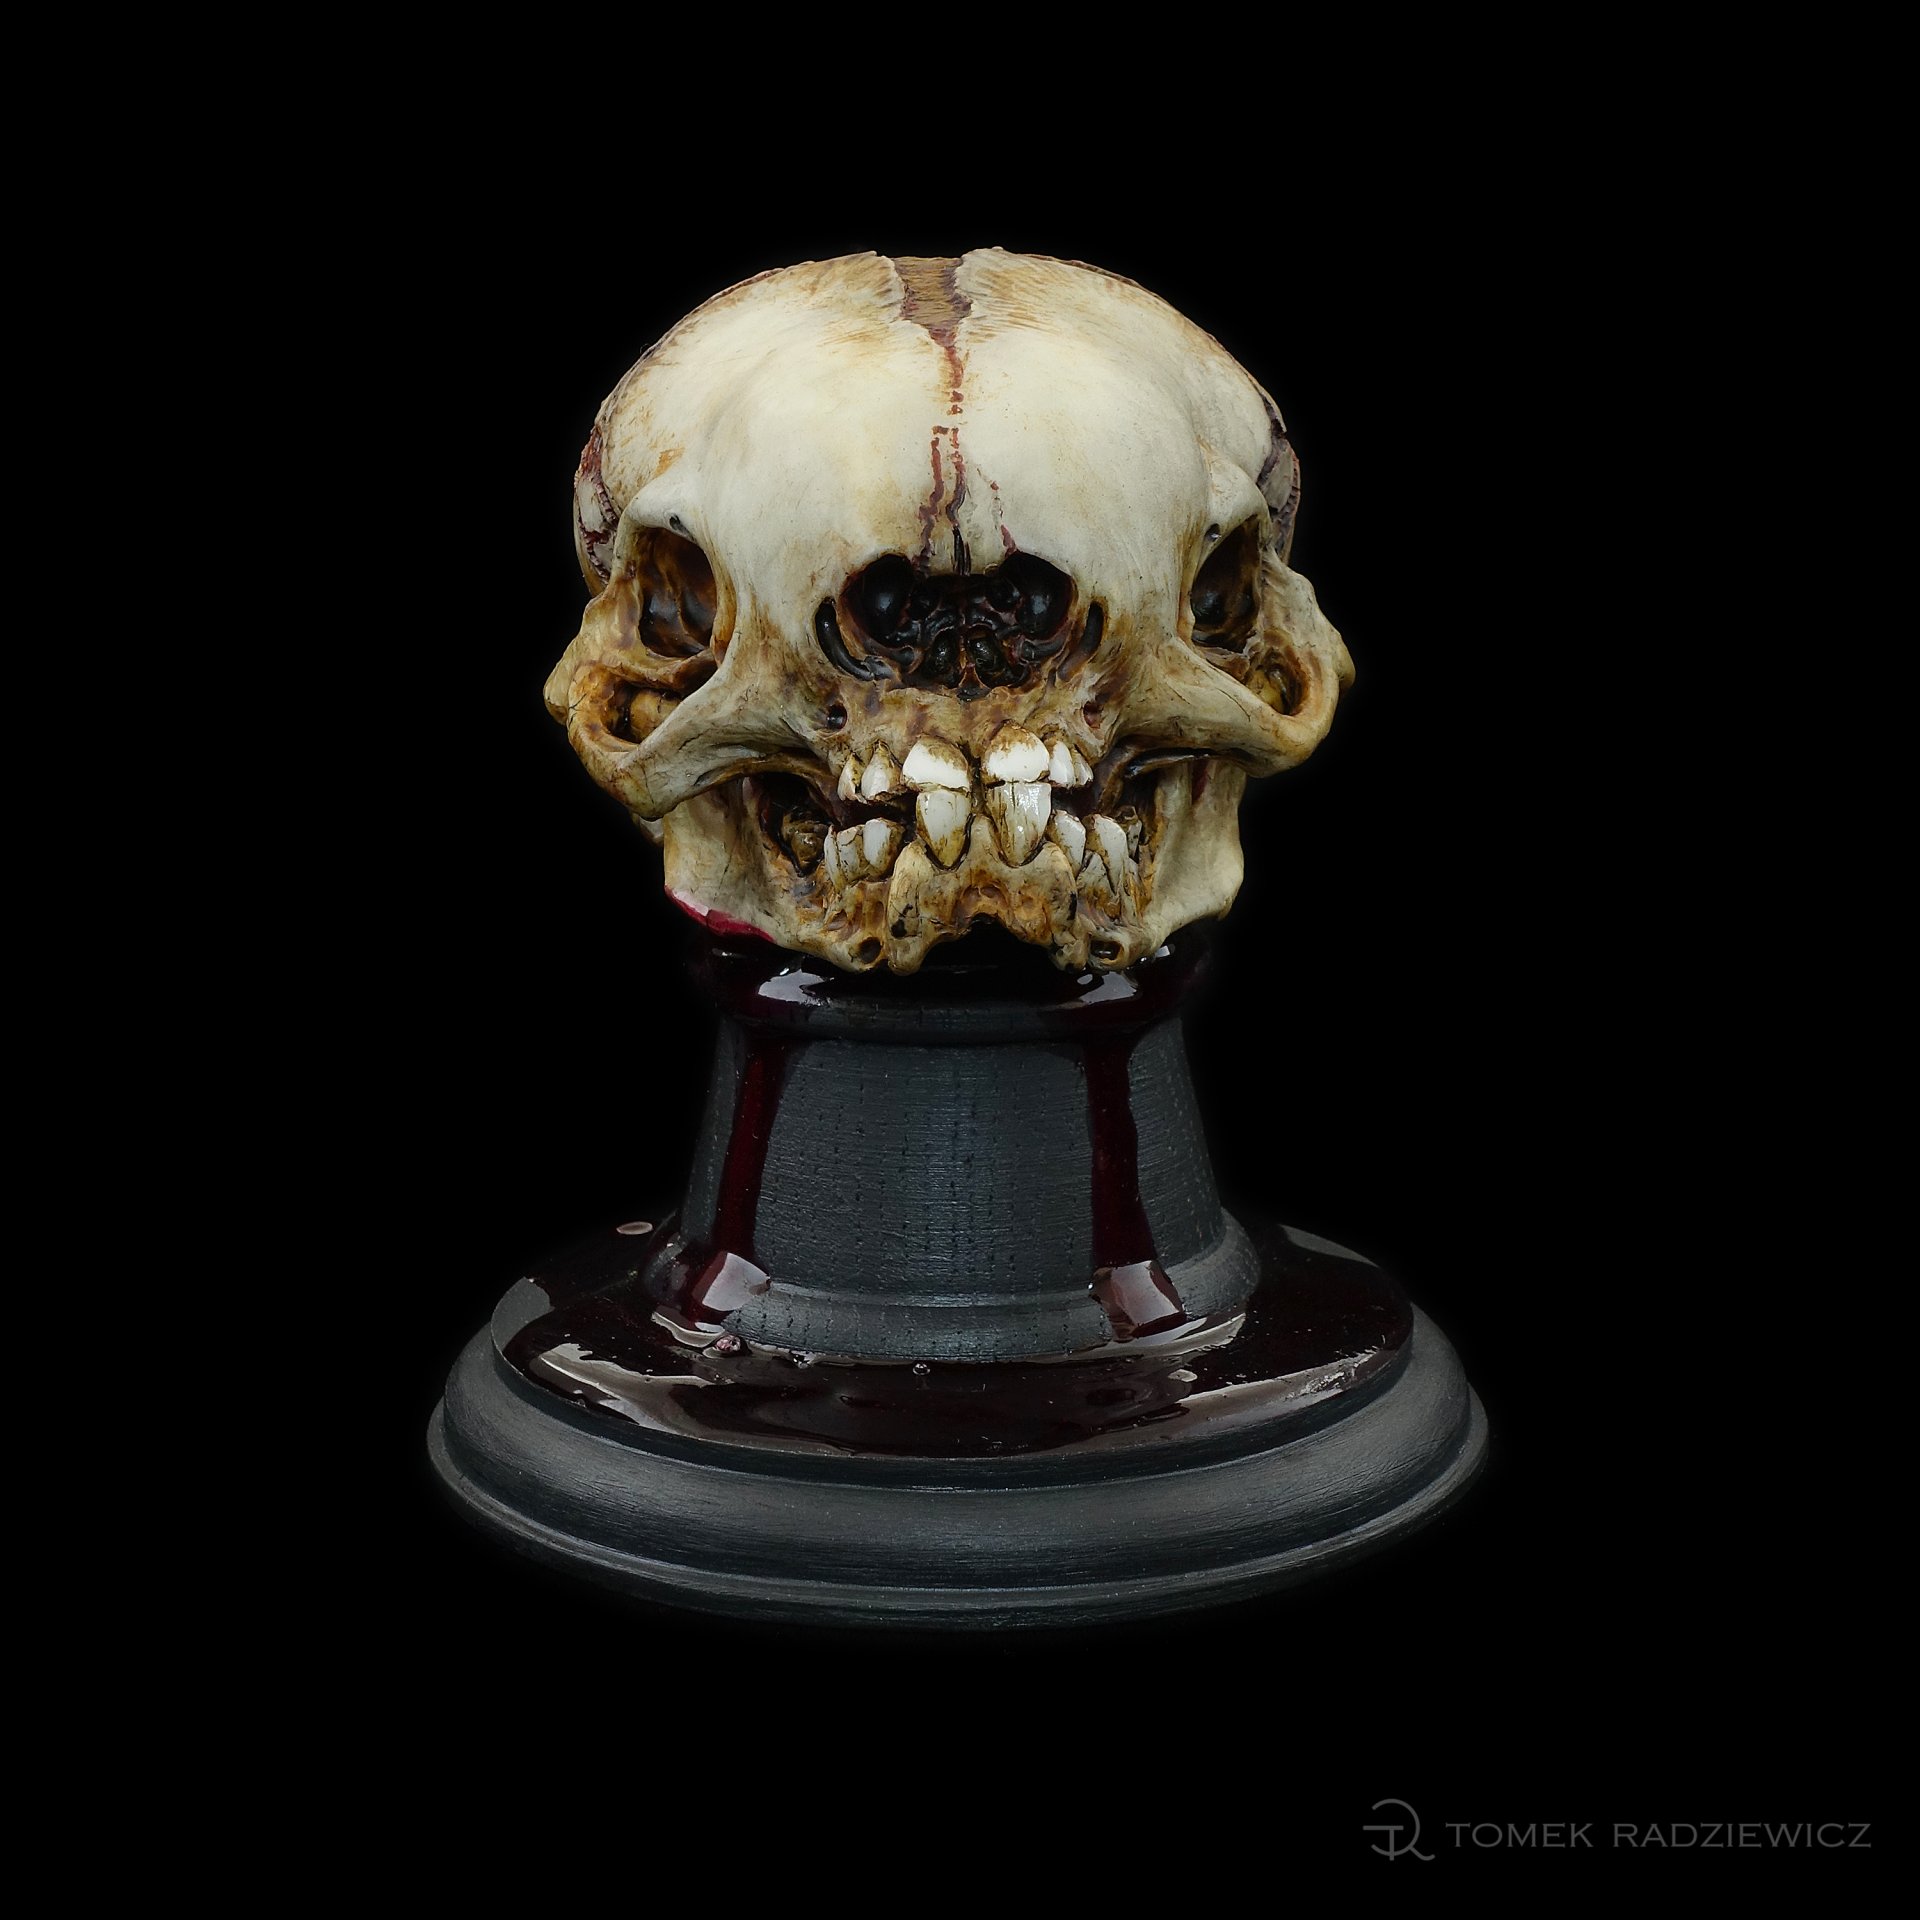
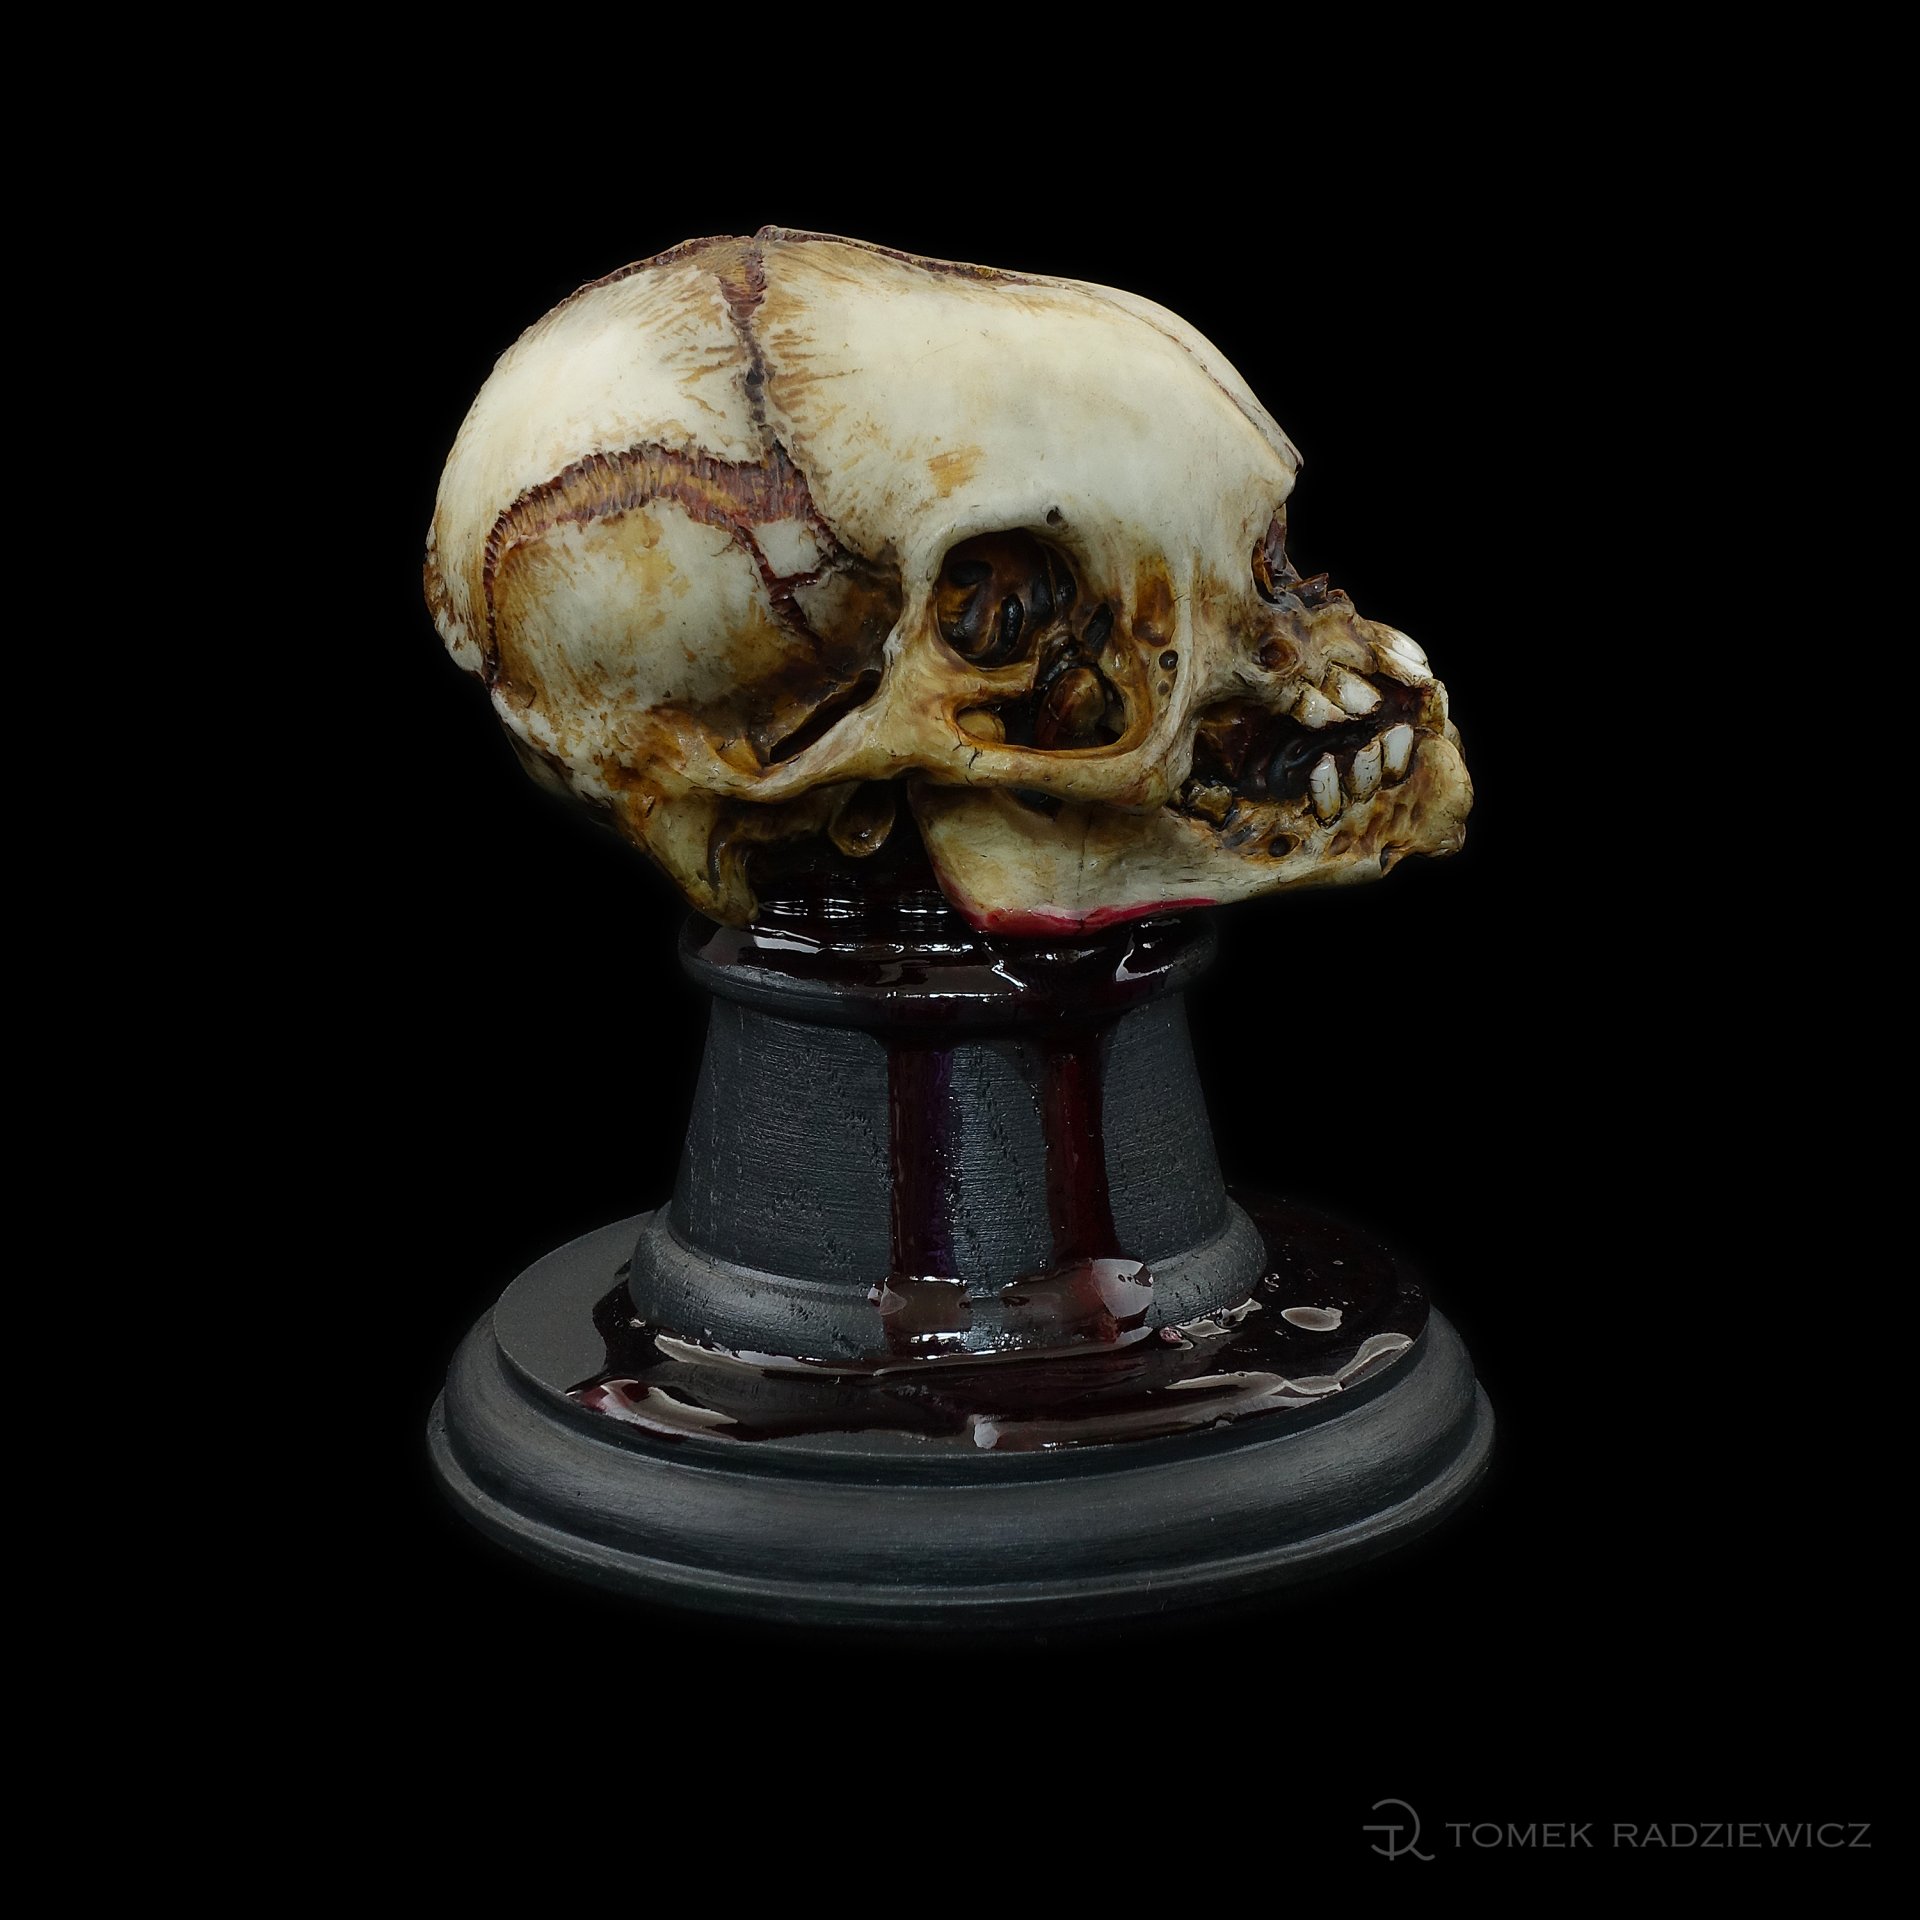
The skull of an alien is another sculpture from the Dracula's Inkpot series. You are probably wondering where I got the idea for it? As you know, aliens appear in my works quite often. In most cases, there are various types of their portraits, but the skull theme has hardly appeared so far. While working on a series, I decided to carve an alien's skull and began to wonder how it might look like. Of course, I didn't mean to create another simple sculpture with big eyes. I wanted to approach the subject in the opposite way and I was trying to figure out how this alien could look like if it had muscles, skin, if it was alive.
Whenever I took up the subject of a stranger, sculpting his portrait, I think how to create to make the look interesting and threatening, give a grimace, to be an intelligent life form, or just an ordinary primitive monster etc. This is a classic way of designing a character for me.
With this skull was completely different - inspiration came suddenly and it was one of my human plasticine sketch in my studio. It looked quite abstract, so I decided to follow a lead and carve an alien skull. I started to create by asking myself questions: what could the skull of an alien creature look like, how could muscles be attached to it, what could this creature look like in the end...? While carving, I imagined how I could recreate the appearance of a creature on the base of a skull that I would have found by chance. It was a great unknown for me and I was very curious what would come out of it.
MATERIAL
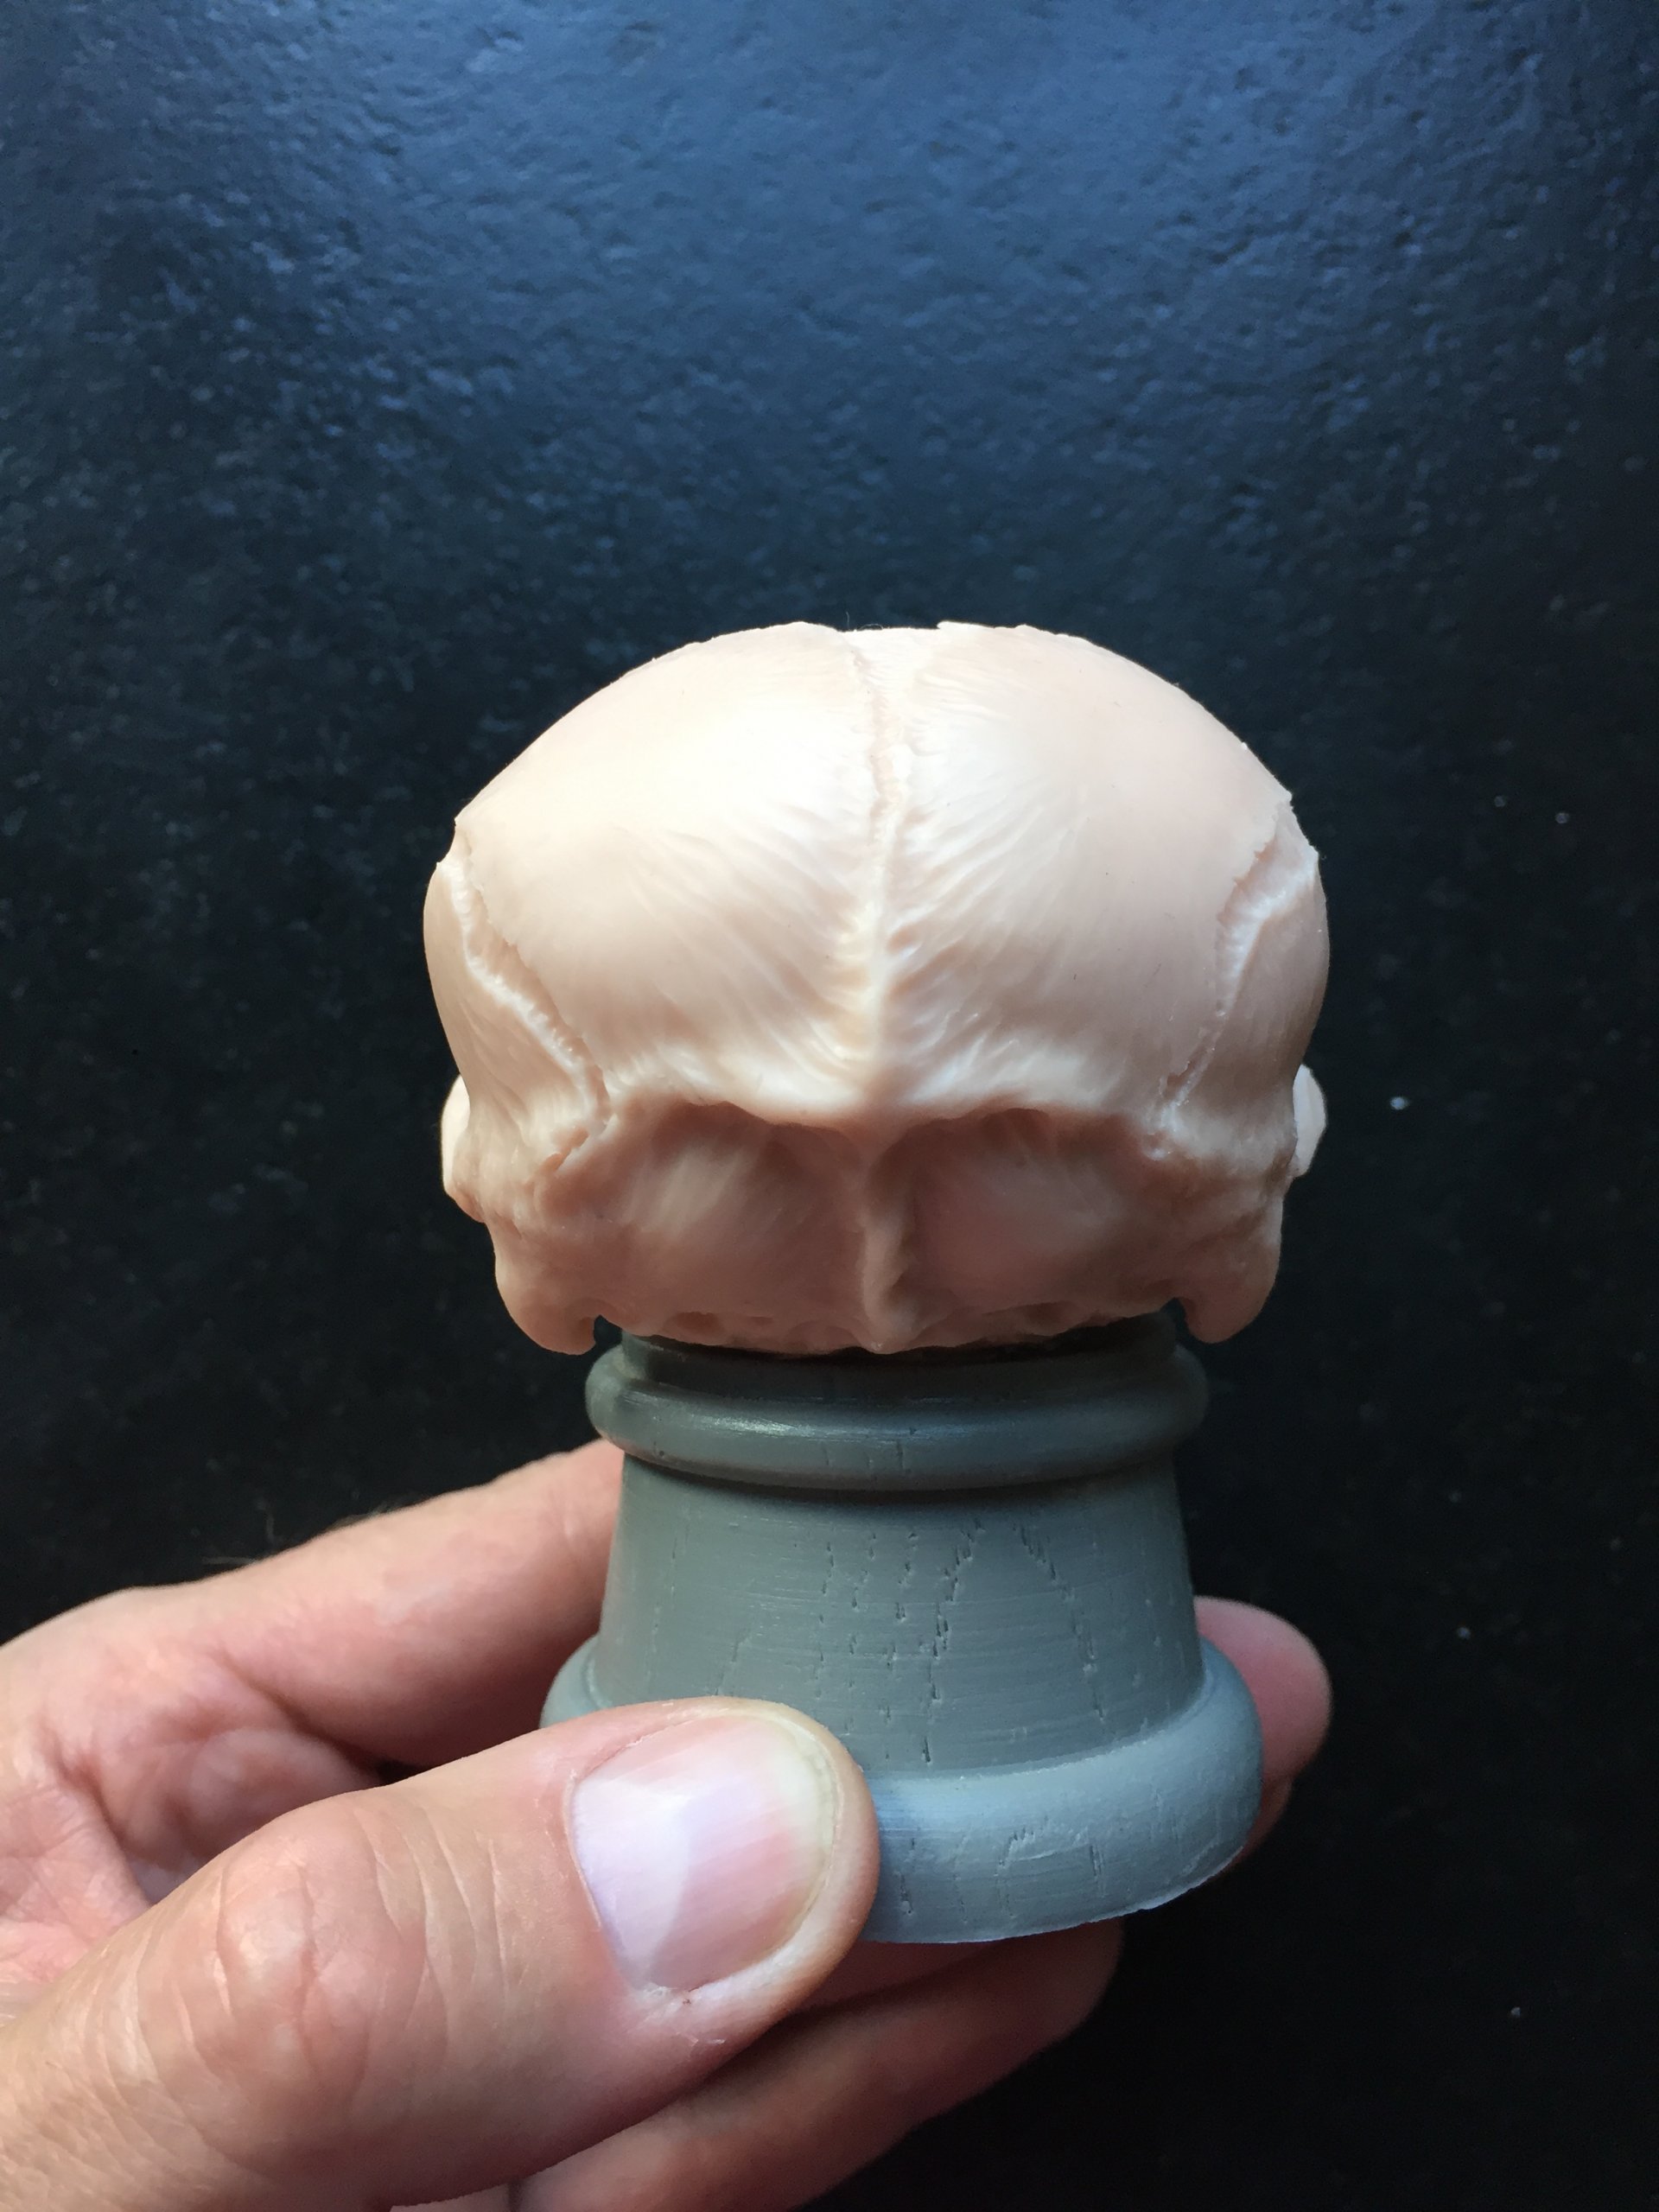
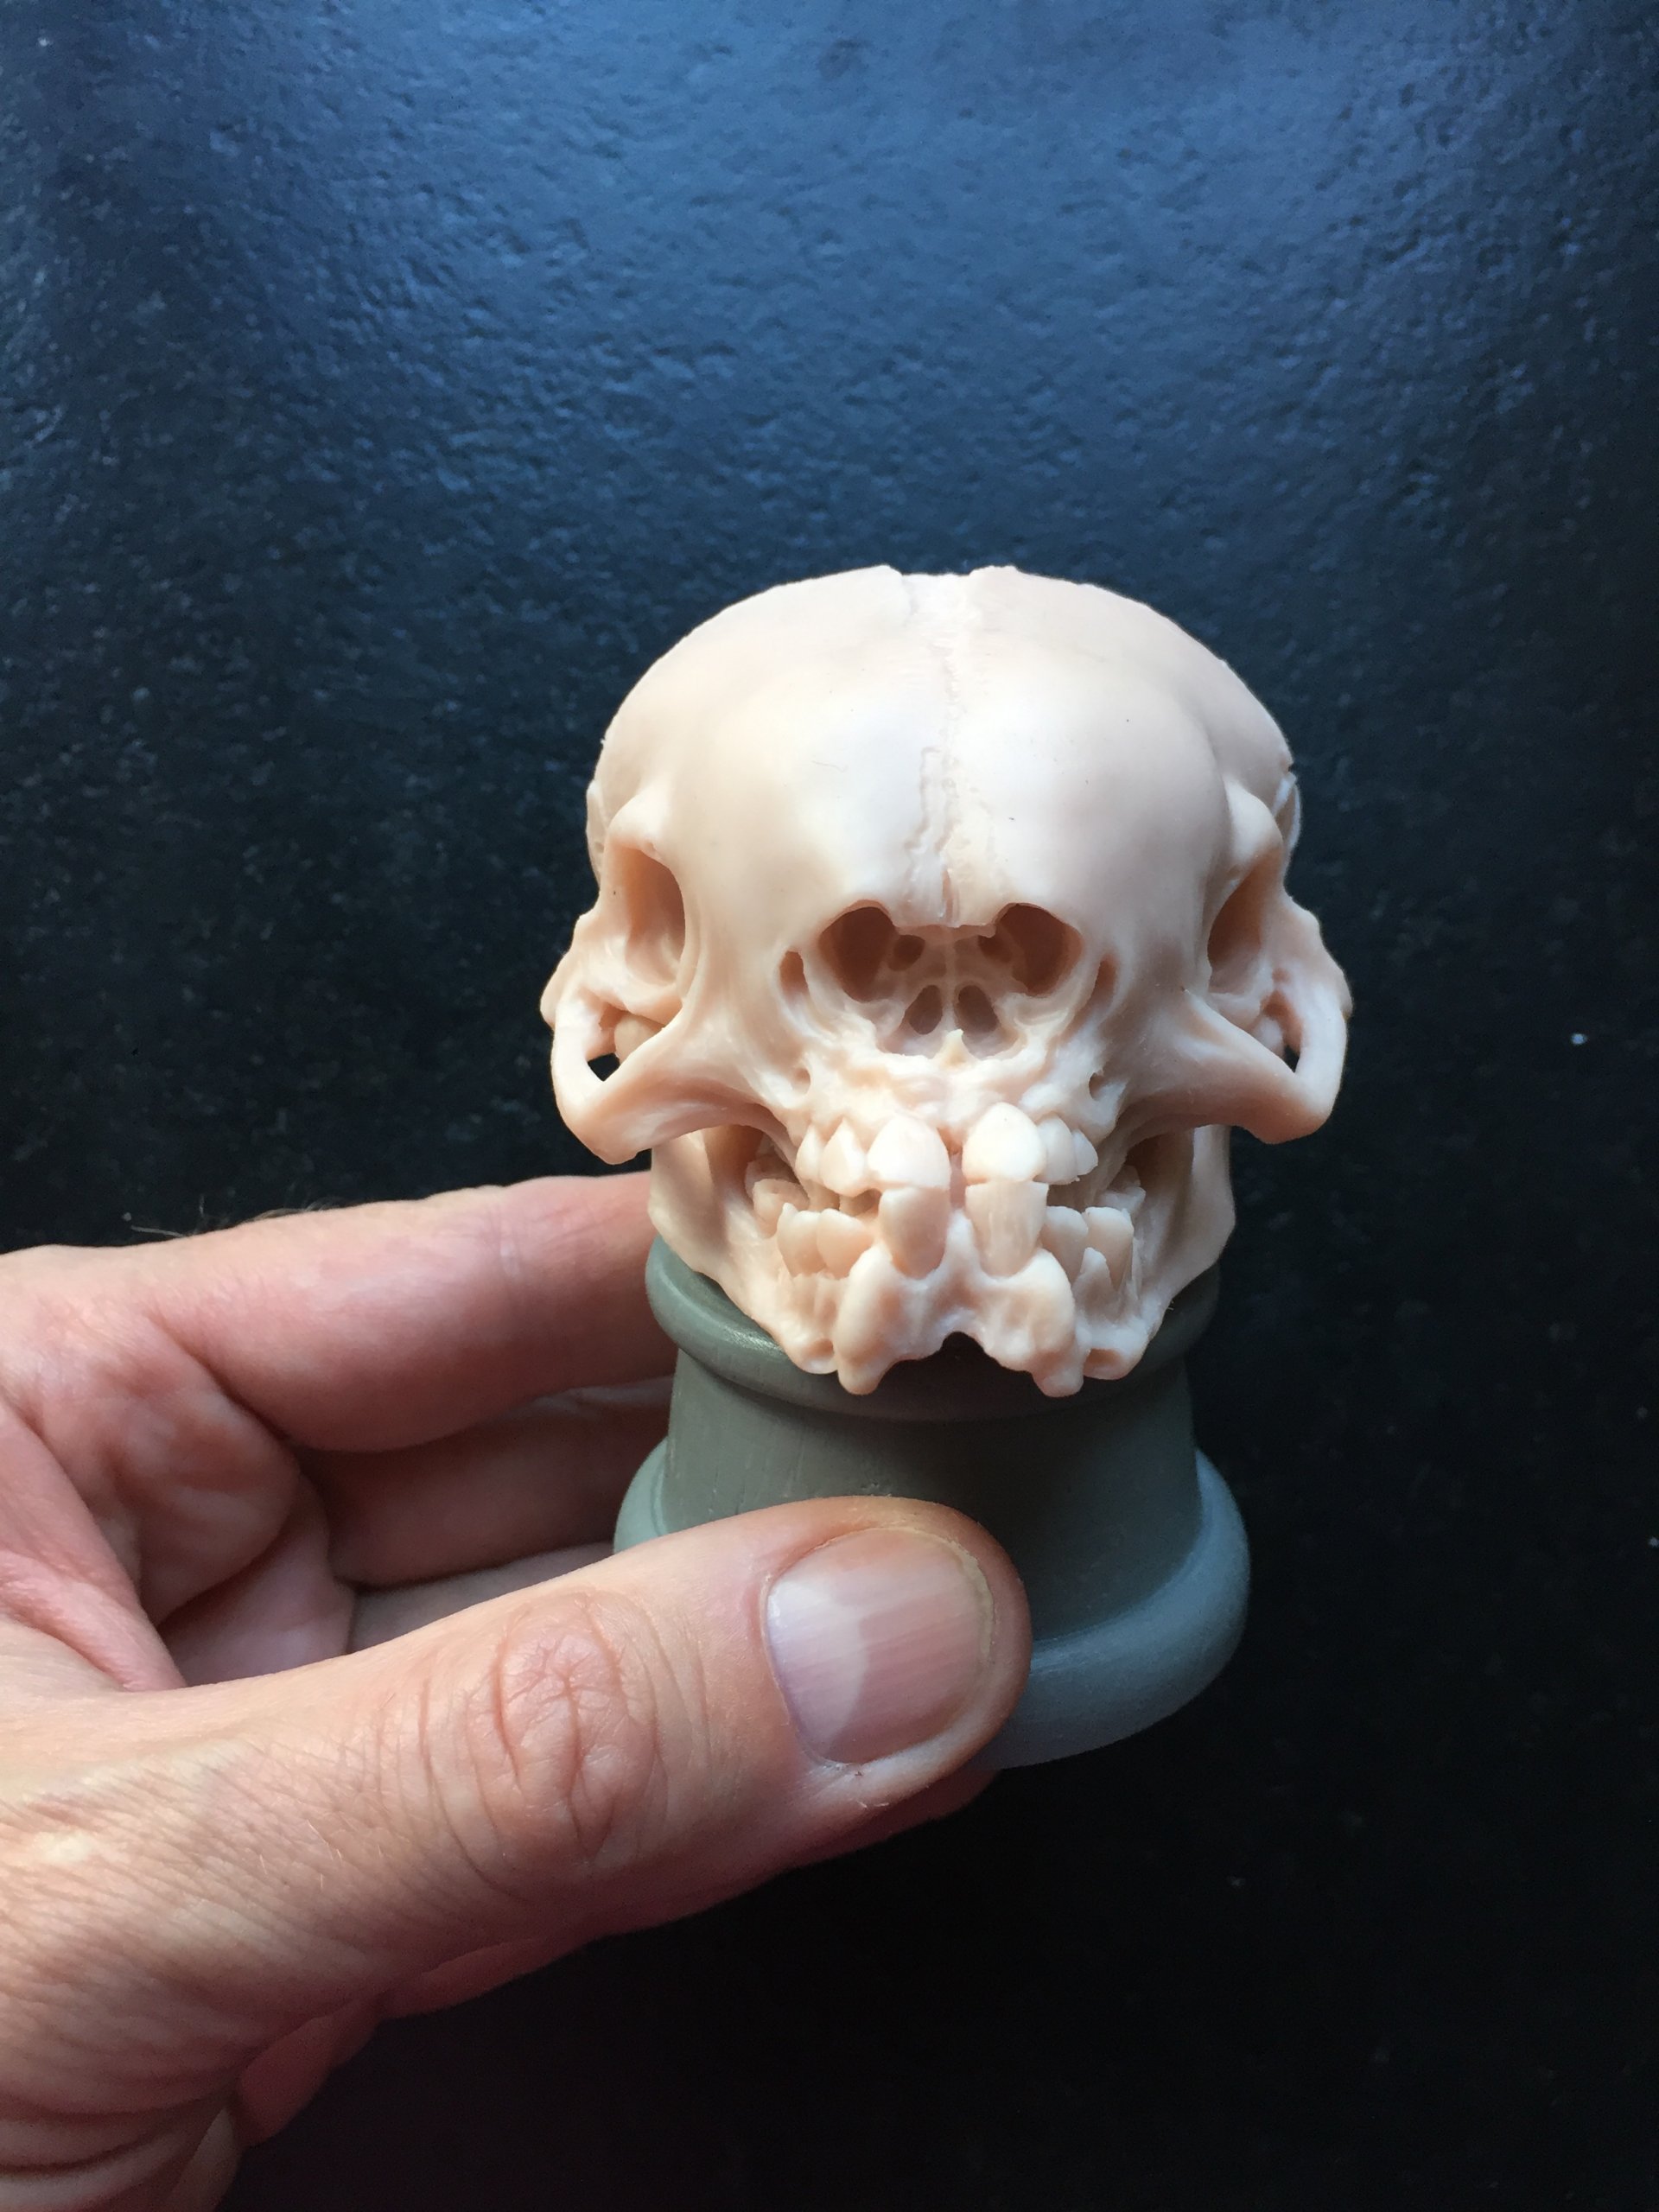
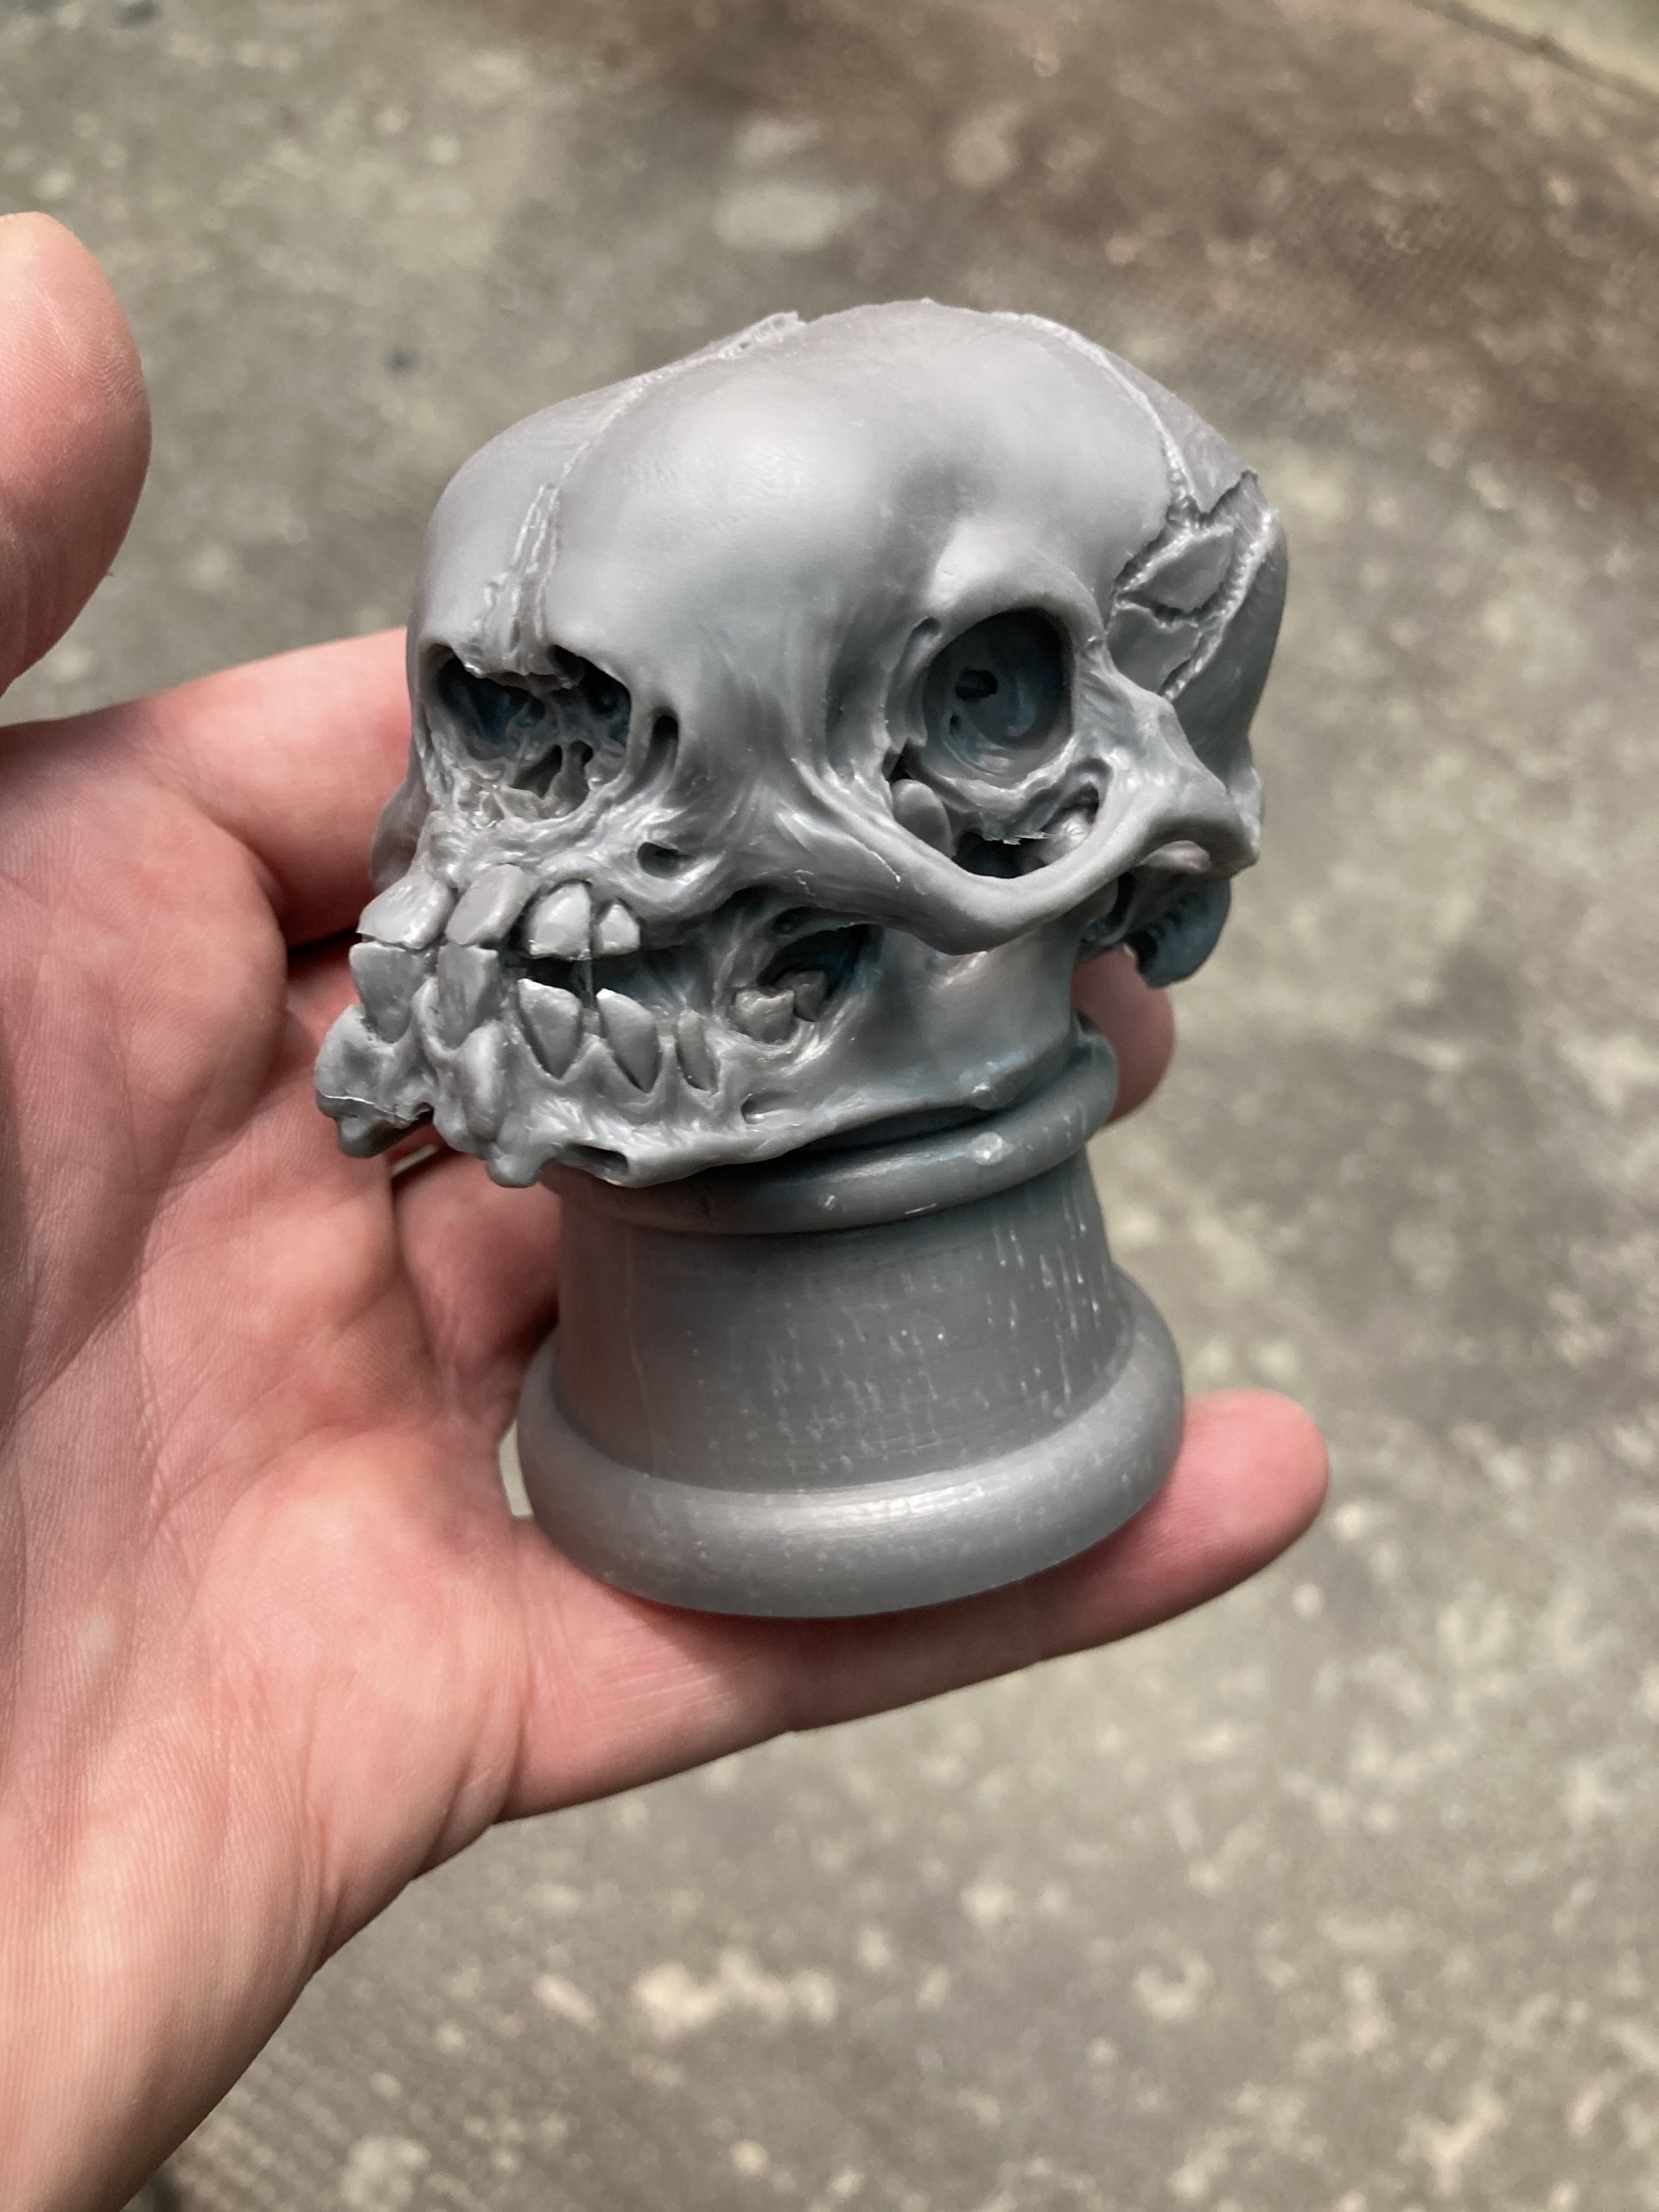
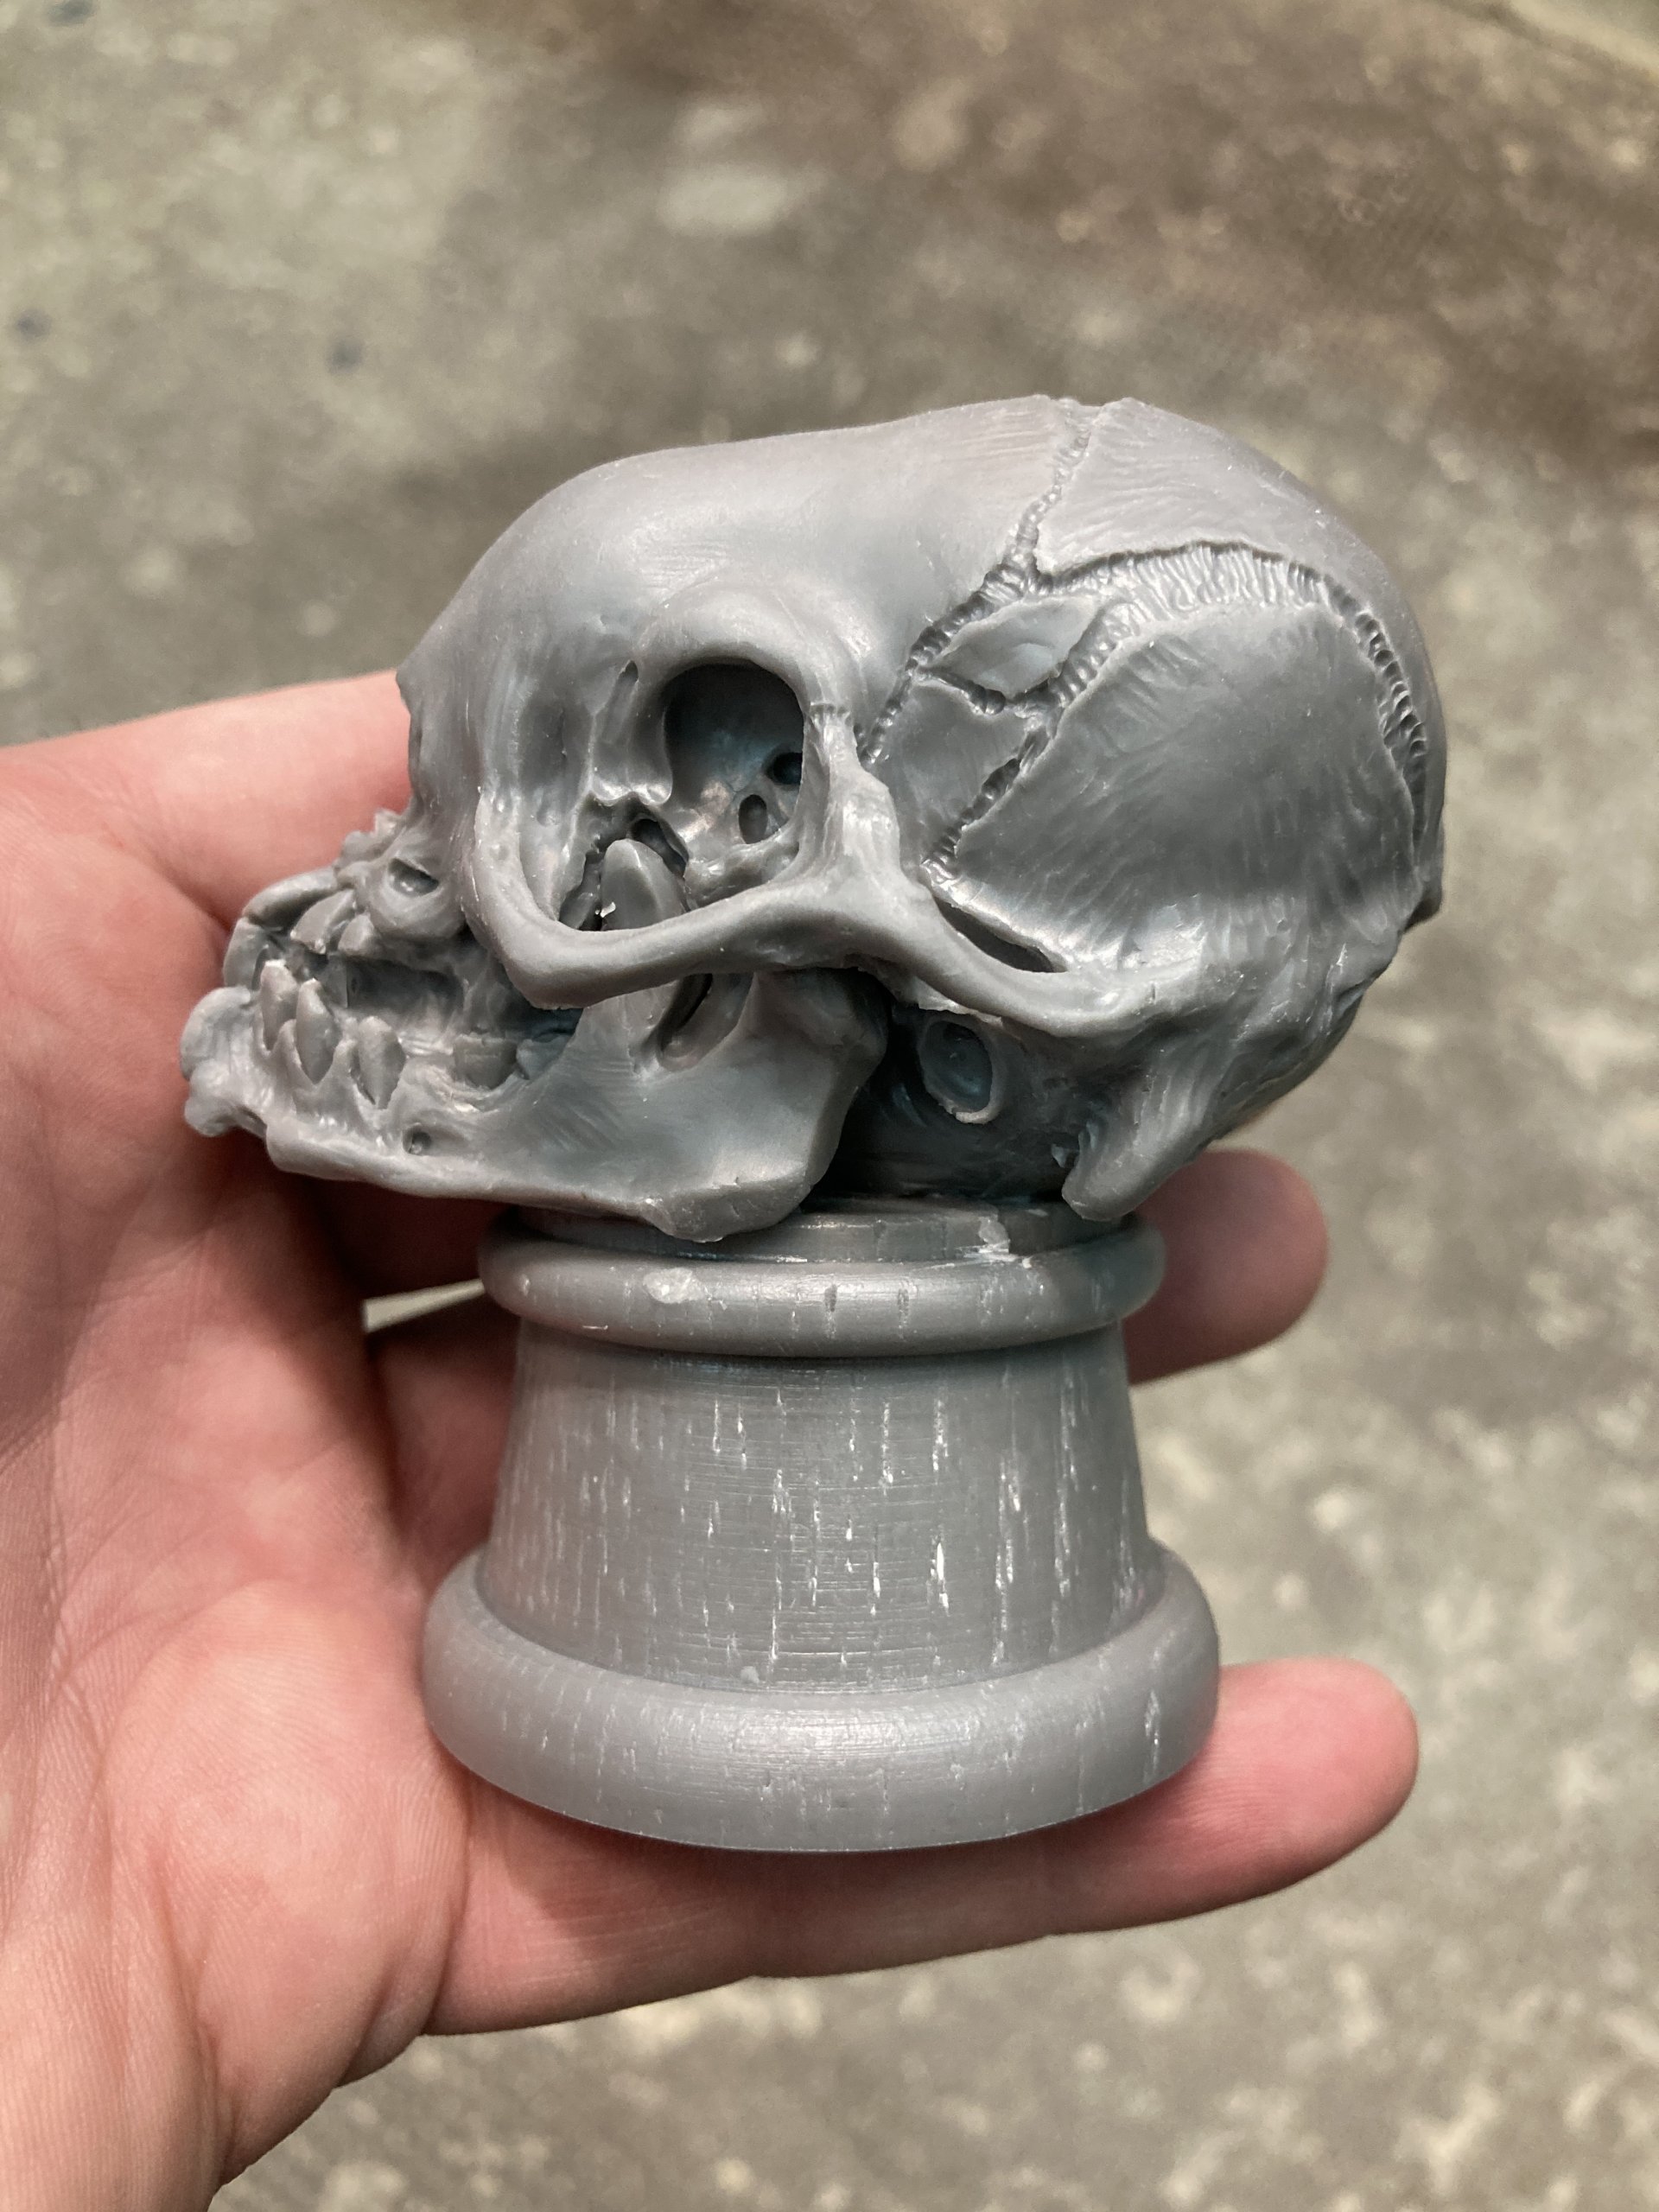
This head was made of polymer clay, it suit best to this scale and subject. The construction was very simple - a piece of resin base, wire, cyanopan glue, aluminum foil and a flesh-colored polymer clay. I glued a nail on the resin base, covered it with foil to shape up basic of the solid and then put a polymer clay on it. Such prepared base for a soft material makes the resin stick well to the structure of the sculpture. As at same point it turned out that a lot of clay was used for the skull, so I had to bake it first. In the beginning of work on a large sculpture it is very important to harden it in the oven, so that at the end, when it is finished and we want to harden completed one, it does not crack. After baking, I wait for the sculpture to cool down - thanks to this, despite flexibility of material, I avoid additional stresses.
SILICONE FORM
The alien skull mold does not differ much from the standard small molds that I make. To do this, I used a RTV 3325 condensation silicone and a 6 hour catalyst. This is sufficient setting time to prepare this form well. After mixing silicone with catalyst and as sculpture is casted in pressure chambers and the mold cannot have any air bubbles in it - I vent it therefore this every piece is precise.
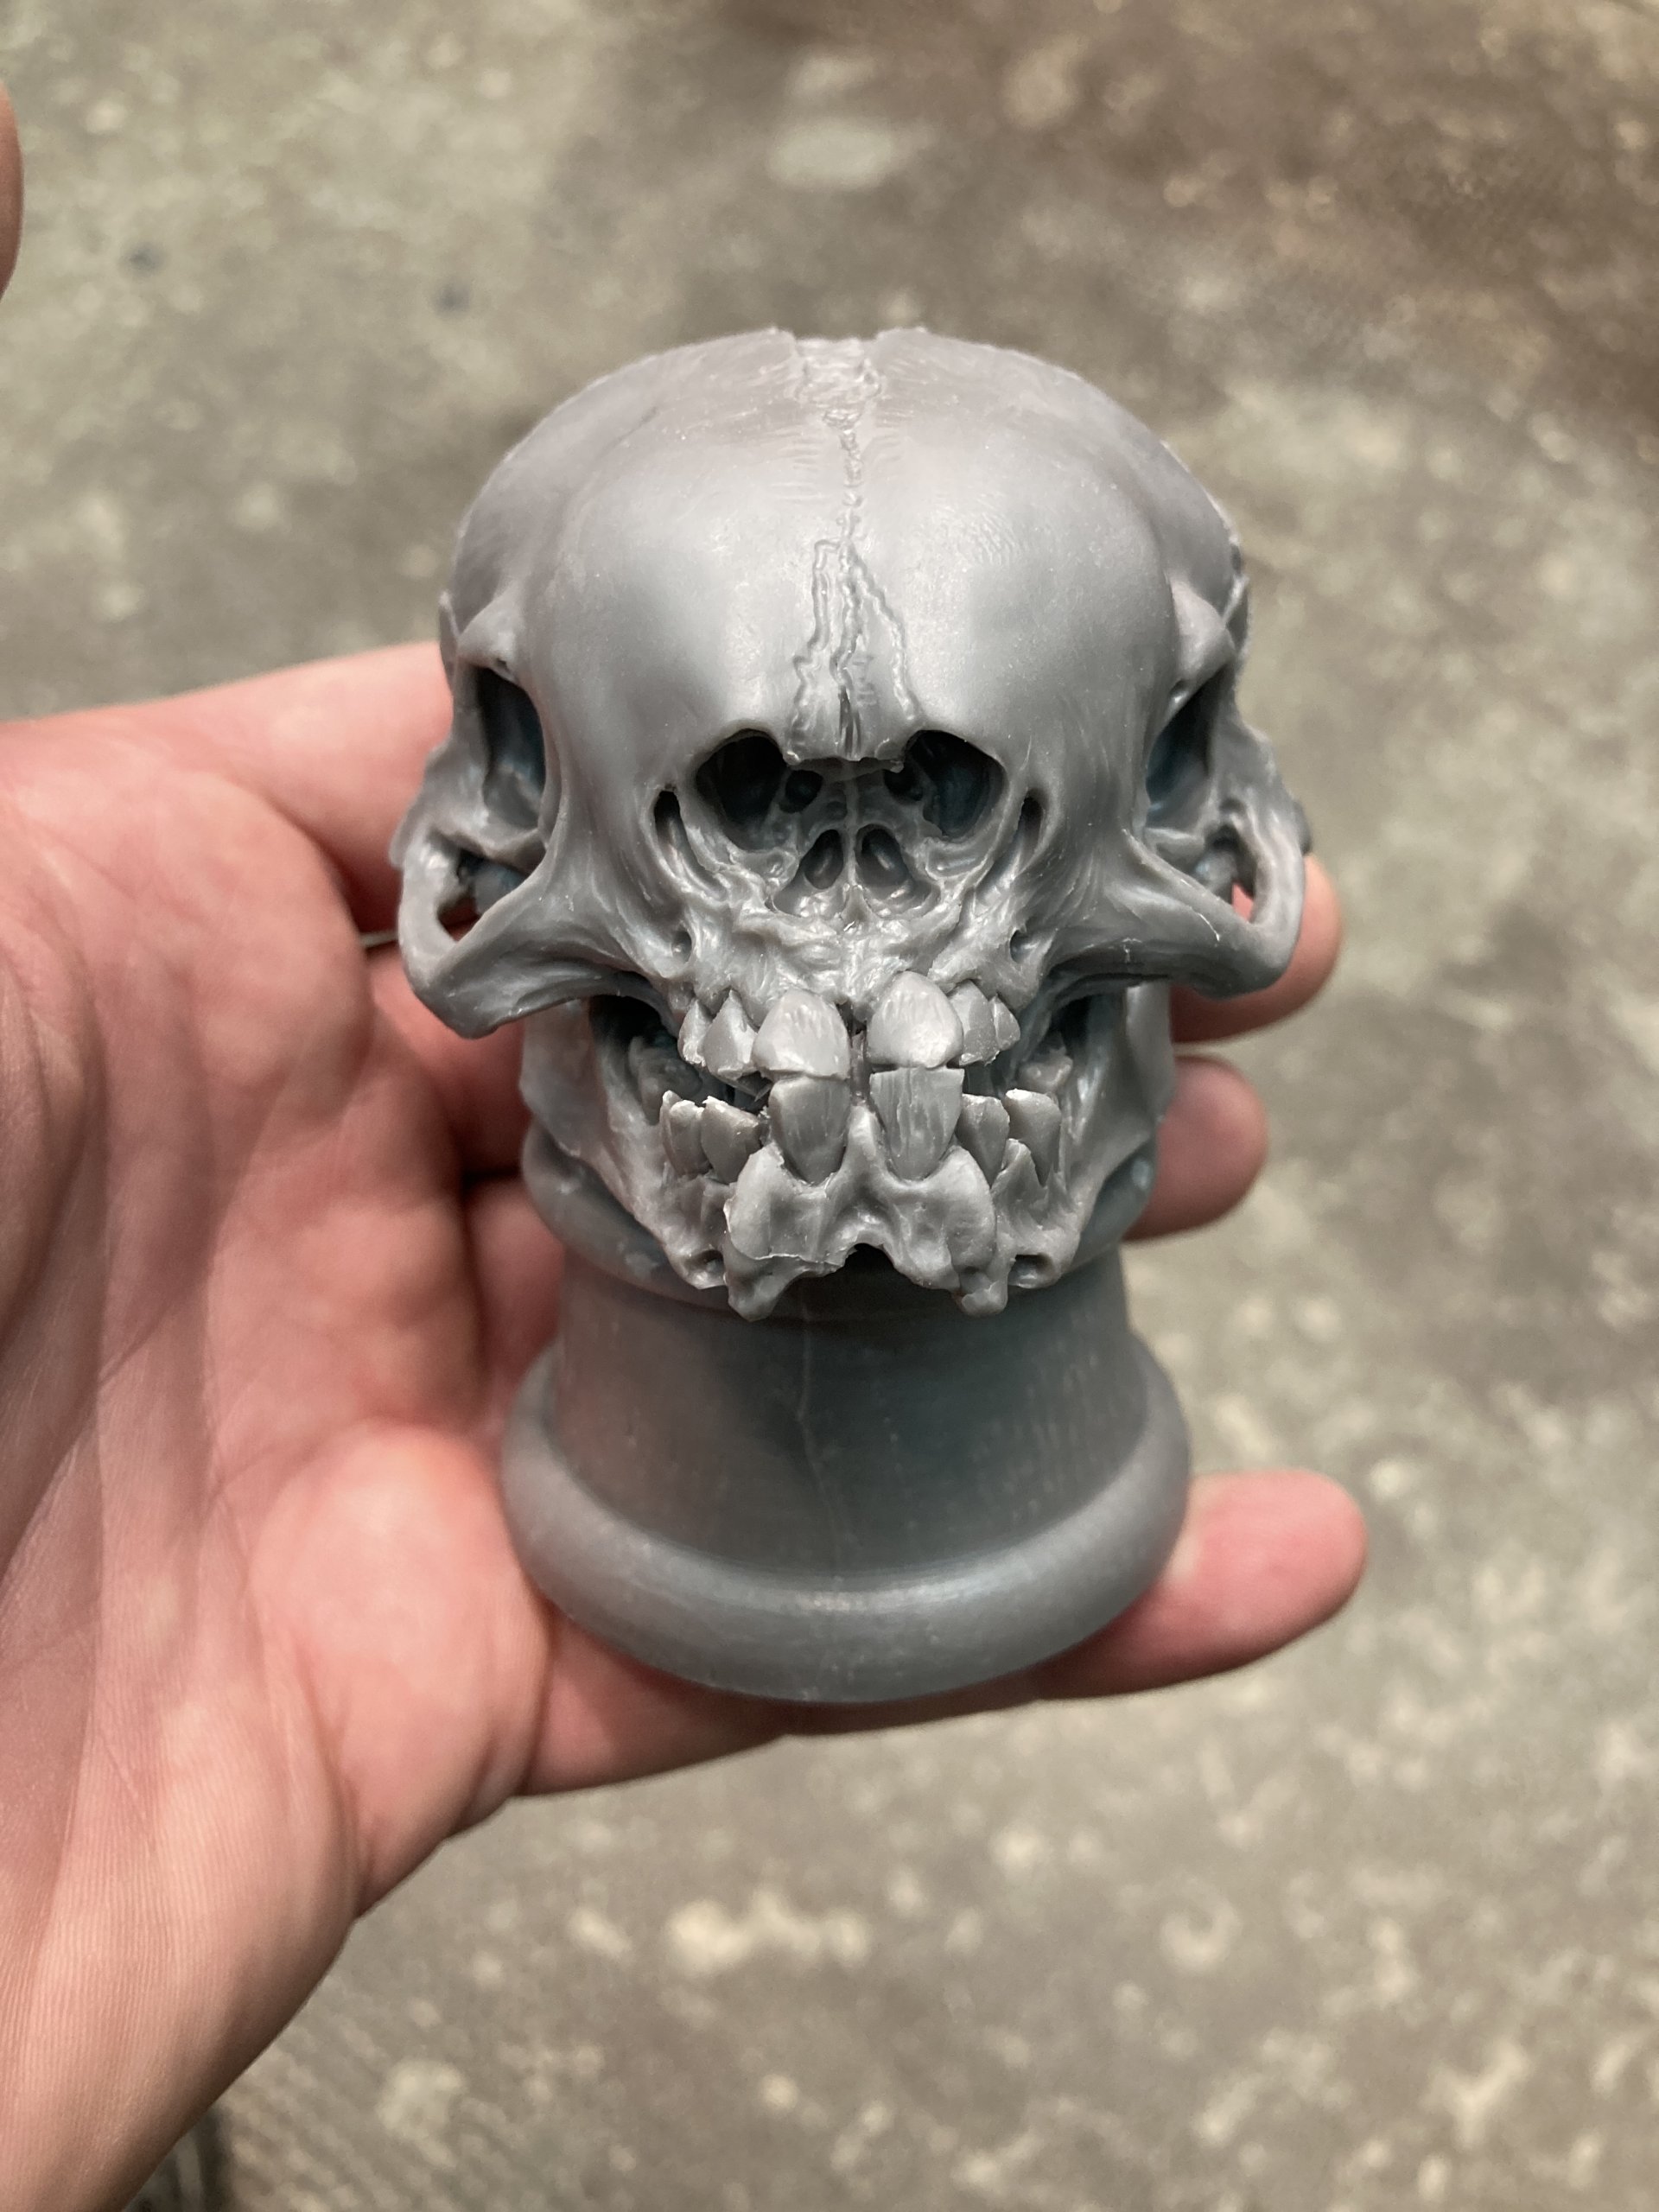
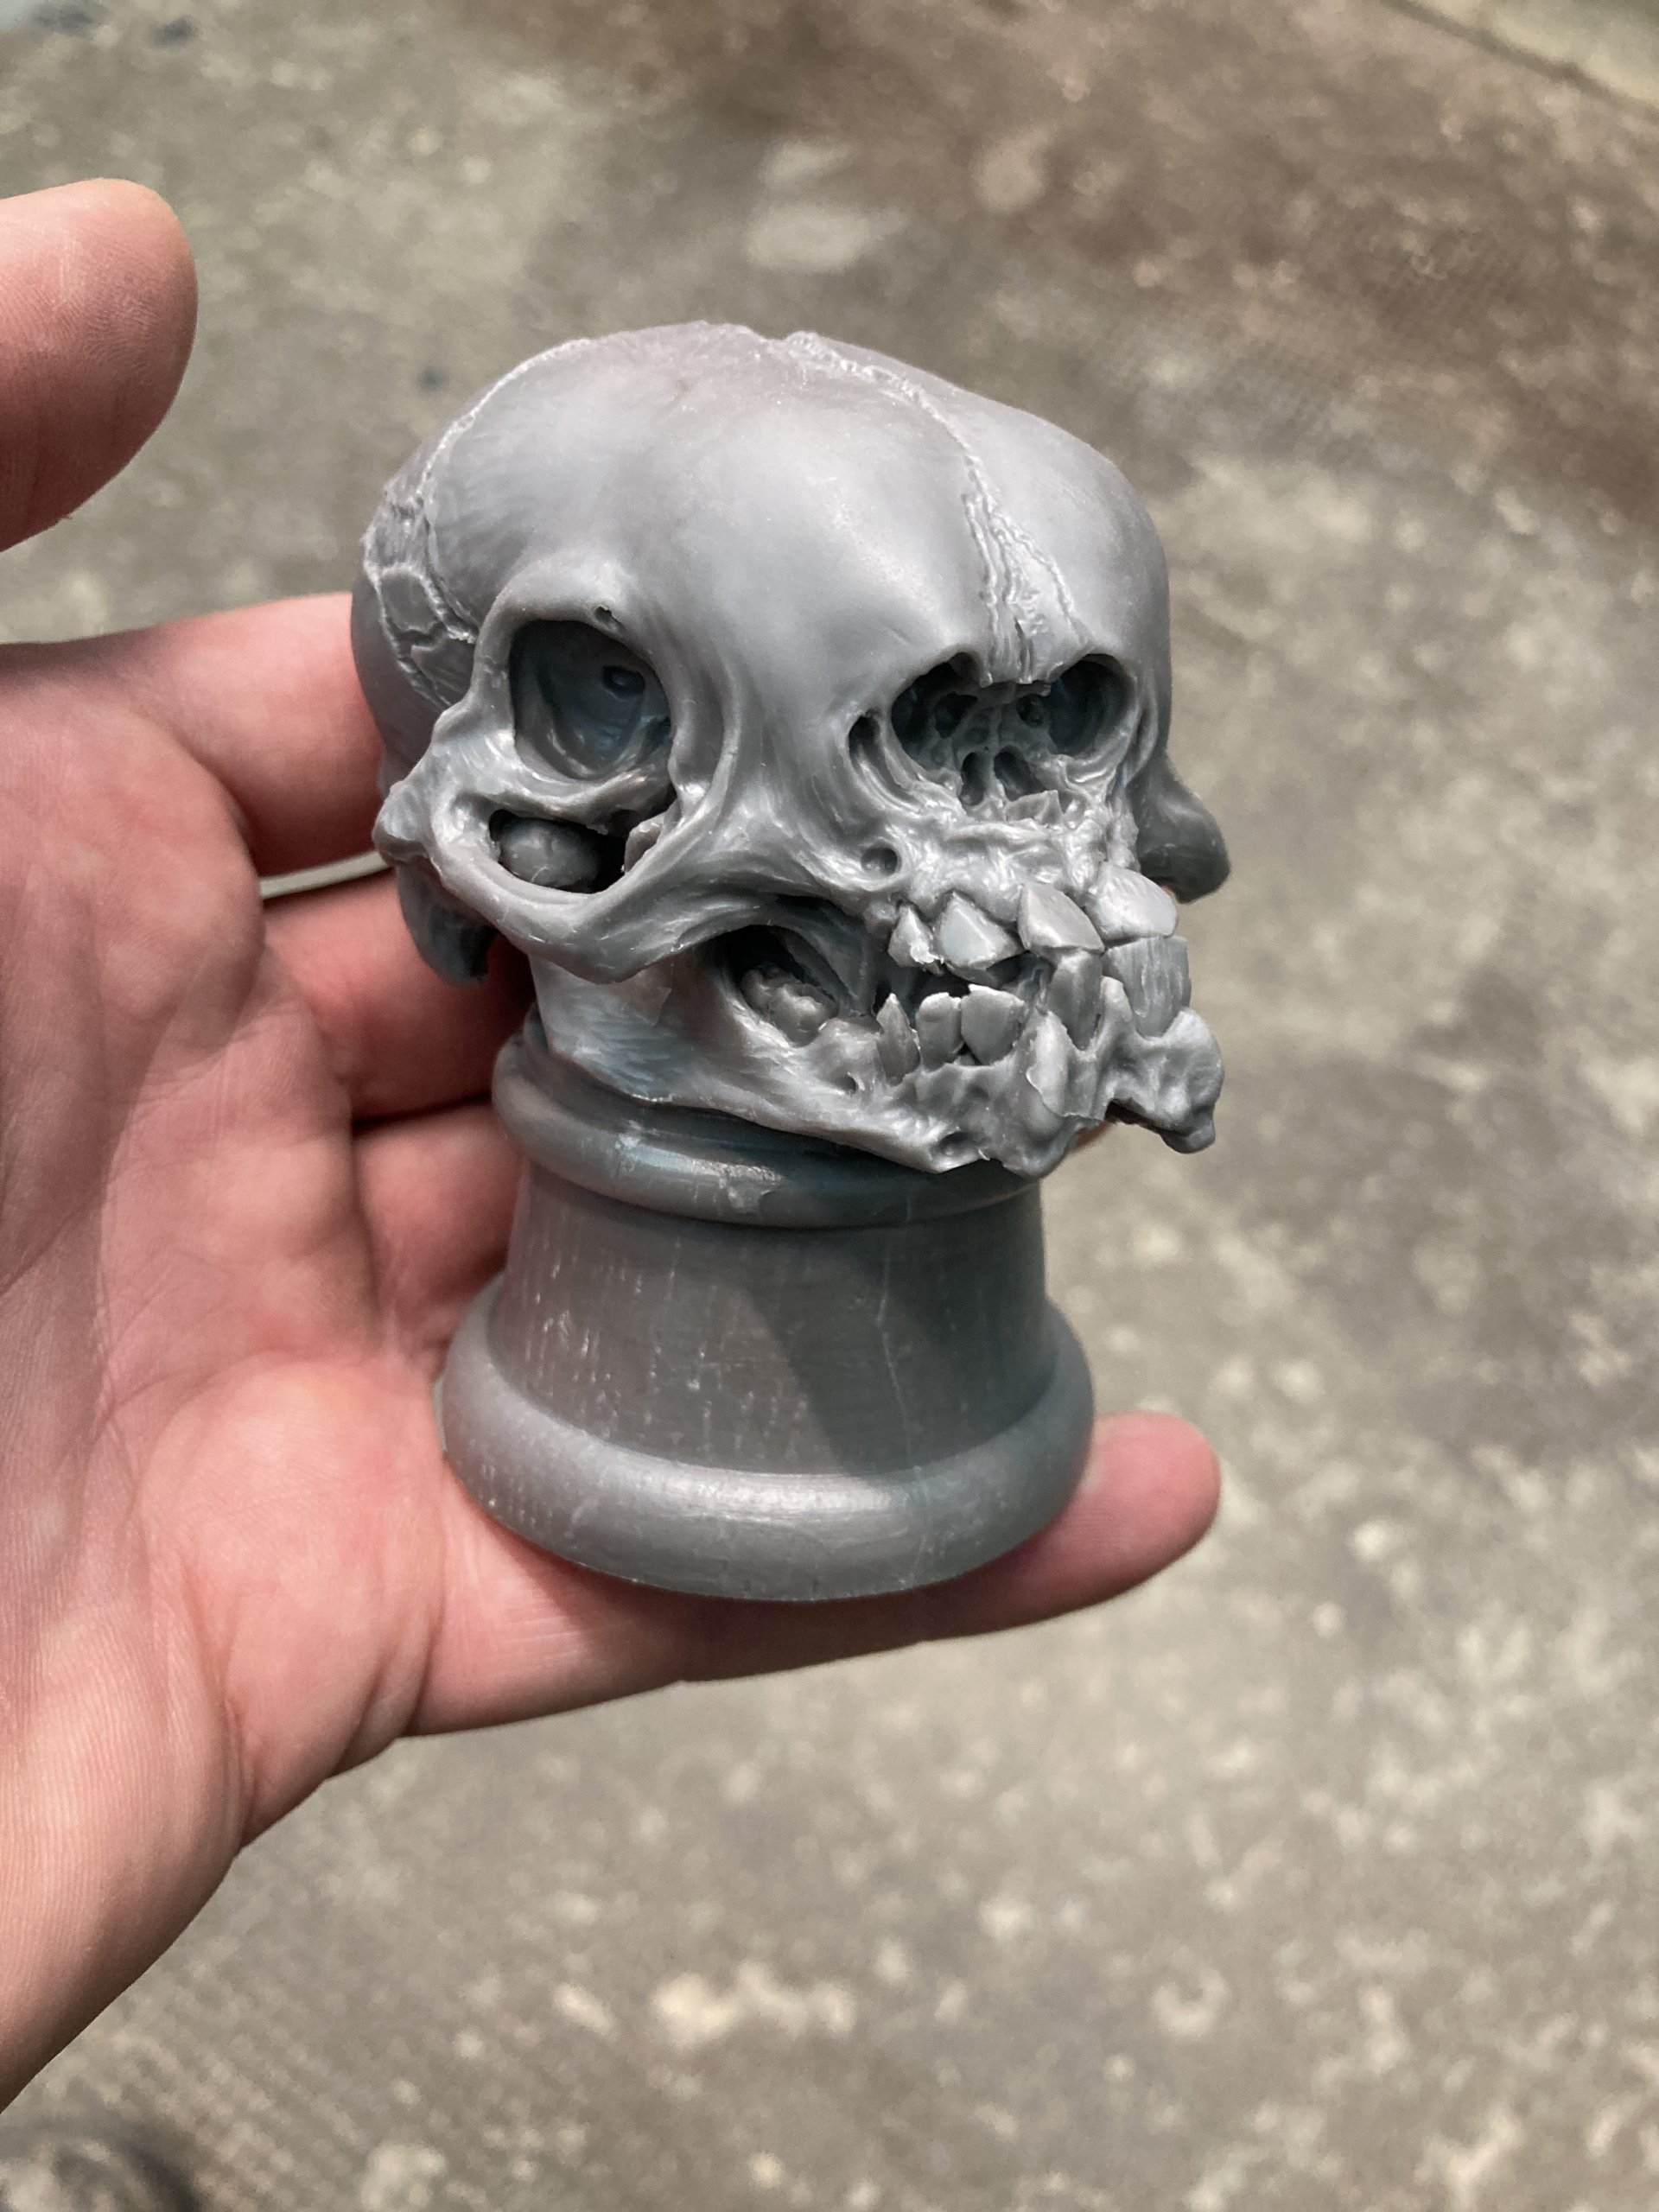
After flooding skull and hardening silicone, the mold was cut precisely from the back in a zigzag motion. Sometimes I need to cut the mold in a few additional places so that the original can be removed more easily. Then I can cast an alien skull in multiple copies which are available as a limited edition in my shop, without compromising the sculpture and form.
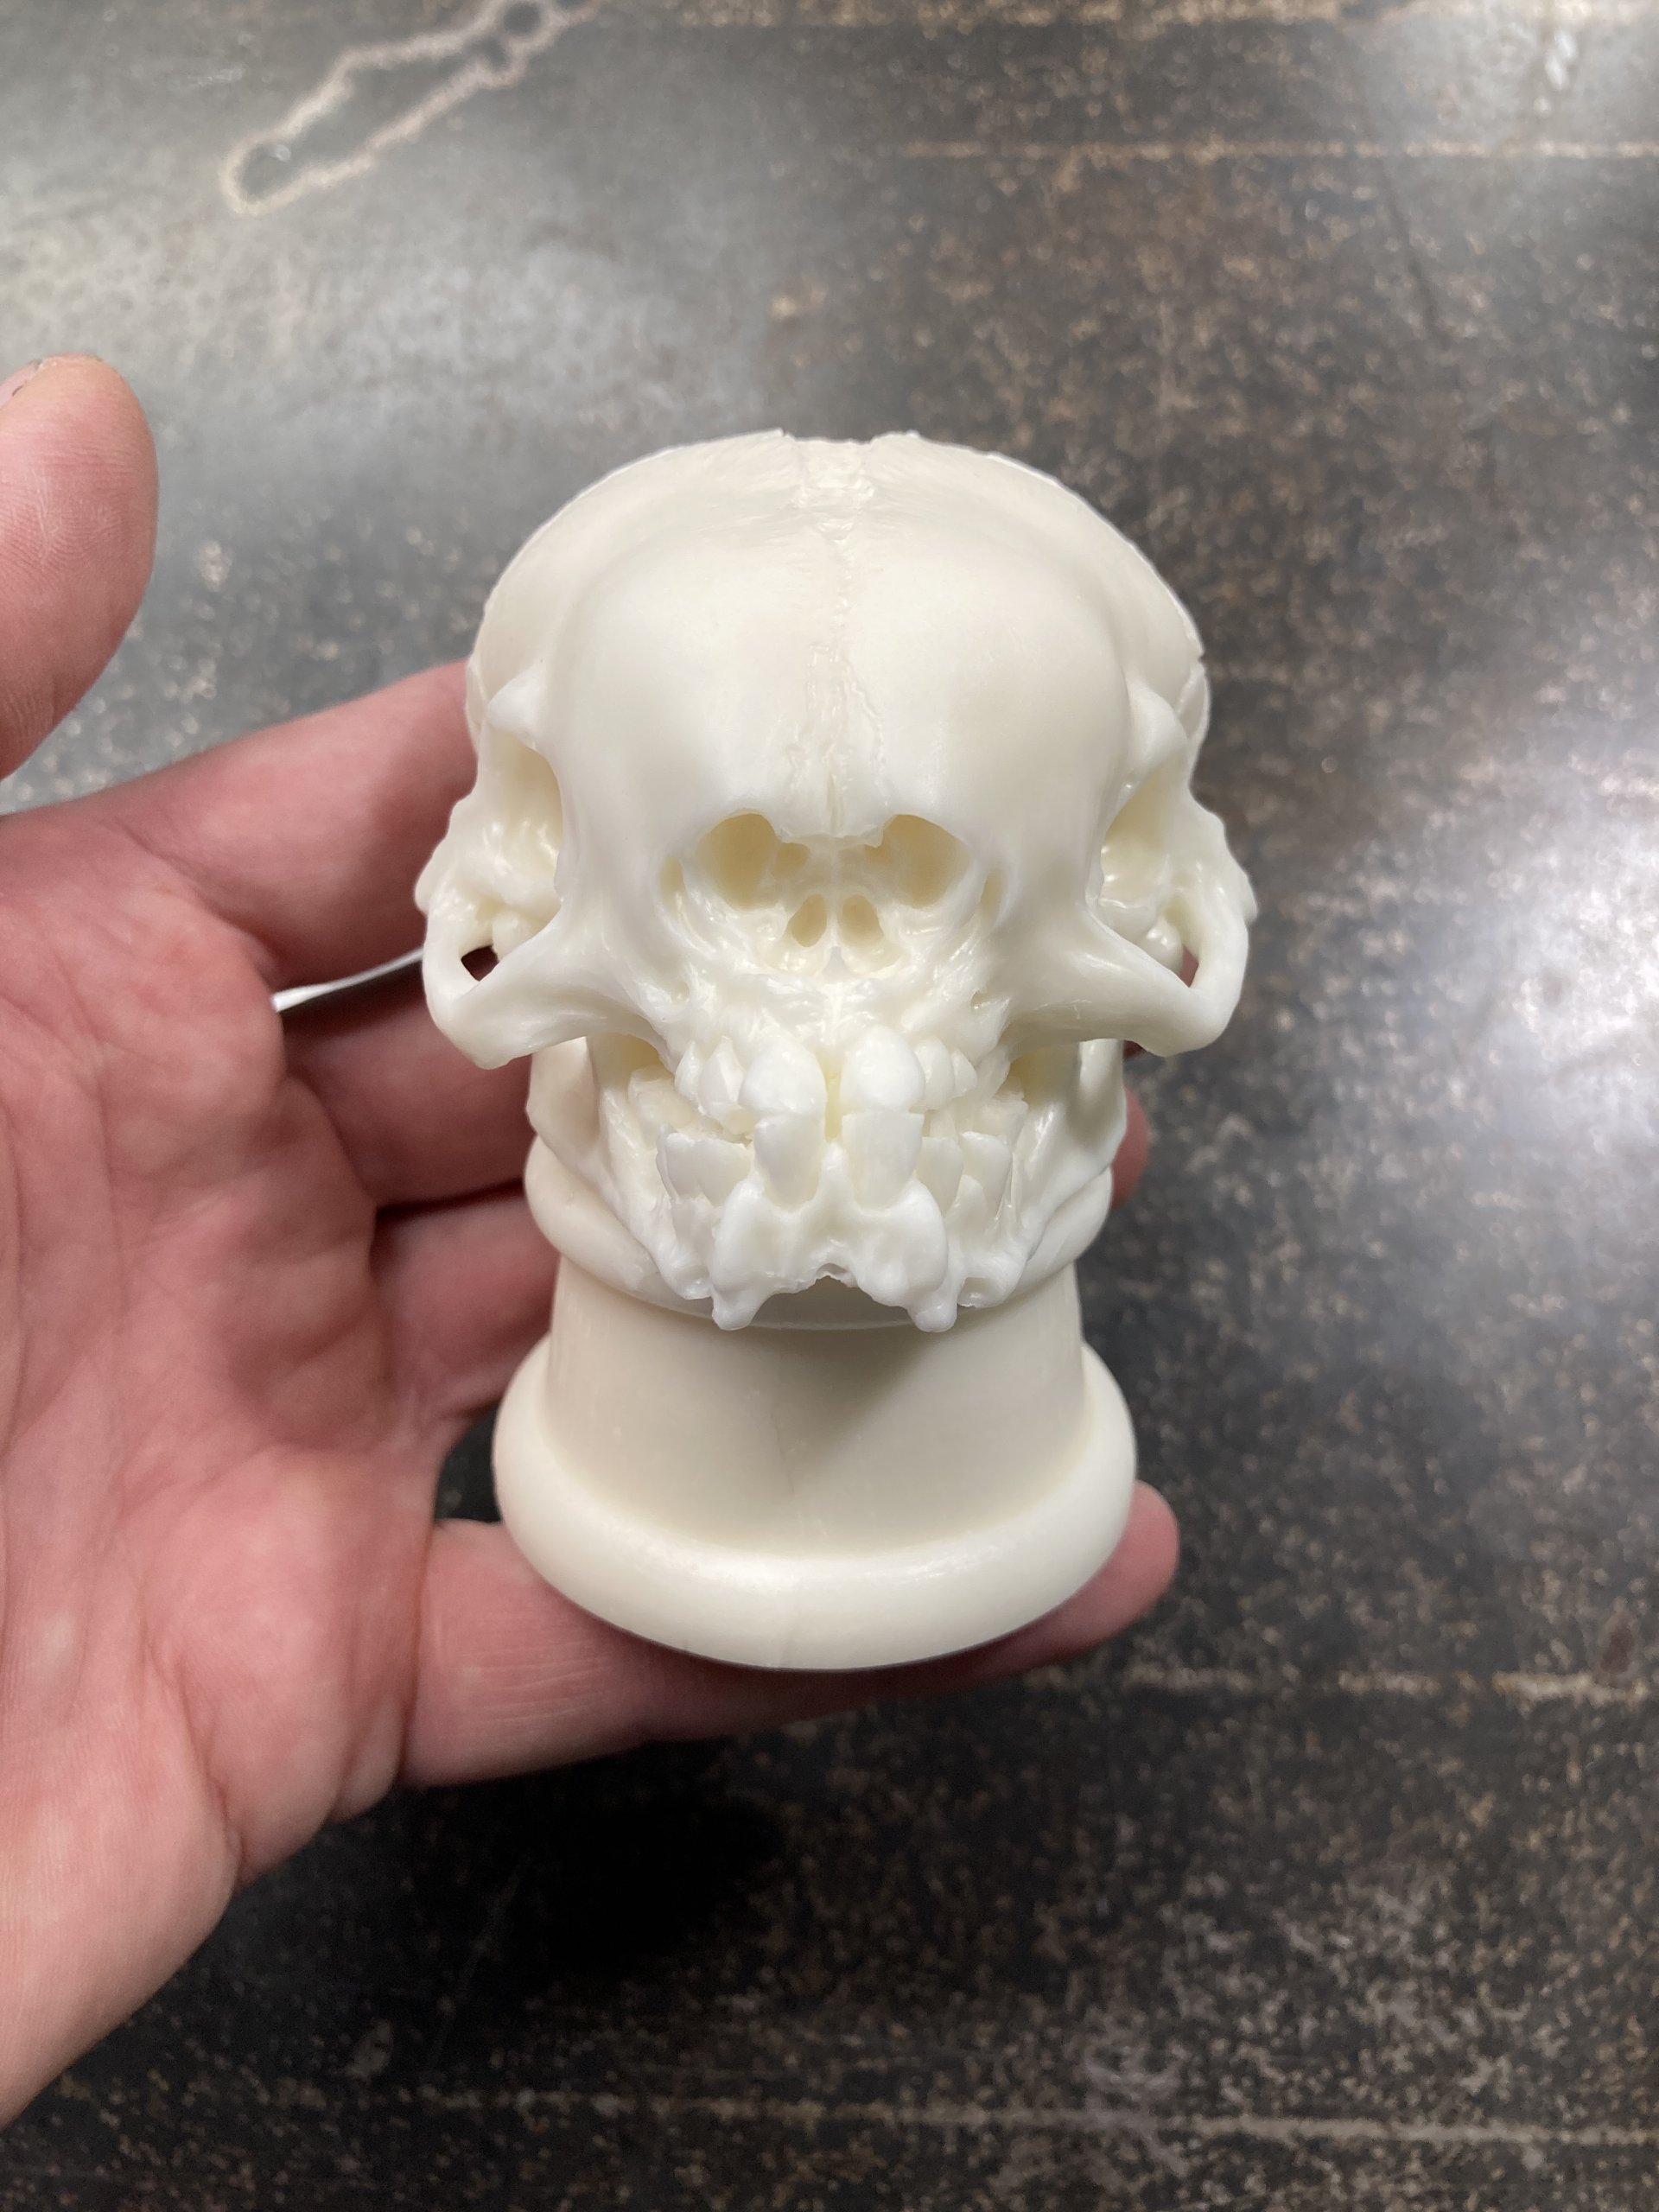
CASTING RESIN
I always cast my sculptures in two basic colors: flesh and gray. The Alien Skull, which is part of the limited edition, I specially made in the flesh color due to the painting technique I used. The casting resin is a standard polyurethane resin with a short setting time of 5-6 minutes of operation and demoulding after 30 minutes. I always keep an eye on the demoulding time so that the resin does not harden too much, and by removing one from it, still is slightly soft, not to expose silicone mold to damage.
BASE FOR THE SCULPTURE
All the elements I use for my sculptures are prepared and designed by me, and this was also the case when creating the bases for the Dracula's Inkwell skull series. First, I prepared the concept, then a shape that was milled (so I can be sure that it is round and precise), and then I made a silicone mold for it.
PAINTING
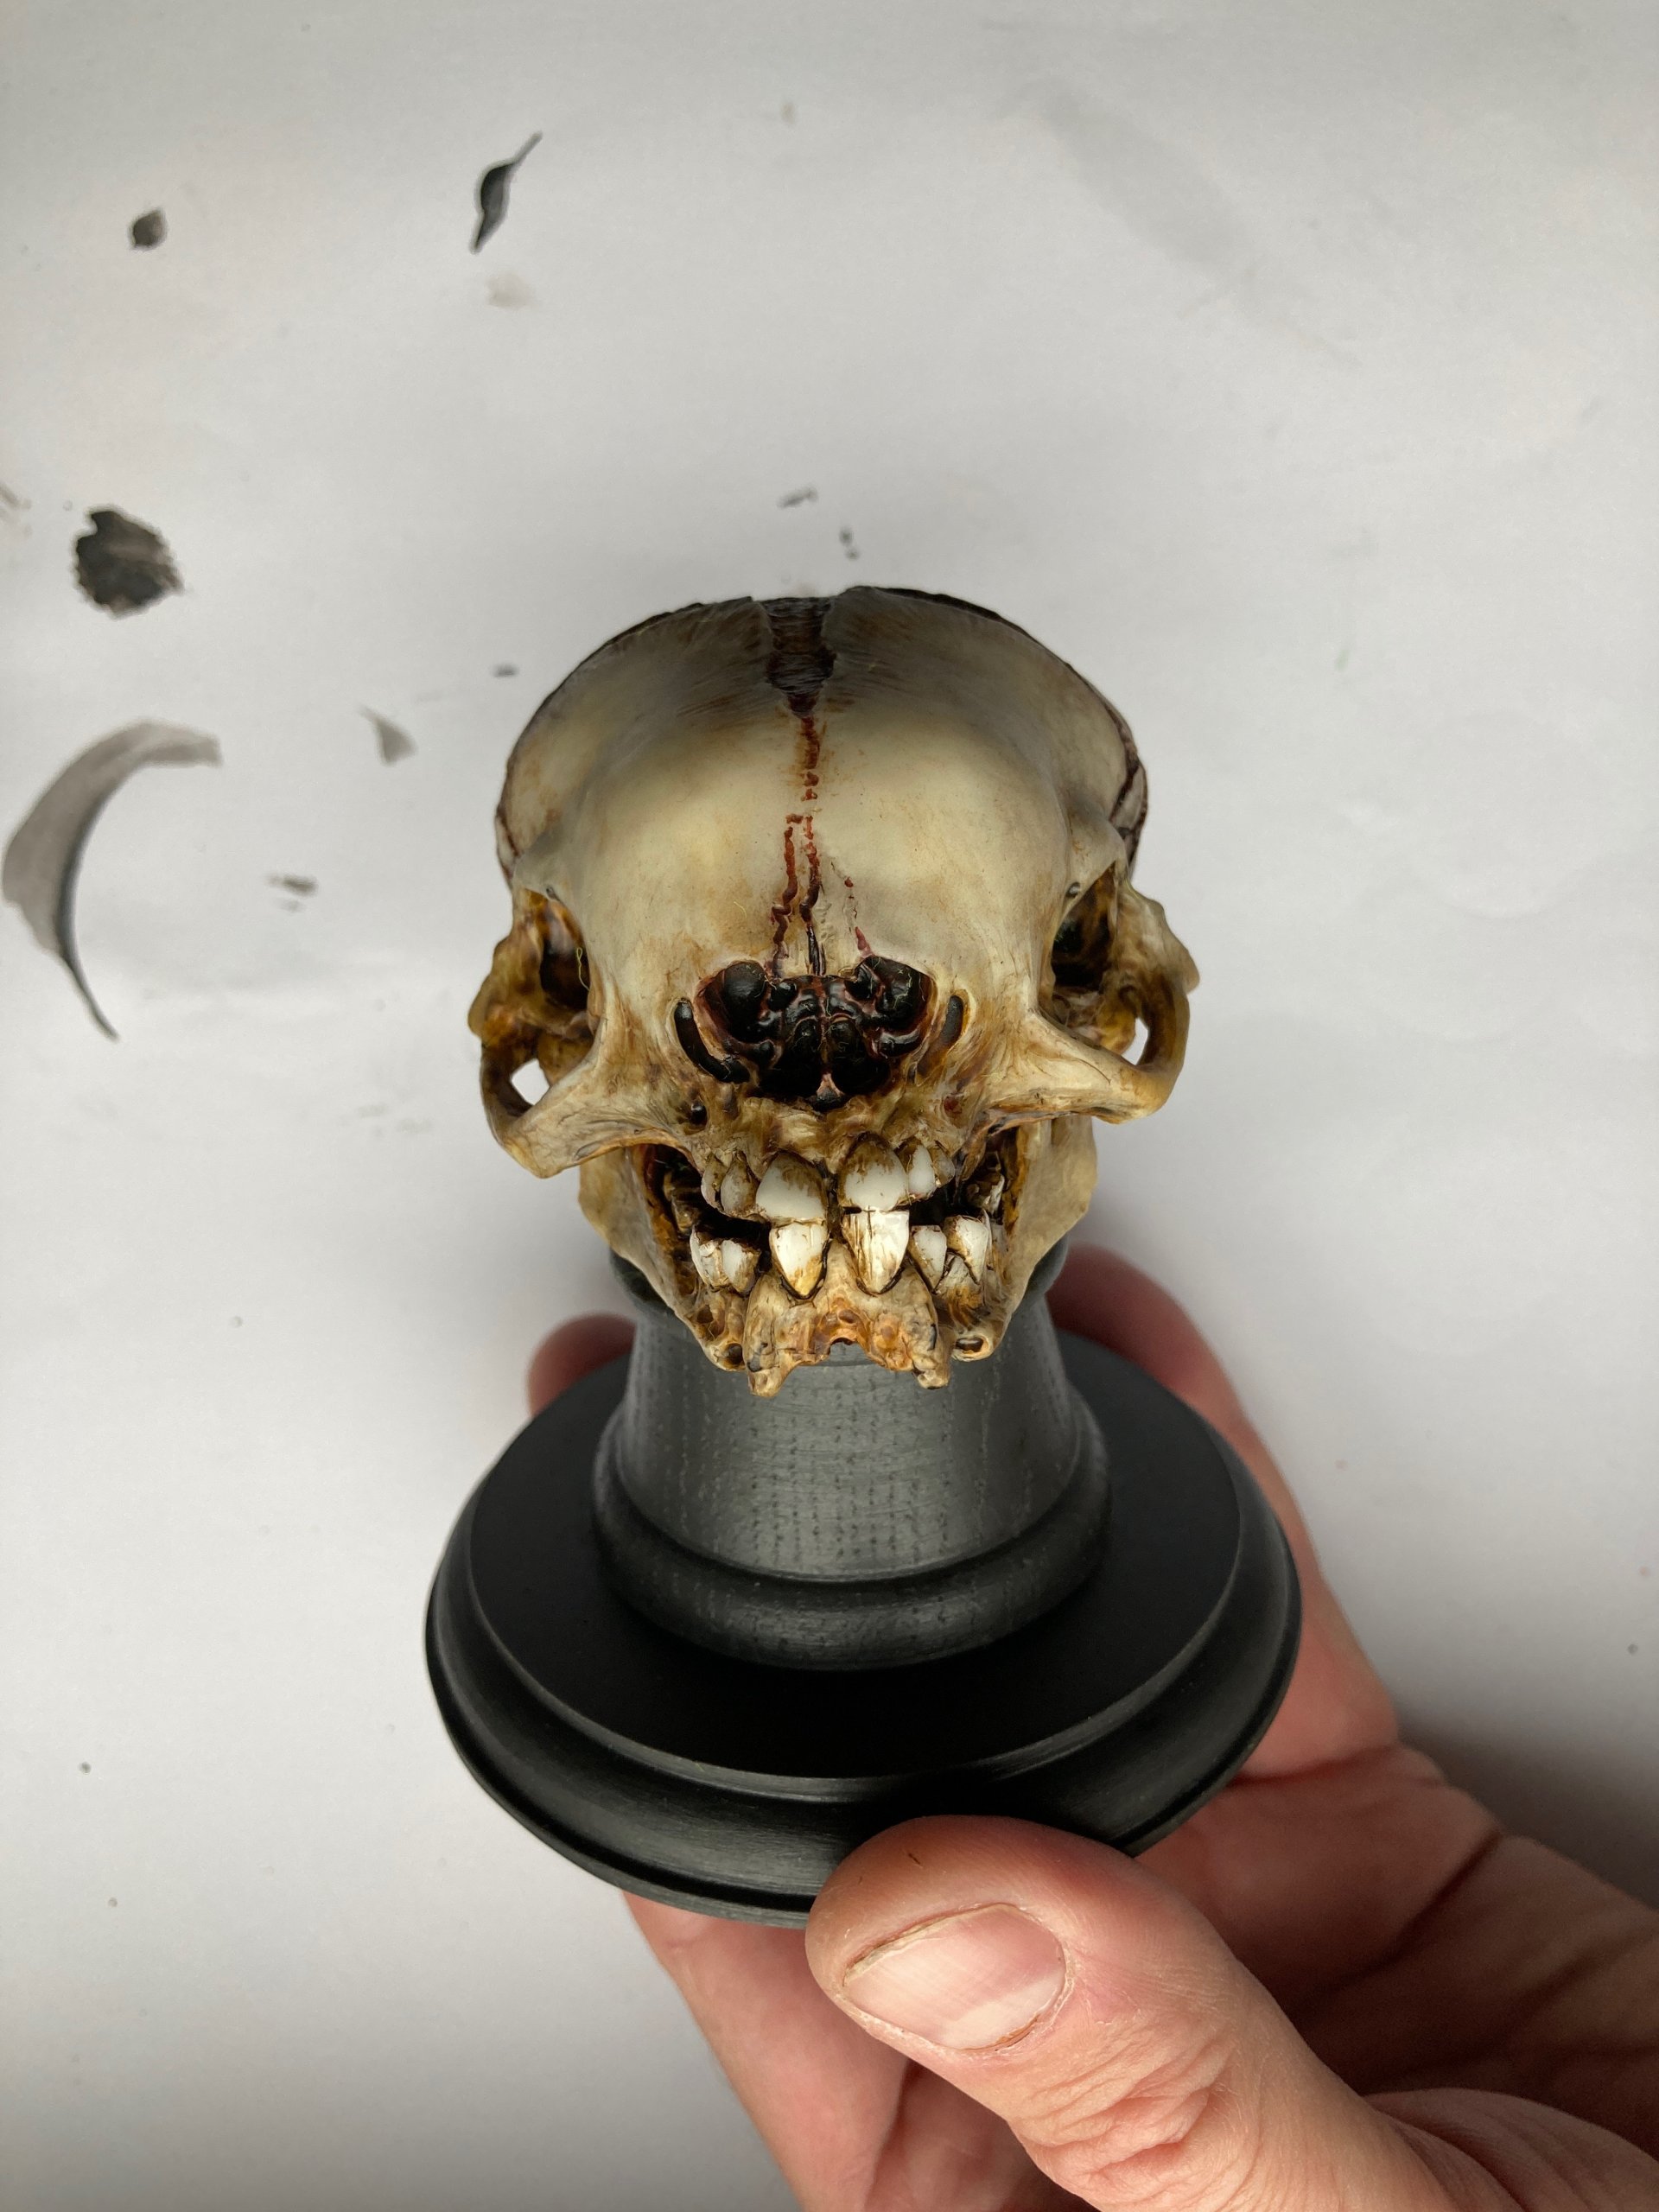
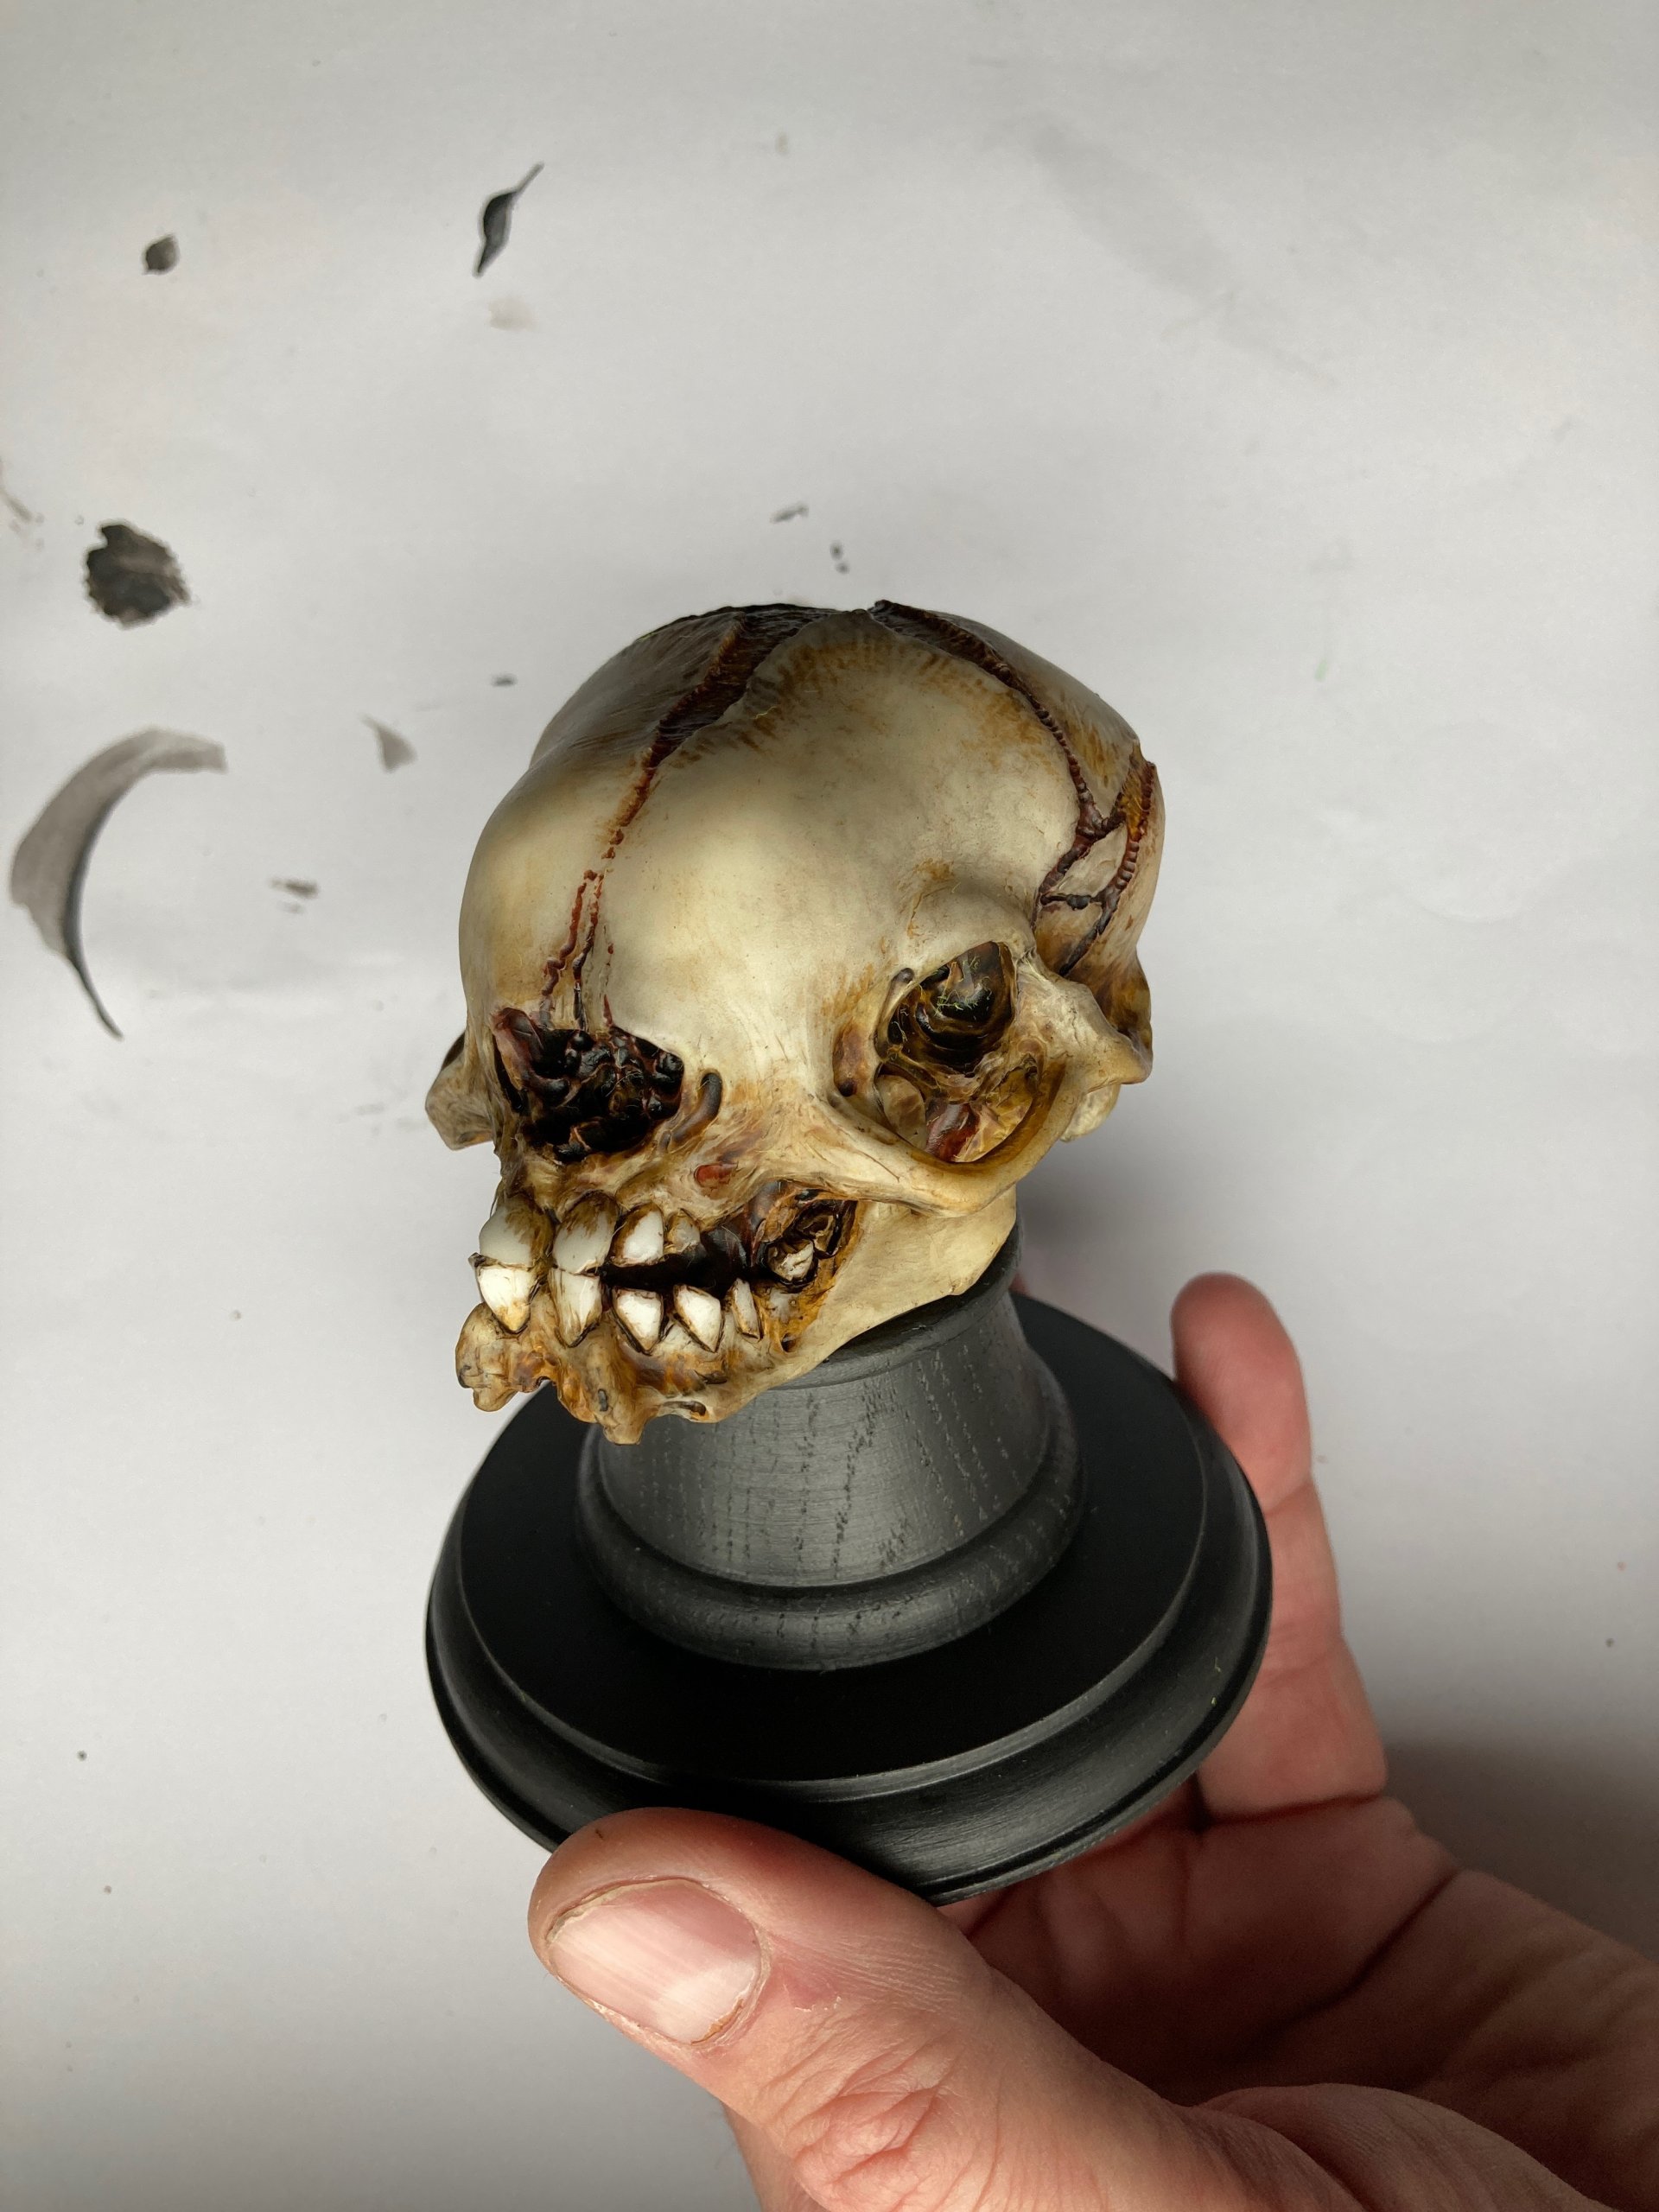
From the beginning, I assumed that the series of skulls I am working on will be painted with acrylics using brushes and mooring techniques. To do this I chose a light color of the sculpture, ideal for highlighting the depth of color in painting layers with glaze. This technique allowed me to obtain a depth effect that is not achieved by covering painting.
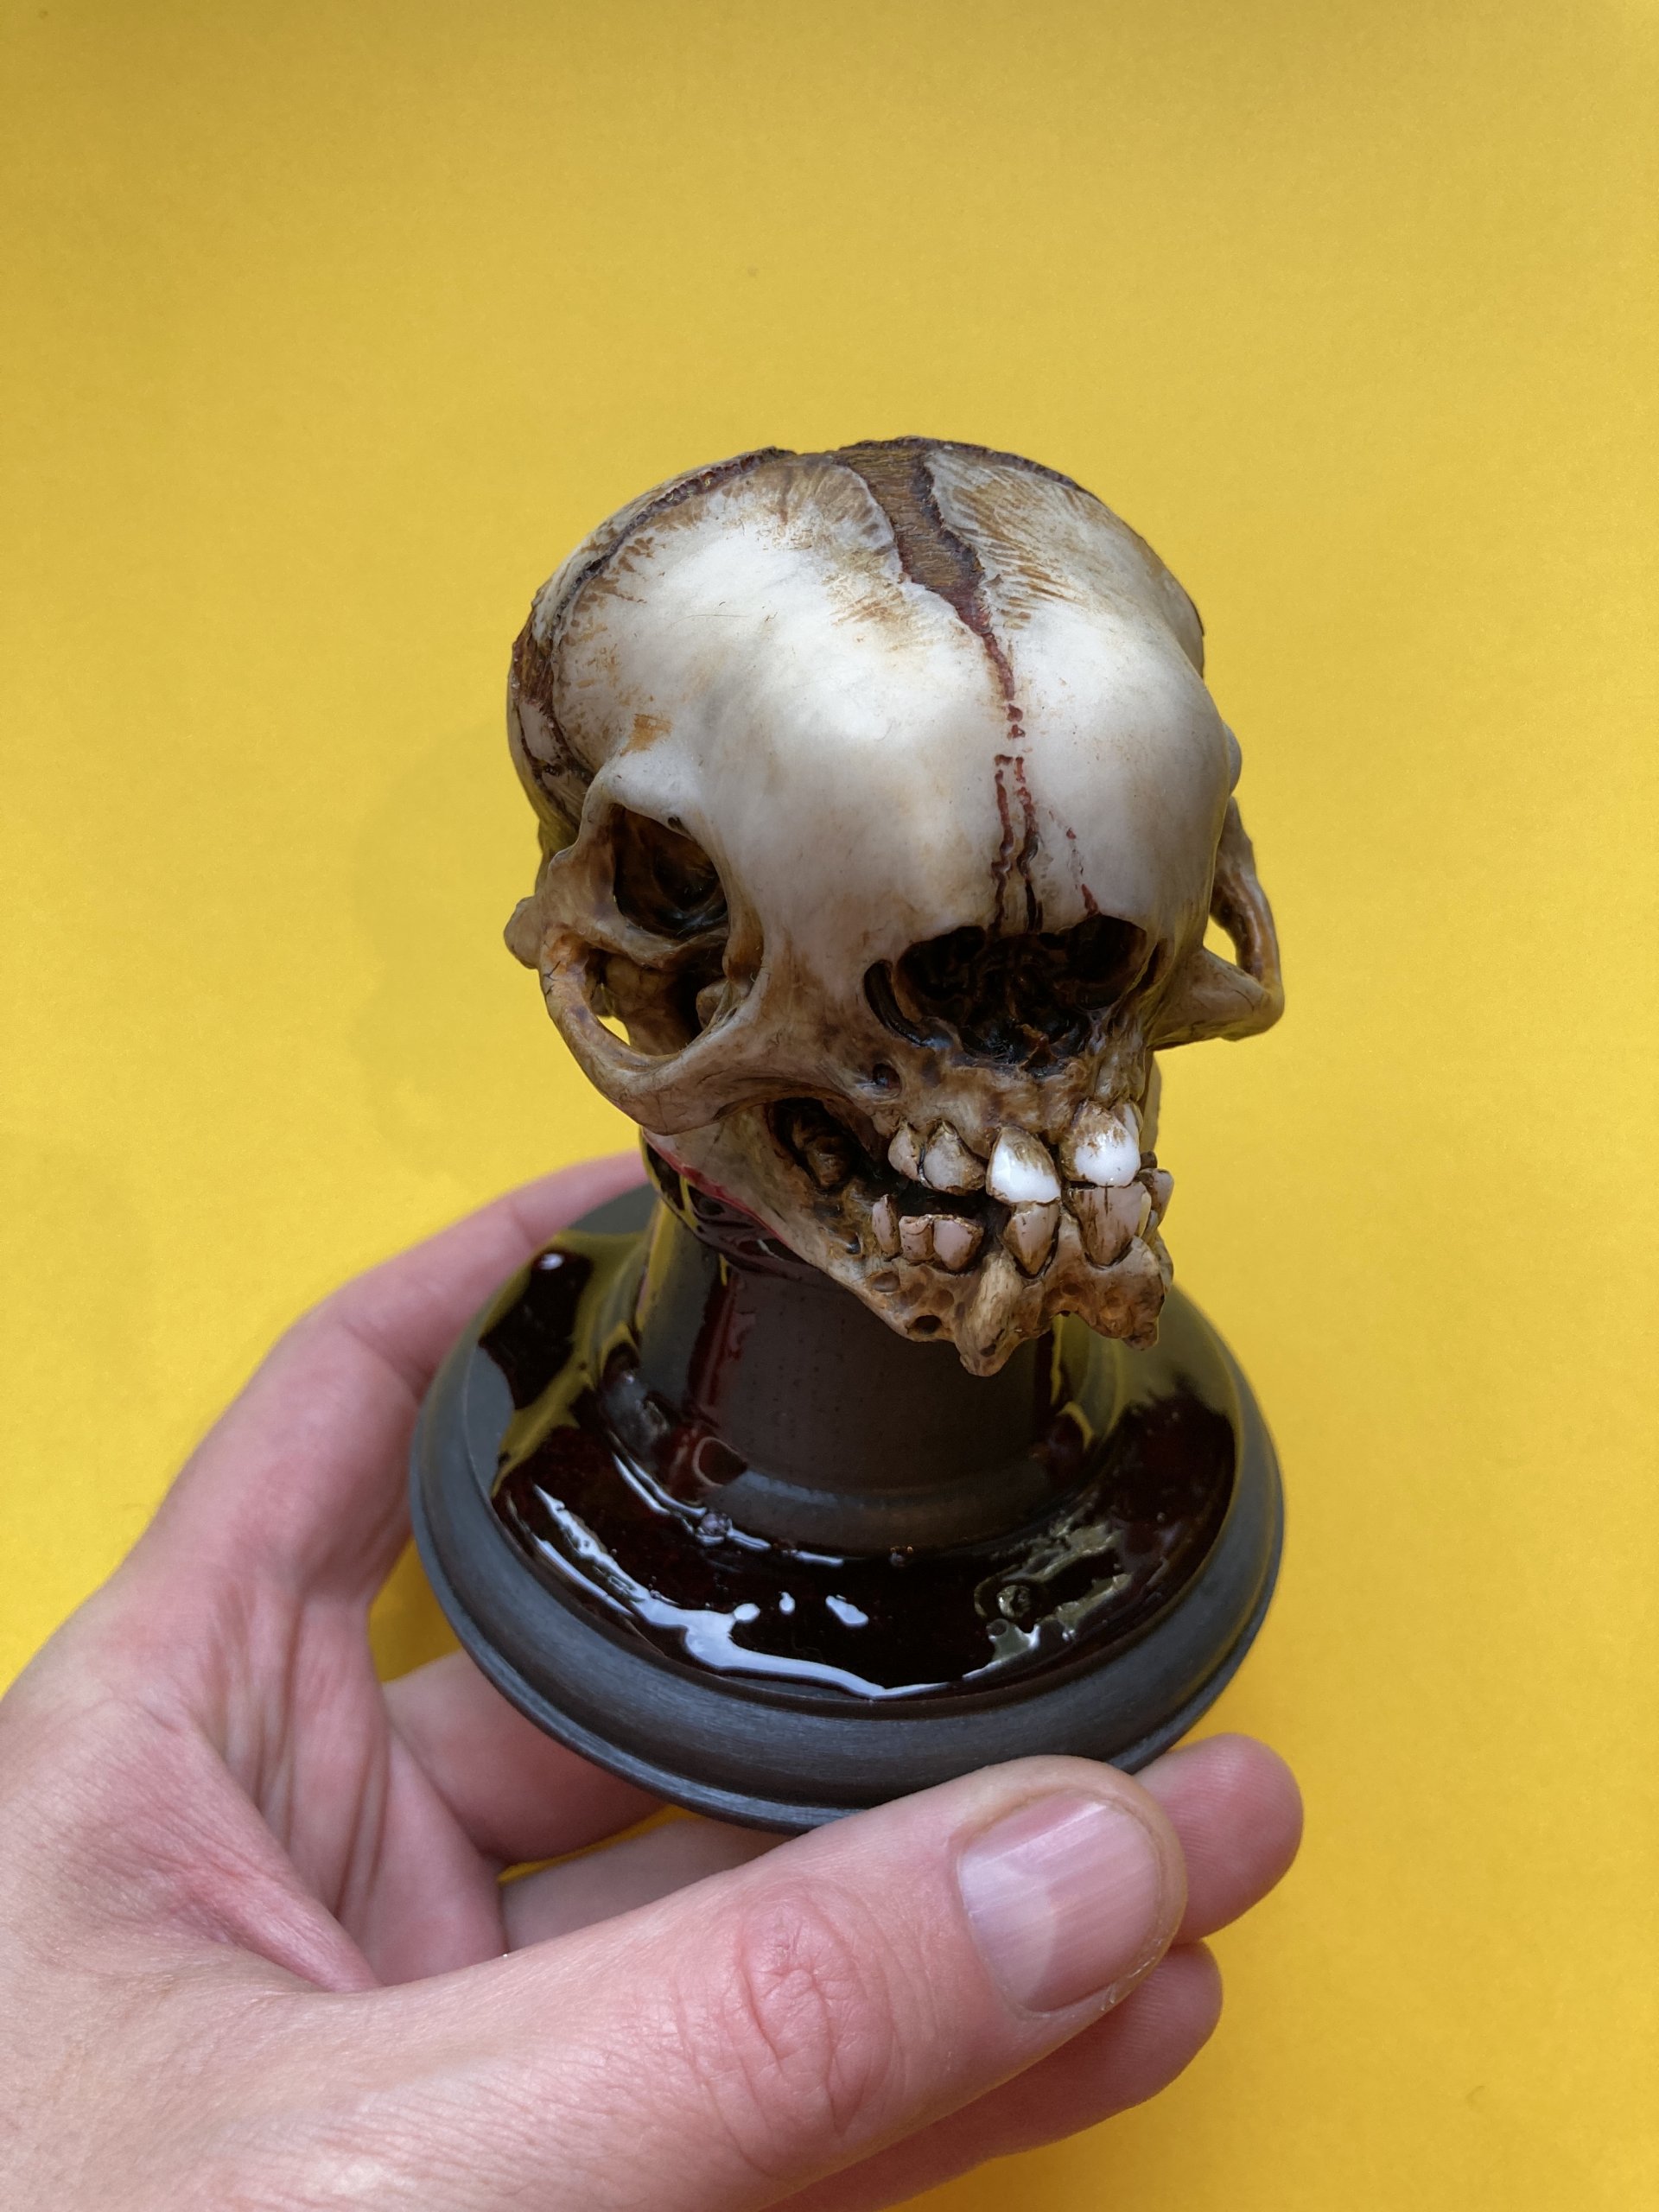
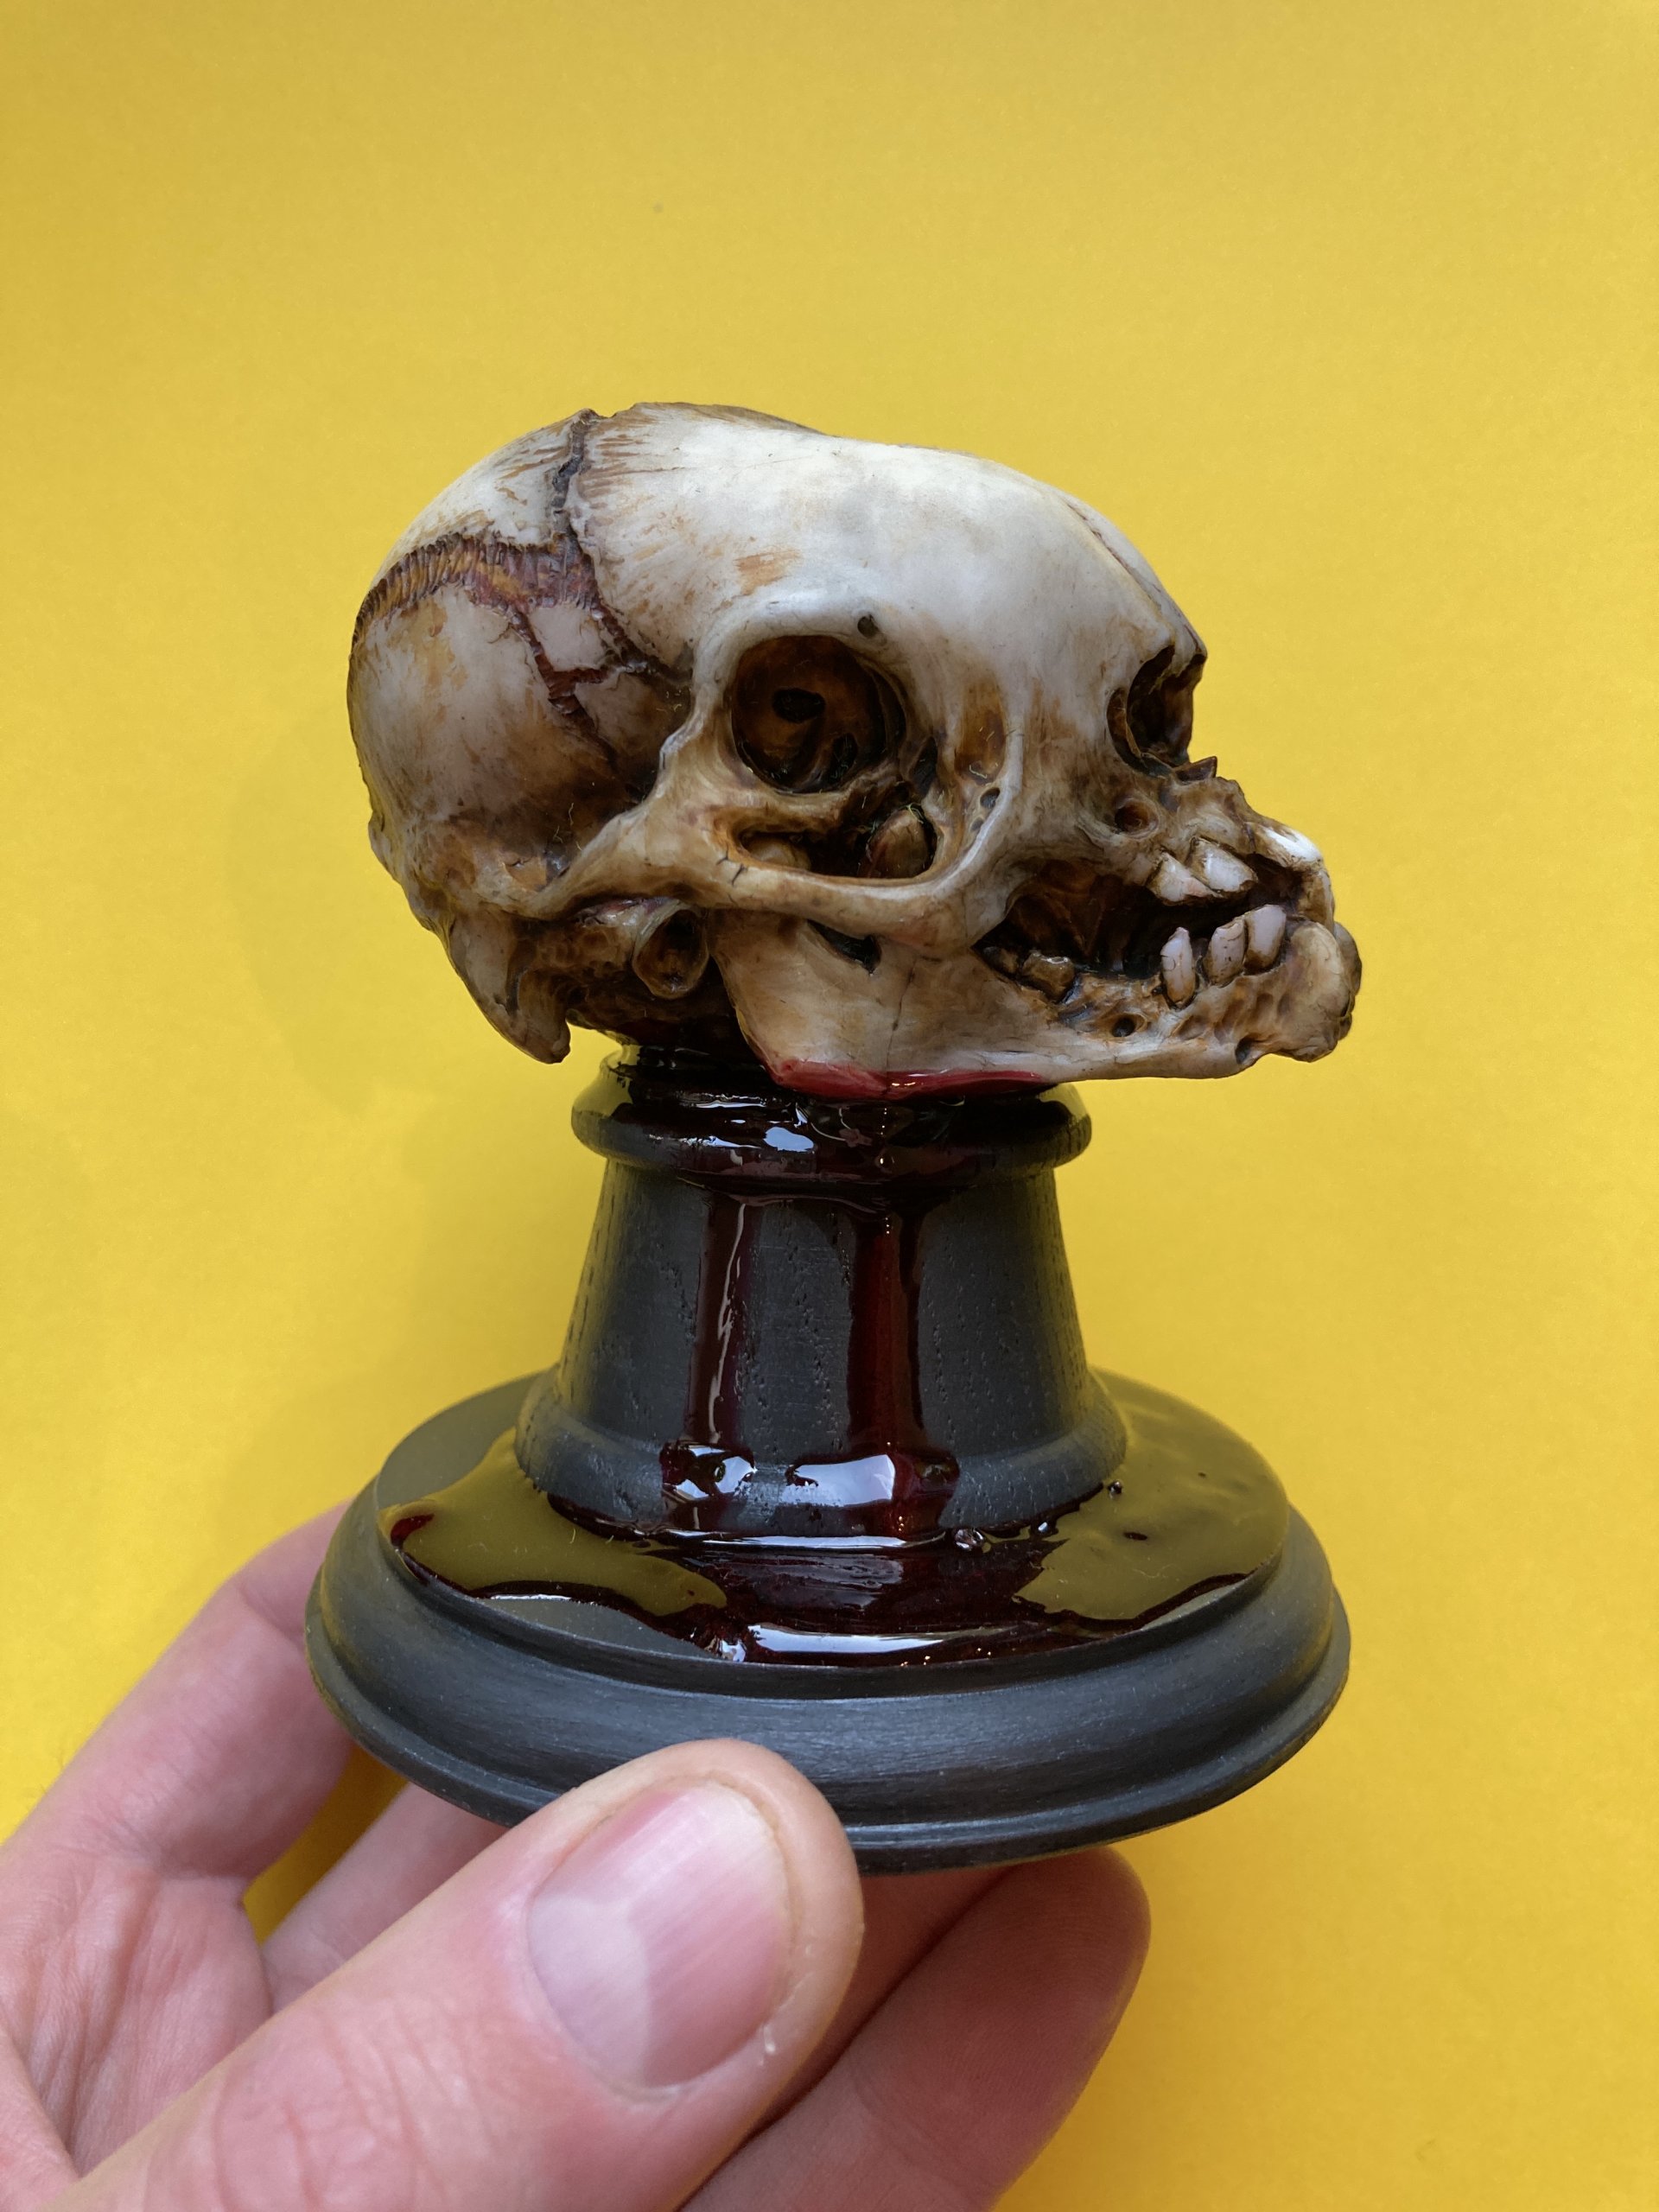
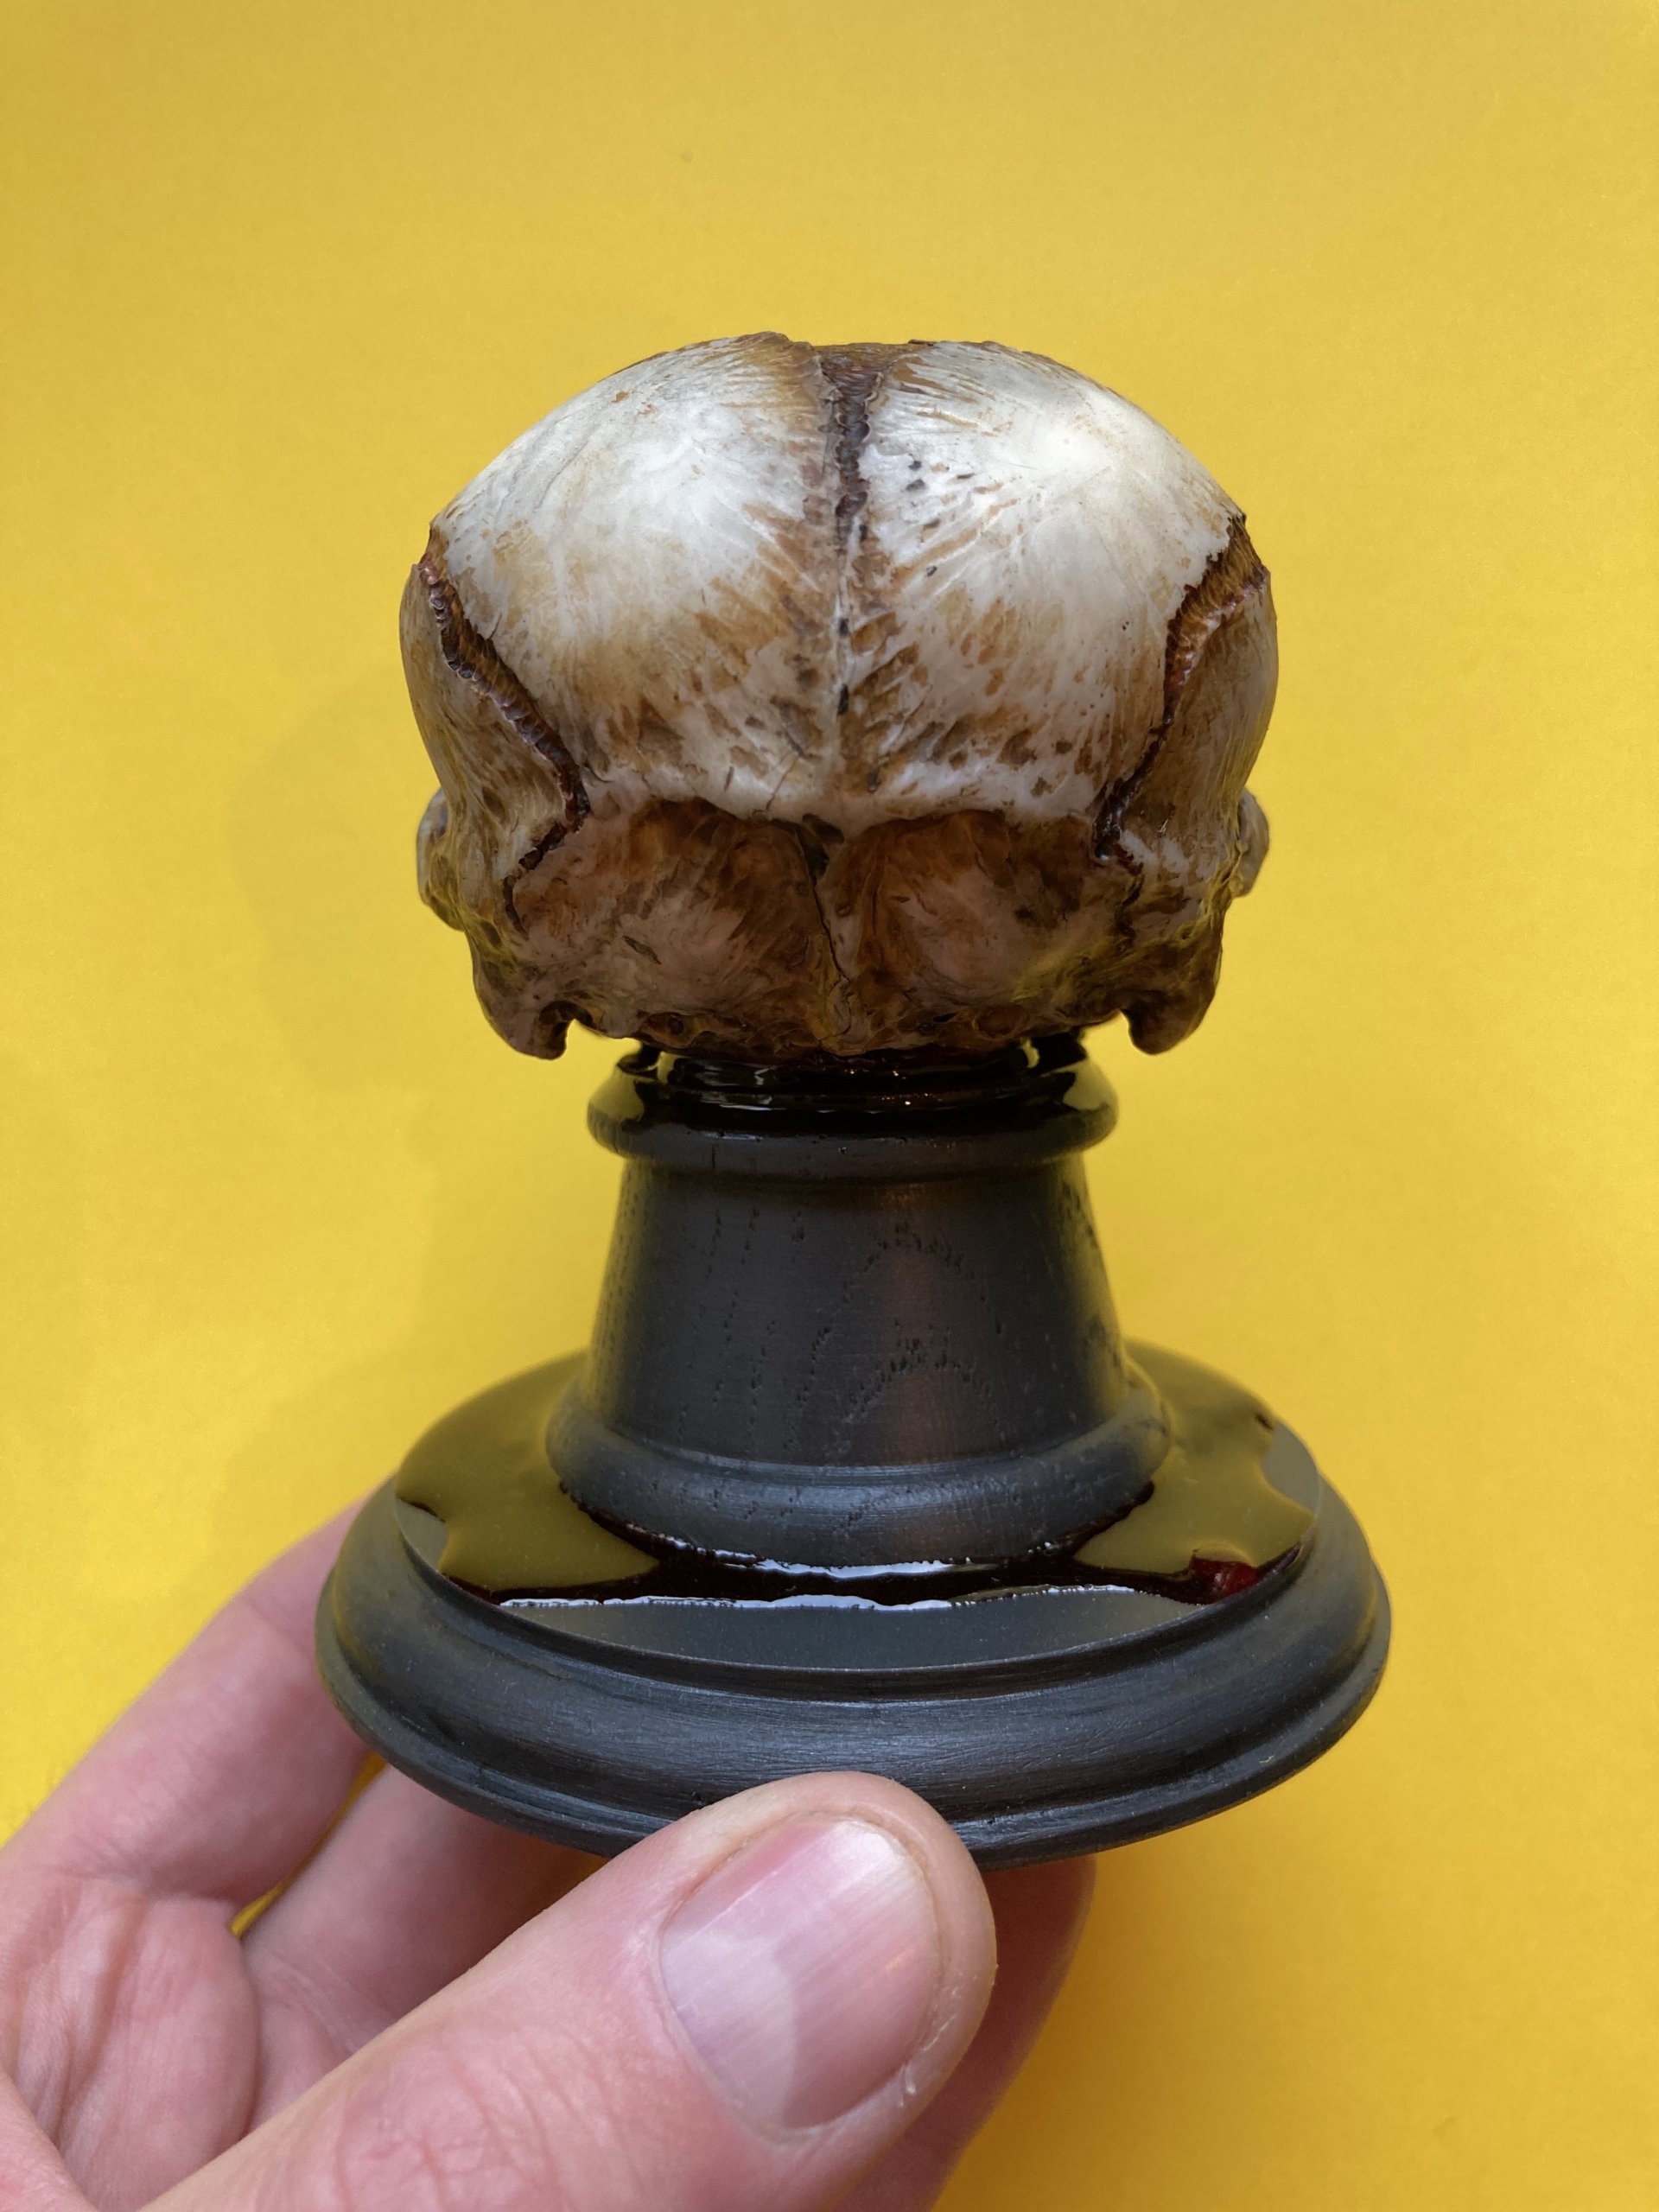
In the Alien Skull, I wanted to achieve horror effect, which is why I put different layers of color on the bright surface. Firstly, I covered the deepest places, those around neck and eye sockets, with brown and red color, here and there with a bit of ocher. Then I covered the entire head with sepia moose. When paint was dry, I rubbed my head in several places, especially around teeth, to reveal bright color of resin and thereby emphasize these elements. In case of this skull, the chafing was quite strong because I wanted it to be brighter and resin color to be shown more. Then I covered head with a layer of black moose, also rubbing it in certain places. The Alien Skull is made in a soft sepia, and only teeth have been covered with glowing varnish, emphasizing its horror.
BLOOD
The combination of a satin head in warm color scheme with fresh glassy blood on the stand was supposed to give this sculpture a unique character. I was very keen on getting the impression of freshly spilled blood, and it took a lot of trials and surprises to get satisfactory result. To get the final effect of blood, I used a clear epoxy resin with red and black pigments. Hope you are convinced and emotional about this effect!